TEXTILES.ORG
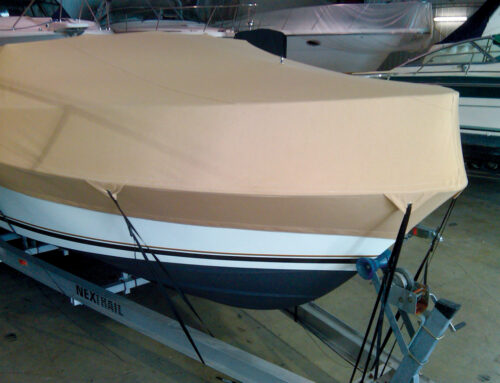
 Precision is key to upholstery graphics
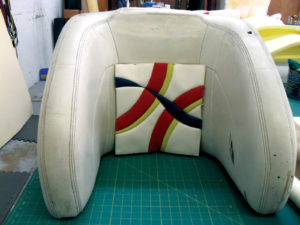
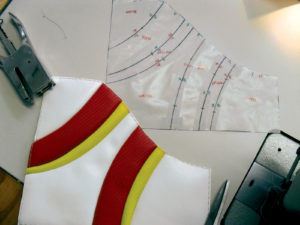
This is where the placement of the new design is going to go on the seat back.
Designing new graphics into an upholstery job doesn’t have to be the most dreaded portion of the job; it actually can be the most rewarding. You just need to get comfortable doing some custom work, so start with something small. The steps from start to finish are the same on a monster sunpad as they are on a small backrest cushion. Be adventurous and have fun with it.
To begin, don’t forget to inspect the hardware on old seats to make sure that you can fasten them back to the frames when you are done. You don’t want to spend hours of labor to upholster a seat, just so you can tear off your new work because you need to replace a T-nut.
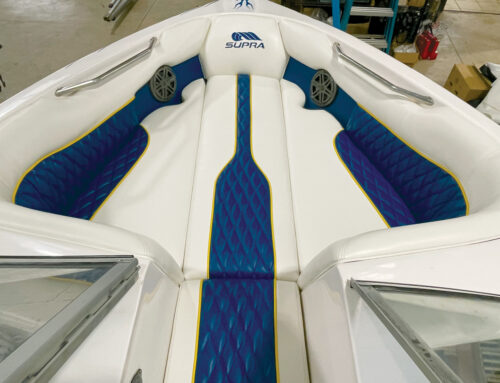
It’s important to create a design that fits the size of the piece you are working on. Don’t try to get too much detail in a tiny space. I will usually use the sunpad to set the theme of the design. The side bolsters and other cushions will play off of the design on the sunpad, and the helm seats will have a simpler version of the sunpad graphics.
Sew foam in my shop is the rule rather than the exception. Even ¼-inch foam is enough to help even out and plump up the seams. If I am going to do a lot of top stitching, I don’t usually use anything thicker than ¼ inch. Remember that when you fold that seam allowance under, you will be sewing through ½-inch of foam. If you are stitching on one side of the seam only, you will have ¾ inch of foam to go through. In tight corners, it can be very frustrating to get it to lay down the right way, and often times you will get little wrinkles—and anti-aging cream won’t make them go away.
I start my work the old fashion way, with paper and pencil. I am not “techy” enough to do the designing on a computer, and I find that sketching on paper helps me plan out the steps to getting all of the pieces together. I can visualize where I need to start and stop the seams.
I decide on a colorful insert for the helm seat. I have a basic idea that I have scribbled down on paper and then transferred onto 6 mil plastic. If this is a design that you will use several times or on different boats, use some scrap 30g or 40g clear vinyl, which makes it easy to use it multiple times.
The next step is to mark the colors on the pattern pieces. A helpful hint is to make all of your instructions on the plastic in the same direction. If you are working with a texture, like carbon fiber, the orientation of the labels will tell you how to lay the pattern piece on to the fabric. You can also use directional arrows.
I mark each seam with letters that allow me to quickly match up once I cut them apart. I also mark each seam with numbers that are the order in which they need to be sewn together. This step is extremely important, so give it some serious attention. You need to be able to sew your way out. Always know where your last seam will be.
As you do more and more of this, you will find that you will need a little less detail on your patterns. On the other hand, if you have more than one sewer in the shop, the more instructions you include on your patterns the better.
I am going to use sew foam on these pieces, so, as a finished piece, the back is going to be bulky. I will use a ¼-inch seam allowance.
When you are tracing out the pieces, be sure to mark your matching marks as exact as possible. This is how you can get sharp corners and curves without waves and wrinkles.
Before you go out and bid a job that has a lot of design changes, try a couple of small trial pieces. (This design is only 12 inches by 11 inches.) That way you will have a better idea as to the amount of time that you will spend on the project, and you can charge your customer accordingly.
When it comes to graphics in upholstery, don’t be intimidated; be inspired. It’s easier than you think.
Photos: Start to finish
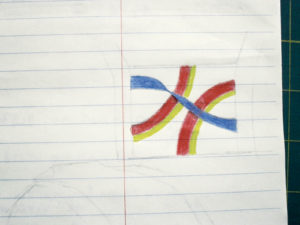 This is the scribble that I am going to use as the design. I then draw the design on plastic for my pattern.
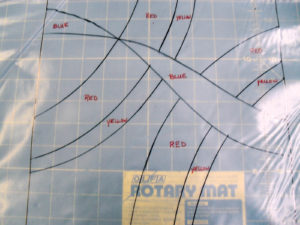 Be sure to label every piece with the colors.
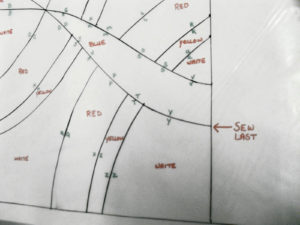 I have identified the very last seam I will sew that will tie the top and bottom blocks together.
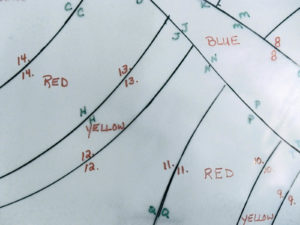 You may want to also use numbers to indicate the order in which the seams need to be sewn.
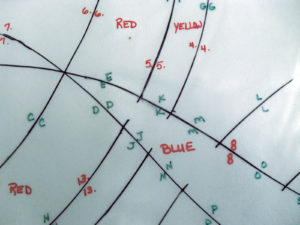 I make marks where the seams meet the blue piece. That way the fabric doesn’t end up short or bunched up on one end.
 The individual pieces with sew foam applied.
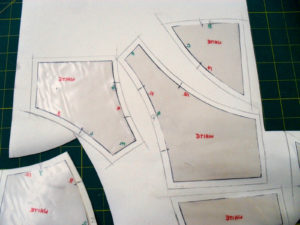 Don’t forget to add the seam allowance when you lay the pattern out on the fabric.
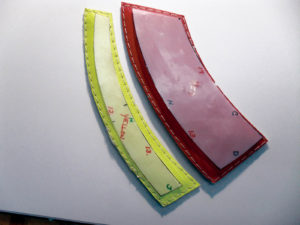
 I planned this design to have two “blocks” that will be connected by the blue strip. Here I have finished the lower block.
 I have joined the top and bottom blocks with the blue strip and I am now ready to use it in the seat.
Carol Racine is owner of Racine Design in Jacksonville, Fla.