TEXTILES.ORG
 Wide fabric reinforcements
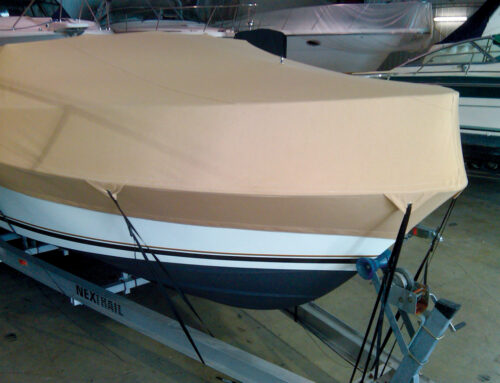
A CW Hood Yachts Wasque 26 outfitted with Hood Canvas and our project aft cover. Notice the stitch lines on the aft cover.
There are many good ways to reinforce aft covers or mooring covers. At Hood Canvas, we like the look and strength that wide reinforcements provide. They require more time, effort and materials to fabricate, but our customers appreciate the results.
Wide fabric reinforcements: Start to finish
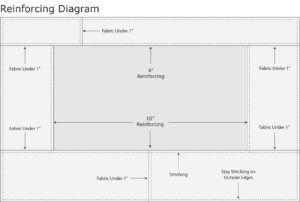
Reinforcing Diagram
It helps to draw up a reinforcing diagram as a guide for the placing of the strips so they can be overlapped correctly.
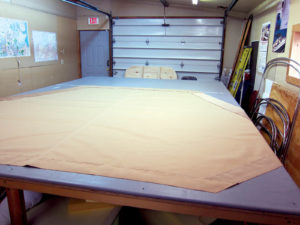
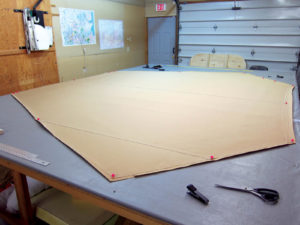 This is our seamed aft cover with 60-inch wide fabric reinforcing strips placed under the edge of the cover around all sides. As we place these strips, we pin out the seams of the fabric to put them into tension. This puts the fabric into the same state it will be in when installed on the boat. We cut our strips across the 60-inch width of the fabric. We do this so the 1-inch folded-under top edge will crease, fold easy and lay flat when stapled. We generally use 6 inches and 12 inches as our strip heights.
 We staple along the entire edge of the aft cover to hold the reinforcements in place. At fastener locations marked on the fabric, we slide a small cut square of fabric between the plies before we staple the edge. This adds extra reinforcement at key stress areas. At this time, we check to be sure there is sufficient fabric to go under the edge of the reinforcement overlap at the corners. This is where our reinforcing plan gets used. We will angle-cut the edges of our strips to angle in to the corners where the strips overlap. The underlying reinforcing pieces do not need to go all the way to the corners. They only need to go under the folded edge of the reinforcing piece above by 1 inch.
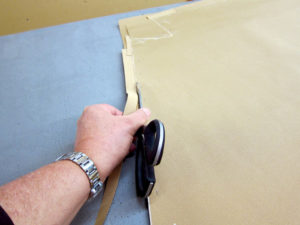 With scissors, we trim away the extra reinforcing fabric even with the edge of the aft cover. We will not make the corner cutout at this time, but will leave the corner squared off. Using a long-arm stapler, reach in and staple around the cutout close to the edge. We will cut the corner out after we stay-stitch the edge in a later step.
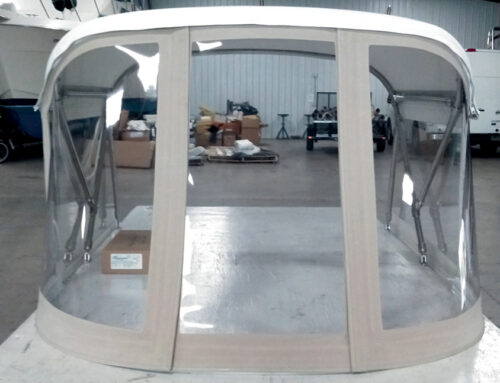
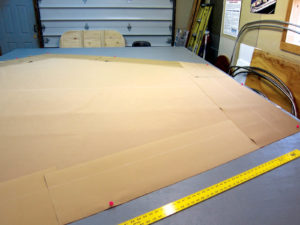 The aft cover is now flipped over so the reinforcing is visible. It is necessary to pin out all the seams as they will be on the boat before marking, cutting or stapling can begin. According to our plan, we have drawn our fold lines on the reinforcements at 10 inches in from the edge on the bottom and sides of our aft cover. The vertical edges and top have been marked 4 inches in for the fold. We like to keep the lines as straight as possible between the corners. Where reinforcing pieces overlap, be sure to use the selvage edge of the reinforcing strip on the outside of the overlap. We do not fold this overlapped edge; we just overlap the adjoining reinforcing strip by 1 inch.
 We cut the extra fabric away 1 inch above the fold line on all sides of the aft cover. Using a long-arm stapler, fold on the fold line and turn the fabric to the inside by 1 inch. Staple the tops of the reinforcements on all sides of the aft cover. Also staple down the selvage edge where strips are joined. Notice the reinforcement overlap in the forward corner of the photo. The overlapping top piece is stapled to the edge of the cover. If you had X-ray eyes, you would see the reinforcing piece going under the stapled edge is ended and cut 1 inch in from the folded edge.
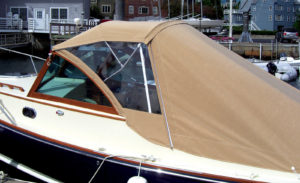
 Here is our aft cover all stapled and ready to be brought over to the sewing table to get sewn and bound. We heat the edge with a hot knife to prevent fraying. Stitch just in from the folded edge on all sides and stay-stitch the outside edge of the aft cover. Stitch down all selvage edges where reinforcing strips are joined. We prefer to run over all stitching rather than use a lot of back tacking on all covers like these.
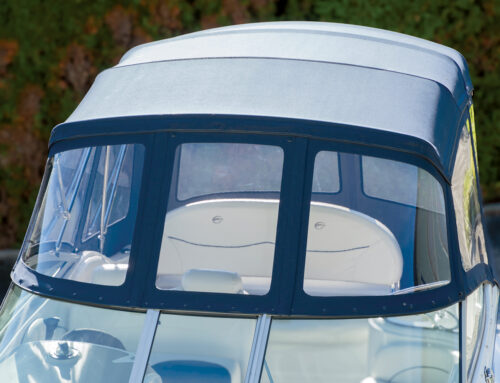
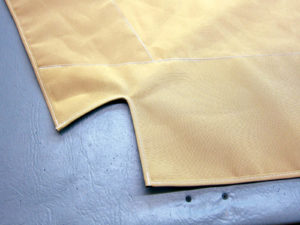 Here is one of the finished corners stitched with the ¾-inch edge binding installed. In the case of this cutout, we stay-stitched the edge around the cutout before we cut it out. We do this any time we have a cutout as it minimizes distortion while stapling and sewing. We heat the ends of the edge binding, and we try to avoid rounding corners when it is just as easy to make a point. Notice the corners in the photo, they are not rounded, but rather squared off with overlapping bindings. Everybody has their techniques for binding, so I will leave our binding technique for an upcoming article.
Mark Hood, MFC, and his wife, Deb, own and operate Hood Marine Canvas and Hood Marine Canvas Training Workshops in Merrimac, Mass. For more information and to purchase the large binder seen in these articles, visit www.hoodcanvas.com or email mark@hoodcanvas.com. For more information on CW Hood Yachts visit www.cwhoodyachts.com.