 TEXTILES.ORG
 Finishing small windows
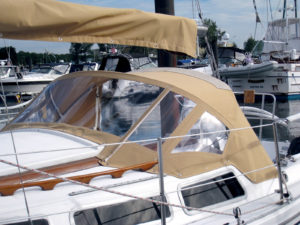
A Hood traditional dodger with its side panel fabricated using the method shown in this article.
At Hood Canvas we have a method of sandwiching our window material between two layers of fabric. It is not unique to us, and we know of other fabricators who use this method in their enclosure fabrication. We do not make any large enclosures with this method because we construct larger enclosures a different way.
The example for this article is the fabrication of a traditional dodger forward side panel. We will fabricate a fully finished window panel with both sides looking the same.
Finishing small windows: Start to finish
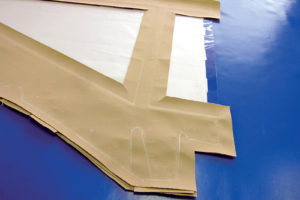
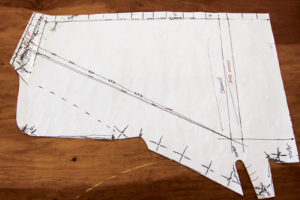 This is the pattern of the forward side panel we are going to fabricate. Notice that the lines for the windows are drawn with holes punched at the corners. We do not make one large window, but rather a larger and a smaller window. The area between the two windows is labeled “Crunch Zone” on the pattern. This area of just fabric between two stiff pieces of window material allows the dodger to fold down easier on the corners without damaging the windows.
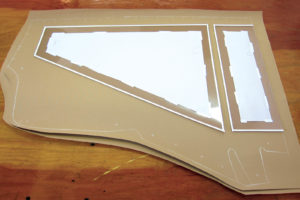 We have two rough-cut pieces of fabric with the pattern marked out on the top piece. The lines for the windows have been drawn on the fabric. We have cut two pieces of clear window material ¼-inch larger than the lines for the windows on the pattern. We have applied ¼-inch double-sided tape to both sides of the cut windows along their edges. The bottom layer of fabric will be the bottom layer of the sandwich. Be sure to slightly round the sharp points of the window material.
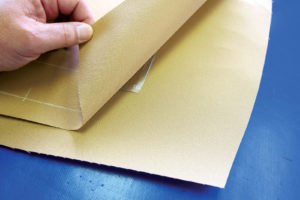
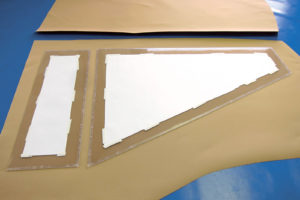 The corner points of the window markings have been transferred to the underside of the fabric using a small pin. This allows us to align the windows on the backside of the top fabric, as the photo shows. All the backing for the double-sided tape has been removed. Take the rough-cut bottom layer that can be seen at the top of the photo, flip and carefully place it on top of the windows seen at the bottom of the photo. Now, using your hand, push and rub the window edges so that they stick to the fabric on either side.
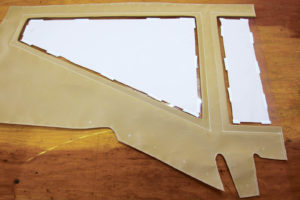
 This photo shows the window sandwich created by the previous steps. The window material is now stuck in place between two layers of fabric. Note that we have very carefully flipped the sandwich over so that the outside with the lines drawn on it is facing up.
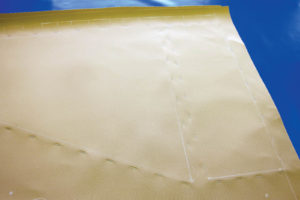 With a long-arm stapler, we have stapled close to—but not onto—the edges of the windows on all sides. This holds the windows in alignment while sewing
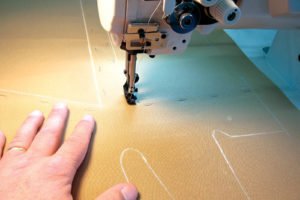 Sew along the window lines. Remember that there are three layers with the window stitched in the middle.
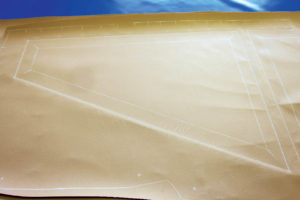 Draw cut lines 1½ inches in from the stitching on the outside panel. Then flip the panel to the backside and do the same. Using a ruler, we have drawn folding relief cut lines halfway to the corner on both sides.
 We have cut the fabric out of the center of the windows on both sides. We have made folding relief cuts halfway to the corners on both sides. The outside edges of the dodger panel have been first stapled then stay-stitched. In areas where there are fasteners, extra strips of fabric have been inserted between the plies for reinforcement.
 The window inner edges of fabric have been folded under to the stitch line on both sides. We have cut away the extra fabric on the cut line below the stay stitching on the outside edges of the panel.
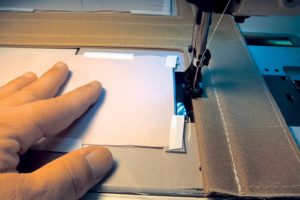 Here we are stitching the inner window edges. This edge is folded in on both sides to complete the windows at the same time. We are stitching through two layers of fabric on the outside of the panel, the window material and another two layers of fabric on the inside of the panel.
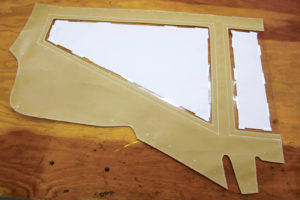 Here is the nearly completed traditional dodger forward side panel. You have probably noticed that the right side of the panel has a raw window edge. This is by design, but that edge could be finished to look the same as the rest with a fabric border on the right side.
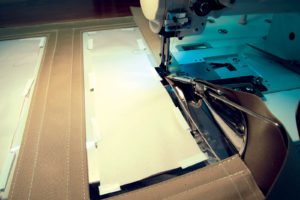 We finish all zipper edges using our large binder. In the photo, we are applying 1½-inch binding to finish the last edge. The center panel on traditional dodgers typically rolls up and we like to hide those zippers using our system. The lower edge of this panel will eventually have color-matched binding on it. The completed forward side panel now looks the same on the outside as it does on the inside.
Mark Hood, MFC, and his wife, Deb, own and operate Hood Marine Canvas and Hood Marine Canvas Training Workshops in Merrimac, Mass. For more information and to purchase the large binder seen in these articles, visit www.hoodcanvas.com or email mark@hoodcanvas.com.