TEXTILES.ORG
 Smarter upholstery patterning
By Steven Wayne

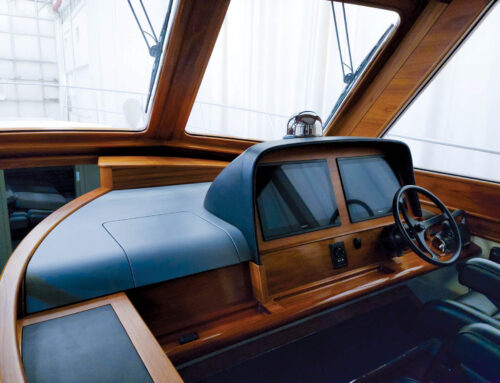
Upholstery. It’s a funny word, isn’t it? Even unique. Most people, as it happens, do not know how to spell it. Others lump everything from canvas products to apparel in the word’s meaning. For marine fabricators like ourselves, we know there’s a difference between canvas and upholstery!
I would like to share a few of the many techniques we do here at Southern Stitch Canvas & Upholstery LLC in Gulfport, Miss. Starting from the beginning of a project, when the client wants us to price it over the phone without seeing it (because we all know how that works out), to how we approach break-down patterning and patterning from scratch. I hope you can take something from this column to sharpen your craft for your next project.
Tackling tough projects
Upholstery is fun, but like anything else we take on in our shops, it can be overwhelming at times. But with the right processes and procedures in place, anything can be accomplished using your mind and willpower.
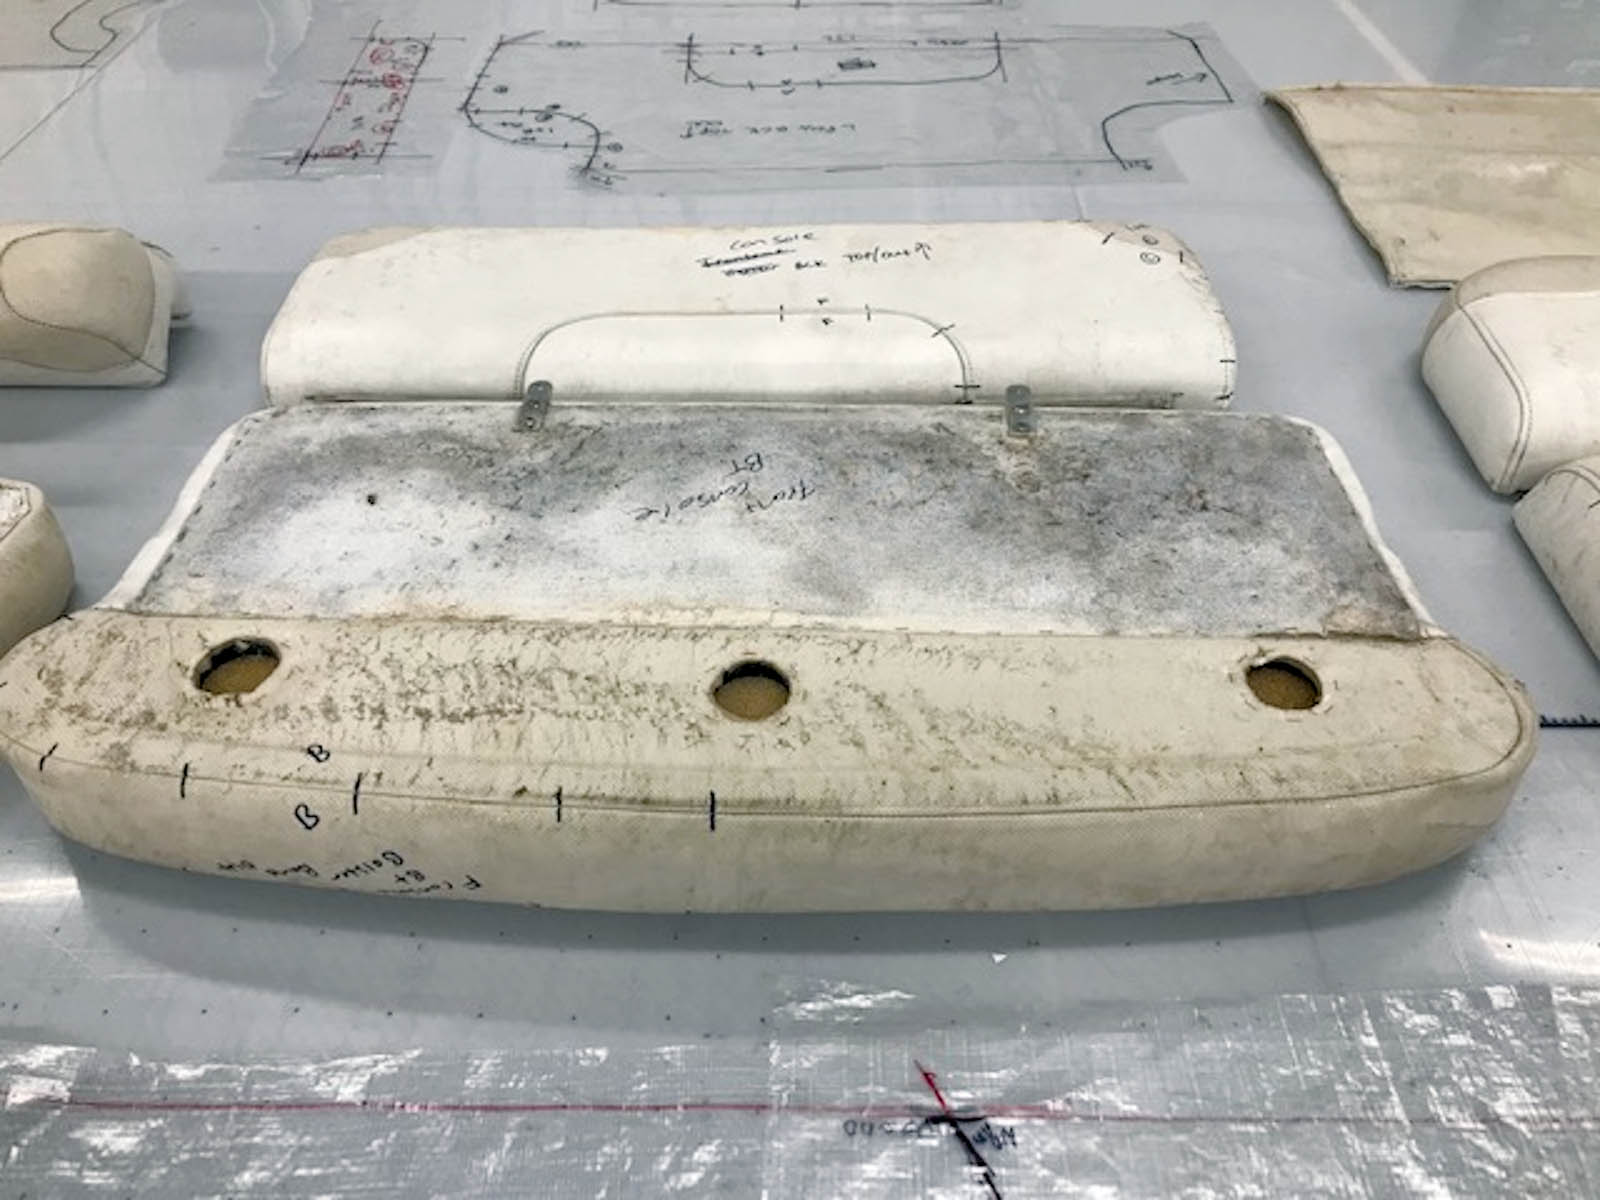
One of the worst upholstery projects to tackle are cushions that boat owners have let go to the point of no return. If they’d brought them in sooner, before the foam started washing away and Mr. and Mrs. Mold and Mildew started setting up a homestead to have their firstborn, it would have saved the boat owners plenty in the long run. Of course, they are now expecting us to “just throw some scraps on it” and pay what they saw online from the overseas sweatshops with labor costs of 15 cents a day. Yet, even these projects can be streamlined and made simple.
Create project departments
Something we recommend for any size shop is breaking up a project into stages. This helps in a variety of ways. For example, when clients inquire about where their projects are in our work in progress (WIP) queue, we can tell them the exact location. Establishing departments helps customers understand that there is more to our skills than what the general public assumes.
Here are the stages or departments a client’s project goes through after all the front office items are handled:
- Breakdown
- Patterning
- CAD
- Cutting
- Sewing
- Installation
- Quality control (QC)
Streamline the breakdown
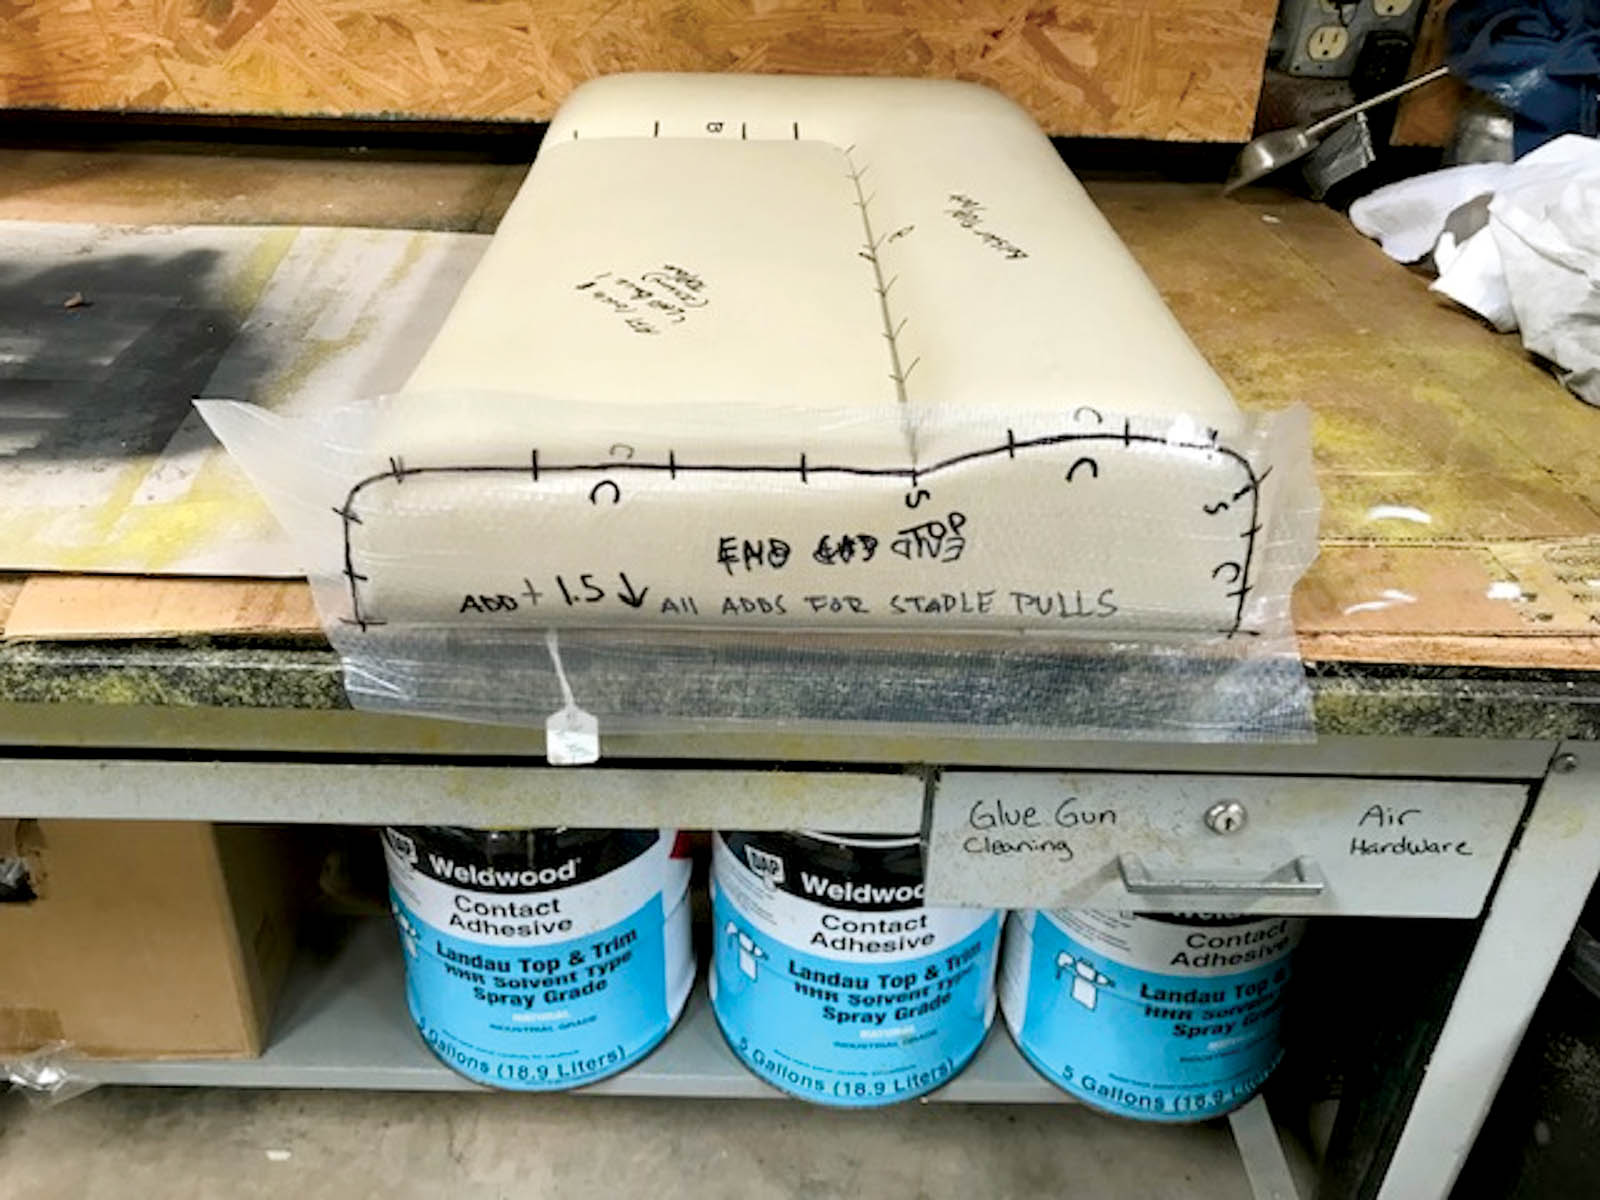
When we’re patterning, we break down upholstery projects with covers that are still soft and pliable differently than projects with covers that are hard and brittle. We used to spend a lot of time heating cushions up with a heat gun and trying to get the parts to lie flat using weights of some sort. We spent too much time wondering if this line was straight and does that line have a slight curve? Does this end wrap that way and finish off here? Sound familiar?
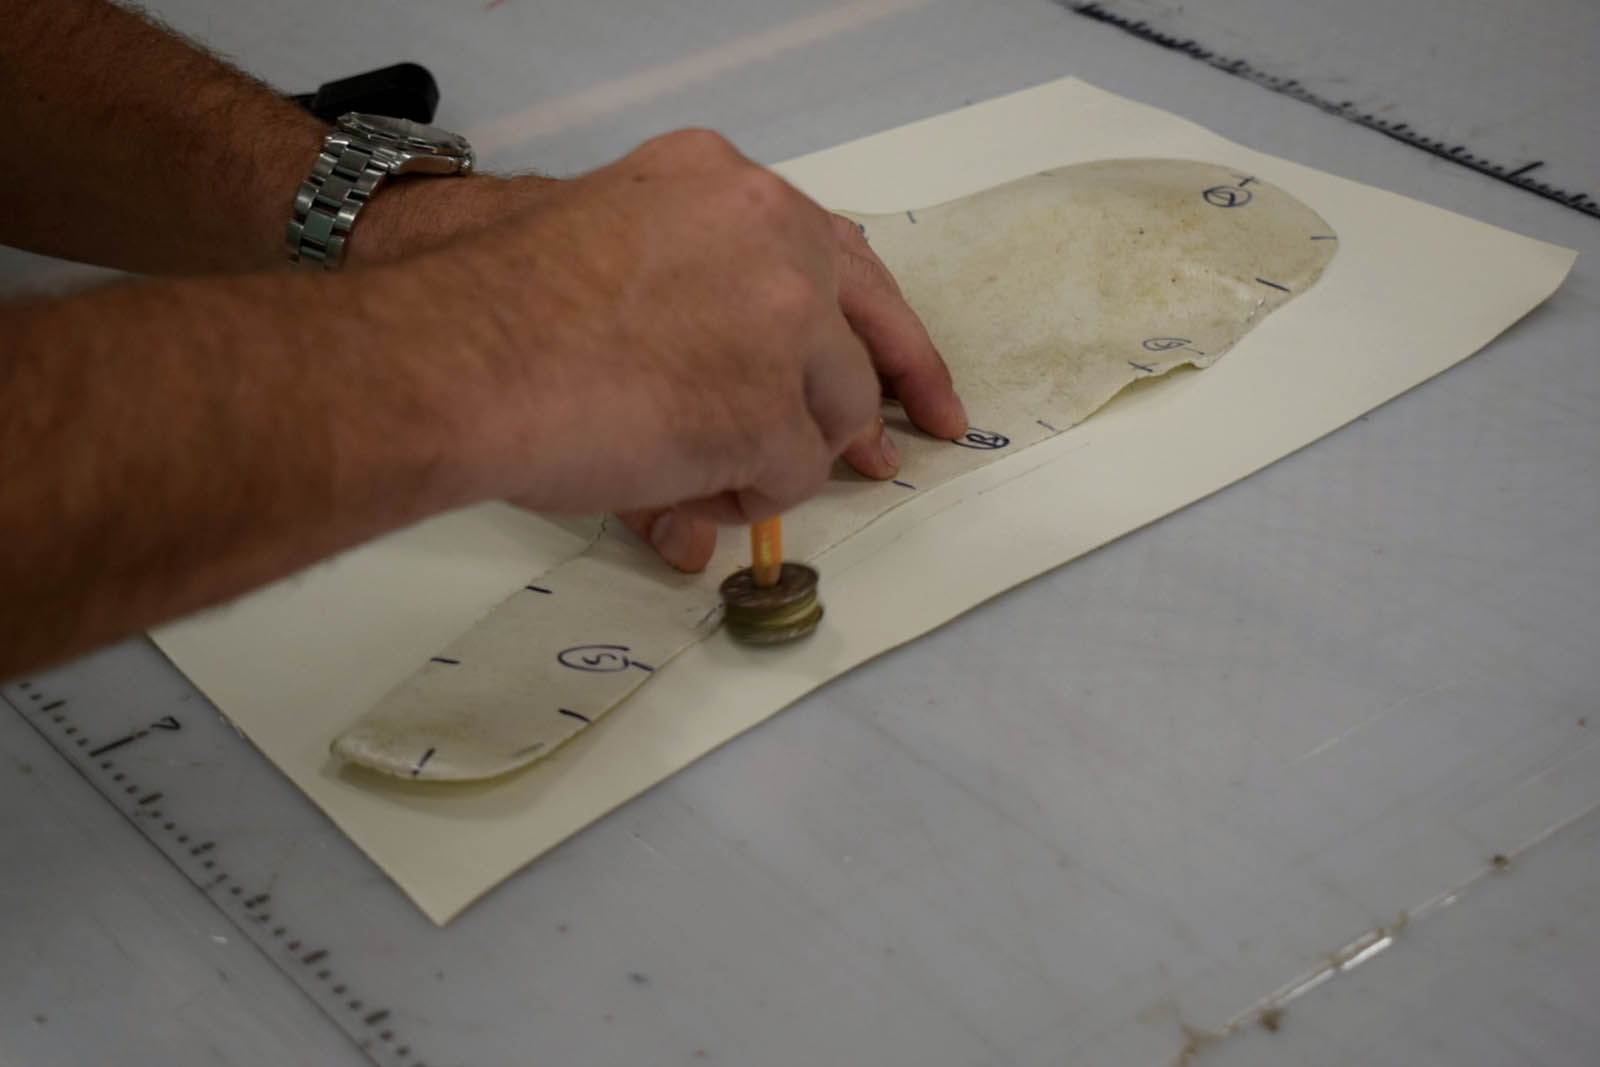
At Southern Stitch, we moved away from using weights for the soft patterns of upholstery projects and found, for us, it’s better to just staple down the patterns on a soft cutting surface and capture our pattern.

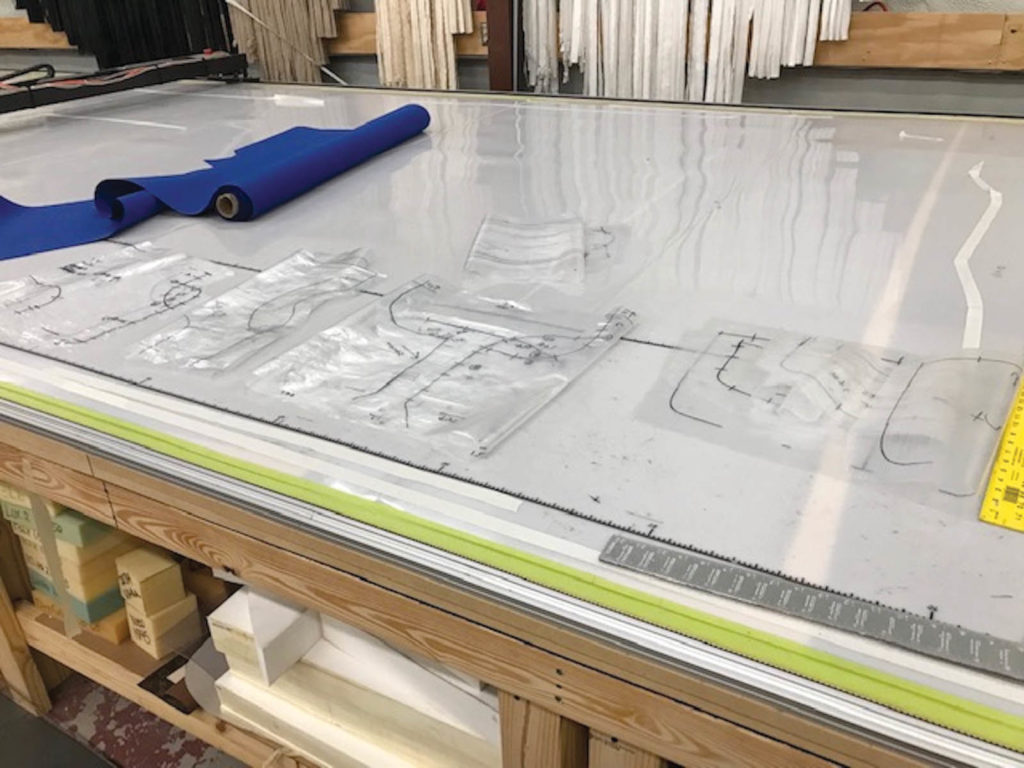
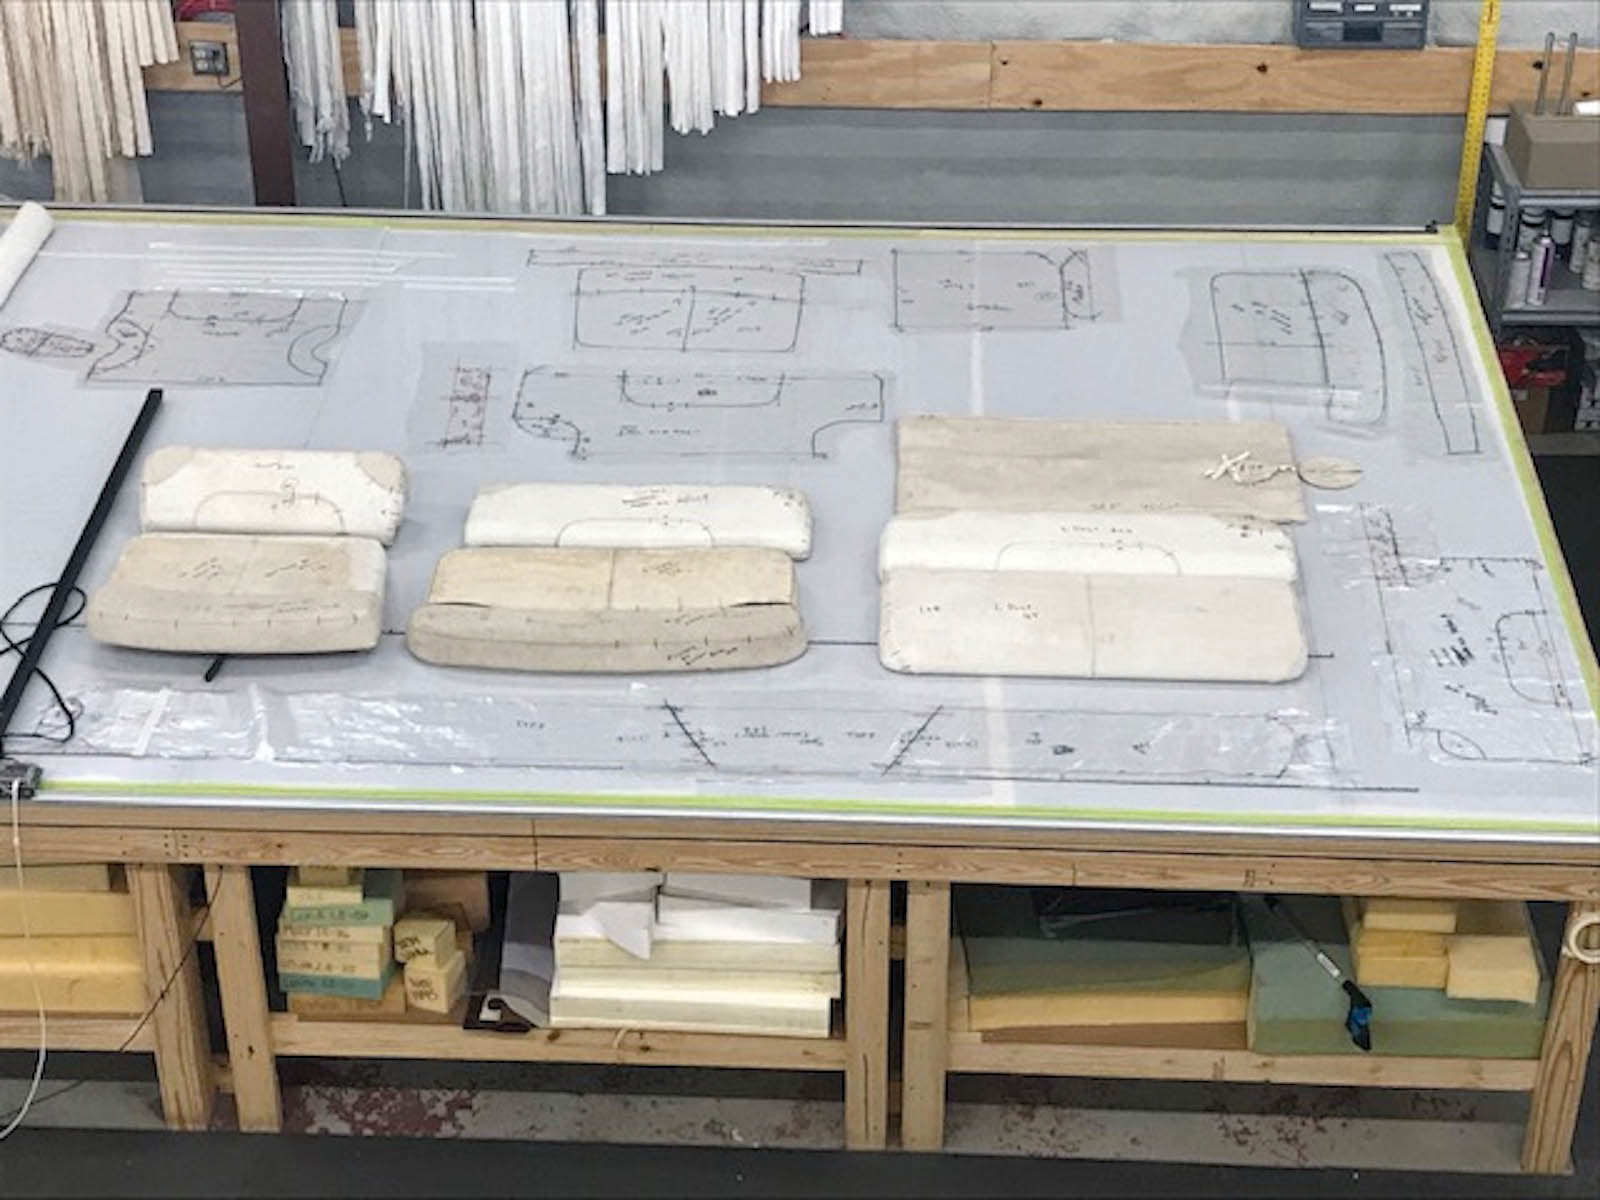
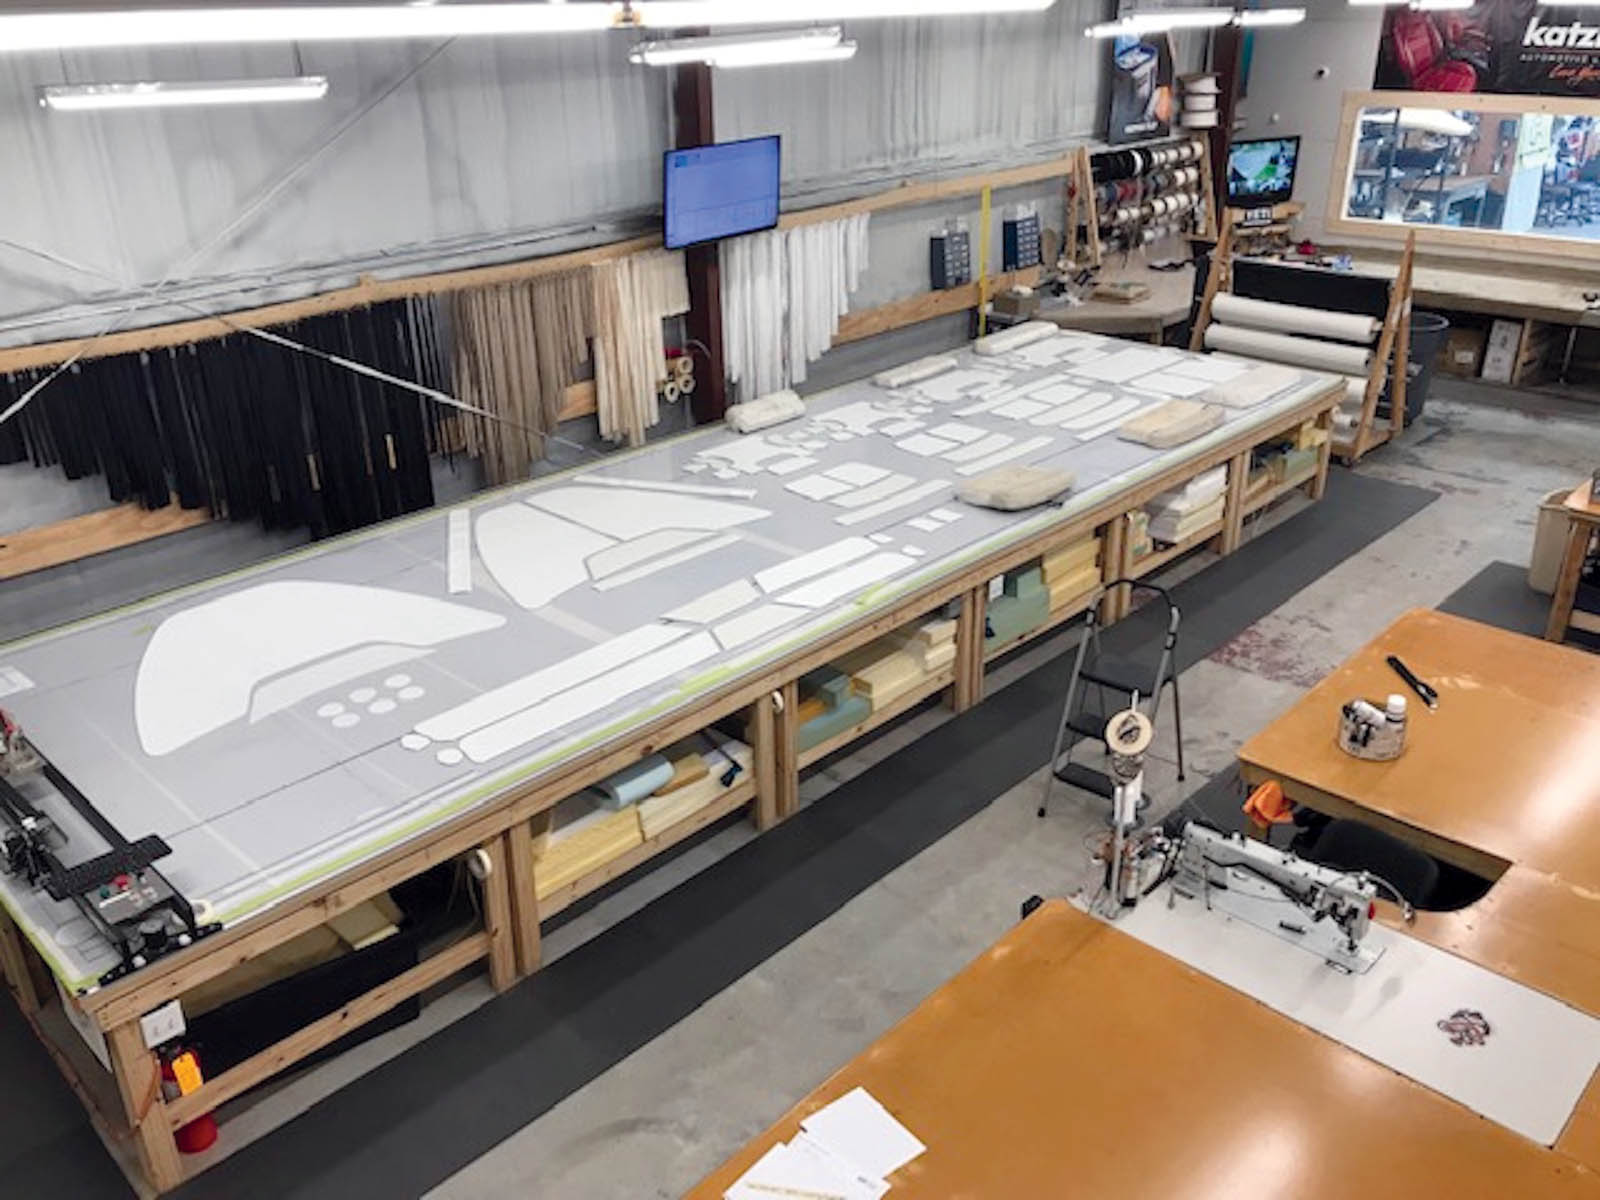
For the most part, we capture our projects digitally for repeatability and cutting on our CNC. You can still use these processes for hand cutting as well. We still do a ton of hand cutting, even with having the CNC. Storing patterns digitally is something I would recommend even without a CNC.
For those projects that have brittle covers or parts missing, we don’t want to spend all day heating and trying to identify oddly shaped parts. We “pre-pattern” our cushions to get the patterns needed and never break them down until it’s time to install. We do this for a few reasons. The breakdown of cushions really needs to be done by someone other than the main fabricator in the shop, whose skill is more valuable elsewhere.
I know you’re thinking, “Well, I want to see how it breaks down, so I know how it goes back together.” Right? That’s why we leave the cushions together until it’s time to install the new covers. When that time comes, we get Break Room Bobby (when you can’t find him, check the break room) to break down the cushions with the installer so he or she knows how to install and trim out. Everything is fresh on the mind, and it’s time to make the cushions shine like a new dime.
Pre-patterning pays off
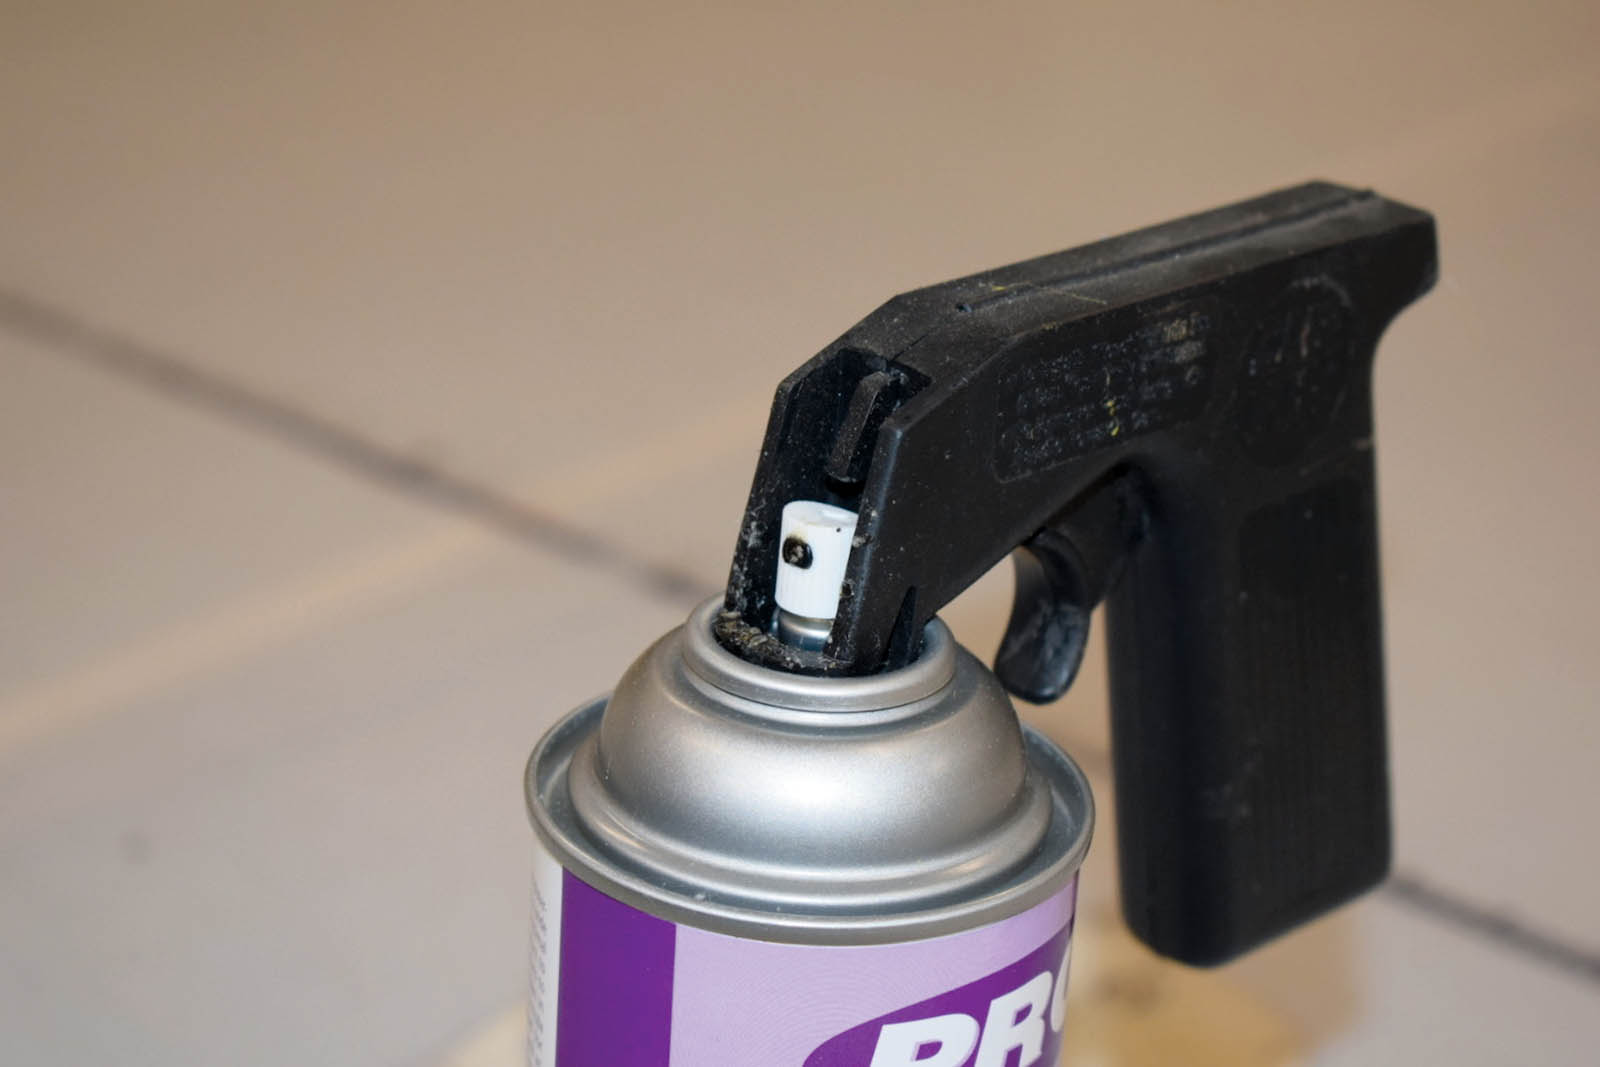
We pre-pattern our projects using a light-tack foam and fabric spray adhesive with a handle attachment. After making the marks, it’s time to lightly mist and start patterning the parts. We use clear paper and trim back to our marks and lines, so the next piece of paper can go on top and we can trace over lines for accuracy. After patterning the complete item, we remove all our patterns and lay them out for the next step. Whether you’re tracing for hand cutting or digitizing for storing and/or CNC cutting, this process takes away any guesswork about whether a line is straight, needs to continue on or finish here or there.
Keep clients updated
After the cutting department finishes its work, we run those parts through our “sticky station” for foam back lamination. Once all parts are ready and stay-stitched, it’s on to the sewing department! Having the room as we do, we love laying out big projects like so for simplicity and to show clients their projects moving through the different departments. Giving them regular updates with pictures and videos really puts them at ease with the lead time.
They get to see why a project is more than, “Well, all you gotta do is …”—a comment we hear at times from our so-sweet customers.
Once the clients’ cushions are sewed up and the covers are installed, they are ready for the QC department. After a close inspection to determine the cushions are in fact ready for installation, we send the client completed pictures along with final invoicing and payment terms BEFORE the final install. Another happy client!
Final thoughts
Every shop has its own ways, and not every project requires all the steps I’ve outlined. For those one-off items that will never be made again or for that one simple cushion, we stick to old-school ways. We don’t overcomplicate and overthink it. We knock it out and move on. Time is money and we need to remember that and so does the client. Don’t water down your skills and the trade by trying to get all the work. If you are good at what you do, customers will wait and pay! I hope learning a little about what we do helps shines some light on how you can adjust your own processes and procedures.
Steven Wayne has been serving the canvas and upholstery industry for 15 years. For the past seven, he has continued to grow his own shop, Southern Stitch Canvas & Upholstery LLC, in Gulfport, Miss. He serves a large boating community, showcasing quality marine fabrication. He subscribes to the old saying, “if you love what you do, you never have to work a day in your life.” Steven is an MFA Board member.