TEXTILES.ORG
 Fabricating a bimini

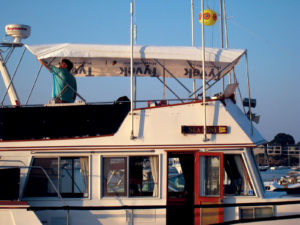
A 13-foot-long Hood bimini installed on a Trawler in Marblehead, Mass.
Bimini top: Start to finish
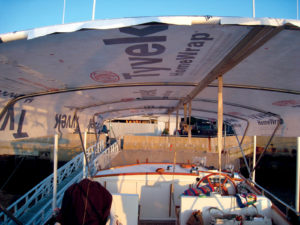
At Hood Canvas, we start the process of fabricating our “Flat Liner” biminis by setting up the frame with stanchion bars at each end. Then we run a strap from the aft bow to the forward bow, under all the mid bows. Now we pull the straps tight along the center line to preload the frame. Next, we run straps to all the mid bows along the center line, but we leave the mid bows lower than the forward and aft bows. We now stick our pattern on the center of the forward and aft bows only and work each side of center until the pattern is uniform over the sides of the bimini. Draw your pattern cut line on the forward and aft bows with a Sharpie marker.
Up to this point, our mid bows have not been part of the patterning process. Now, we bring our mid bows up by adjusting the straps until they just deflect the pattern, about level with the fore and aft bows. Mark the forward edge of the mid bows with a Sharpie. You will notice that the pattern sides will now be deflected slightly and not look right. Resist the urge to correct the wrinkles on the sides of the pattern and leave them be. When the bimini is done and tensioned on the frame, these deflections will align themselves to center and go away.
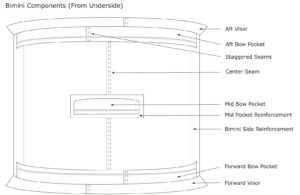 This is an underside view of how we fabricate our biminis. The bimini side reinforcement is folded as an extension of the main panel to finish 3 inches. The forward and aft bow pockets are cut up 1½-inch from the sides of the bimini to allow the enclosure zippers to extend to the corners.
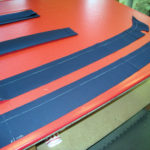
Be sure to run your top panel seam fore and aft along the selvage edge of your fabric roll. Also, be sure to seam all pockets and visors in the same manner and orientation as the top panel to avoid puckering. It is important to put the bimini top panel in its “Natural State” by pulling the seam out flat, like it will be when tensioned on the frame. Then, put your pattern on top to mark and cut out. Do not stack seams for pockets and visors on center to avoid a large knuckle, but rather stagger the seams to avoid this.
Finally, when installing your mid pockets, only the center needs to be tight to hold the bow in place. Ease up the ends of the pocket by ¼ inch to avoid a diagonal ripple in the bimini top extending from the mid pocket to the corner of the bimini when installed on the boat.
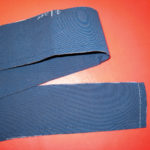
The bimini pockets are cut out 5½ inches wide and reinforced with a folded extension of the pocket ends. A 1½-inch line is drawn as a guide for sewing in the zipper. Inset: Here is one of our visors cut 3½ inches wide that will finish 2½ inches wide. It is two-ply and stitched on three sides. A seam allowance of ½ inch has been added to the ends of each visor.
 Round the corners and make relief cuts along the stitched edge of the visors, turn right side out and top-stitch three sides to finish.
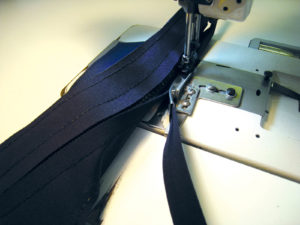
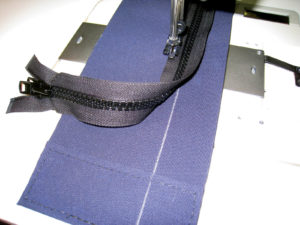 Stitch the zippers to the inside of the pockets down the center of your marked line and cut the zips even with the end of the pockets. We freehand this process and use one zipper, not two as some fabricators do.
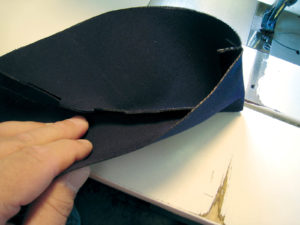
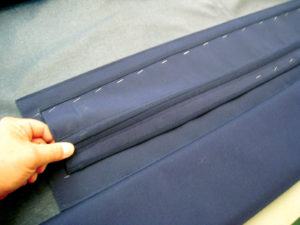
 Turn your pockets over and cut down the middle of the two stitch lines and bind all pocket edges, except the forward and aft edges where they are going into a seam.
 Install your reinforcing patches for the mid pockets and staple your mid pockets in place on the center of the patches. Be sure to ease off the mid pocket corners ¼ inch.
 The forward and aft pockets being top-stitched after seaming. Be sure your pockets and visors are facing out before top-stitching as shown in the photo. We staple all our hems to hold alignment of the pieces prior to seaming.
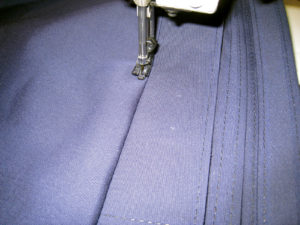
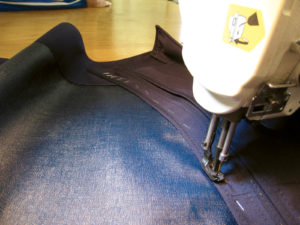 The forward and aft pockets are turned to the inside and stapled in place. The pocket is being stitched down on the binding stitch line in the photo.
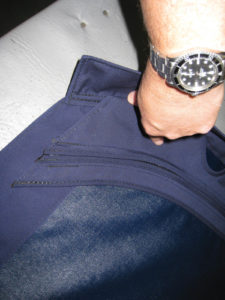 Notice that the pocket corners are up 1½ inch from the sides of the bimini. This allows for a 1½-inch zipper overlap with no leaky gaps at the corners.
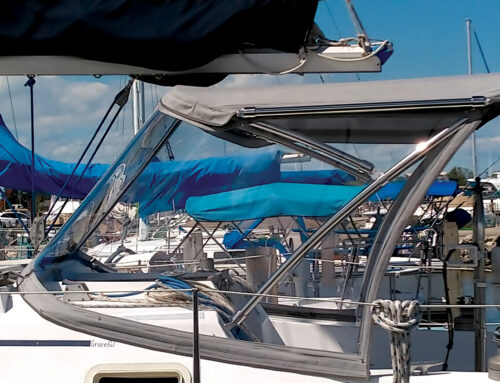
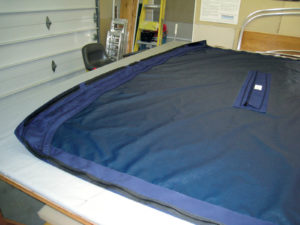 The finished bimini, almost ready to be installed on the boat. All that is left is to stitch the zips onto the top of our enclosure patterns, using our “Flip Trace” method to get the correct curve. Then we install the bimini, zip on our patterns, mark the bottoms and overlaps on the enclosure patterns and head back to the shop to start the enclosure fabrication process.
Mark and his wife, Deb, own and operate Hood Marine Canvas and Hood Marine Canvas Training Workshops in Merrimac, Mass. For more information and to purchase the large binder seen in these articles, visit www.hoodcanvas.com or e-mail mark@hoodcanvas.com.