TEXTILES.ORG
 Patterning a Navy top with side curtains
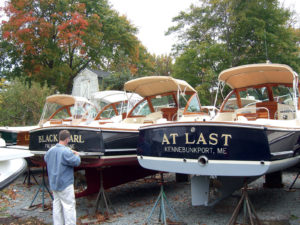
A fleet of new CW Hood Wasque 26s with Hood Navy tops on the hard in Marblehead, Mass.
We made a trip to my brother Chris Hood’s business, CW Hood Yachts, in Marblehead, Mass. Chris was refitting an older Wasque 32 and needed a frame, Navy top and side curtains made up. We took some photos and thought it might make a good article to show Marine Fabricator readers how we pattern a Navy top with side curtains in one step.
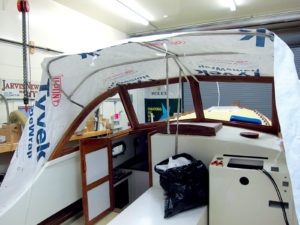
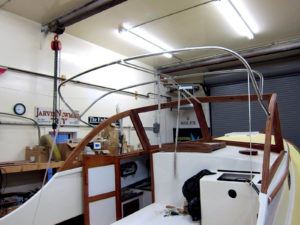 The frame has a kick 10 inches up on the primary bows to enable it to fold to the top of the windshield. The frame is strapped and preloaded in the photo. We added double-sided sticky tape to the frame bows to speed up the process. This is a shorter top by design, so it can fold easy.
 We cut a large pattern blank with a center line and loosely draped it over the frame. The pattern blank needs to be large enough to cover the top and two sides, as well as the total length of the job. In this case, the pattern blank is 16 feet by 8 feet.
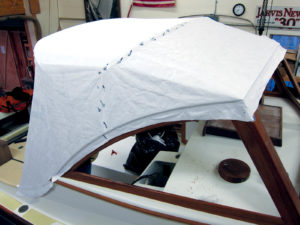
 We aligned the center line of the pattern with the center line of the aft bow and the center line of the windshield. Starting at the center, we peel back only enough backing paper on the sticky tape as we need at a time. In a Navy top, the forward section has an area of extra material at the mid bow that needs to be removed in order for the top to lay smooth. We will handle the aft section of the pattern first.
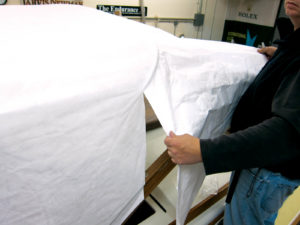 We have alternated side to side, peeling back sticky tape until the section between the aft bow and the mid bow is lying flat and smooth. We will install the snaps when we return, as the windshield is in the process of being restored. To work around this, we are using double-sided sticky tape where the snaps would go. The aft sides have been stuck down each side, flat and smooth. We also cut up from the bottom of the side pattern to the point just below the curve radius of the mid bow. I am holding the forward area that now needs to be adjusted.
We are continuing the slice along the forward edge of the bow to the point near the mid bow’s center where the extra material stops.
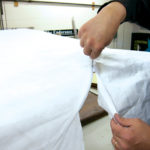
 This photo shows the cuts we just made, pulled back and taped on the correct angle so the forward section is flat and smooth. To get these panels to lay down smooth, it helps to stand on the side of the boat with a hand on each side of the paper. Now feel for the neutral position by pulling each way with your hands until it looks flat. Come straight down with the pattern onto the surface and tape and stick. Be sure to cut off the extra pattern paper as you go so your tape rests close to the top of the bow. Continue taping downward to join the side pieces into one. It helps to have an extra set of hands positioned behind the pattern to push against while taping.
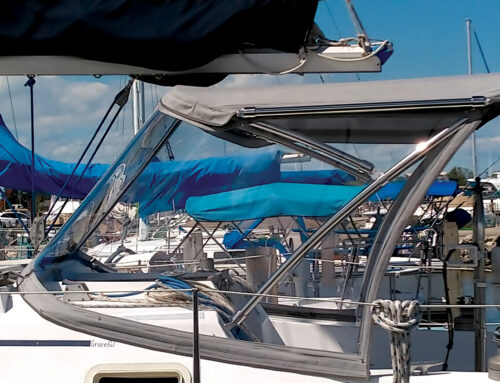
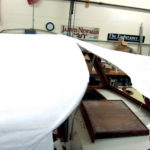
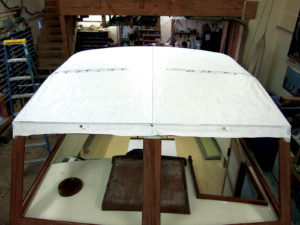 A straight-on photo of the pattern top. The forward edge is held in place by double-sided sticky tape. We have marked where the wipers will be located and three small darts. The edge of the molding is marked to facilitate the snap placement. Looking back where the tape ends, close to the center of the top is where our relief cuts ended and we achieved the neutral position with no loose material.
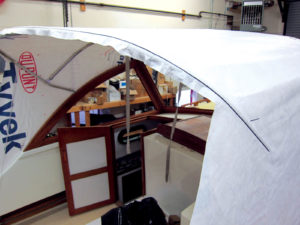
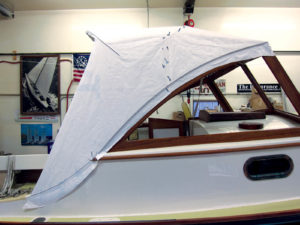 In this side view, we continued our molding marks around to the side and onto the top of the fiberglass. We have marked the aft bow, as well. We now have a form-fitting pattern of the top and side curtains together.
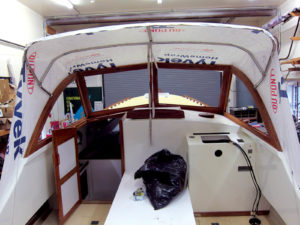 This photo is an inside view of the almost-complete pattern set up. We made hash marks where the two panels join on the sides, just in case the tape comes apart while removing the pattern from the frame. (The late Ralph Hulsman of the Oakum Bay Canvas Co., in Marblehead, once told me, “Mark and label everything, even if you think it is not important.” This holds very true in making patterns. I would add that you should take digital pictures that you can refer to while developing the pattern.)
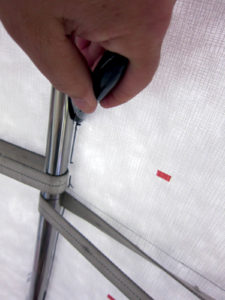 We are using a Sharpie to mark the inside forward edge of the mid bow. Mark the entire length of the bow inward at a 45-degree angle from the underside. You will be cutting your pattern on this line to separate the forward and aft sections of the Navy top. The mid pocket will also be a part of this seam in the completed top.
 We have marked the aft edge with a Sharpie marker. This is where we will cut the pattern when we get back to the shop to start the development phase. Hold your marker at a 45-degree angle along the top edge, transitioning to a 45-degree angle on the bottom edge along the sweep of the curve radius. It helps to steady your drawing hand with a finger on top as you draw along the length of the bow. We have made a reference mark on the side of the pattern as to where we would like the top to end and the side curtains to begin. The pattern is now complete and must be removed in one piece off the sticky tape. In order to release the pattern from the underside, be sure to push up on the backside of the mid bow only. If you push up on the forward side of the mid bow, you might release the tape.
Patterning requires the bending of flat panes of pattern material into angles, and with this knowledge you can pattern practically anything. If this Wasque was going to have an angle back to close in the rear, we would pattern this at the same time as the top and side curtains using our “Flip Trace” method. This saves trips to the boat, and money.
Mark and his wife, Deb, own and operate Hood Marine Canvas and Hood Marine Canvas Training Workshops in Merrimac, Mass. For more information and to purchase the large binder seen in these articles, visit www.hoodcanvas.com or e-mail mark@hoodcanvas.com. More information on the boats in this article can be found at www.cwhoodyachts.com.