 TEXTILES.ORG
 Cover zippers for a clean, quality look
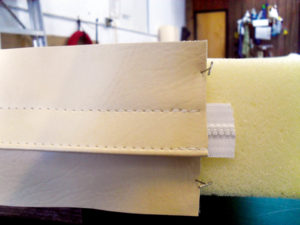
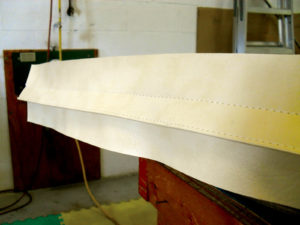
This is a zipper for a 3-inch foam seat cushion.
When someone inspects a piece of furniture, such as a chest of drawers, they remove a drawer to see how it was constructed. What are they looking for? Dovetail ends, of course. Even though these are not visible from the outside, the craftsmanship instills a sense of quality and adds value to the piece.
Upholsterers want to know how our cushions are viewed by the customer. I see two areas that are overlooked. The first is what the customer sees when coming out of the cabin. In most situations, the customer gets a close-up look at the bottom of the helm seats. We pull and tug fabric to get the top looking pristine, but the bottom of the cushion is a mess of stapled wrinkles and raw edges. This can reflect on how the customer feels about the entire job and raises their concerns that you did not take enough care with other elements of the job.
This also applies to seat cushions that are designed to be removed. If their bottoms are messy, your customers will feel that the rest of the job may be slipshod. Always put yourself in the position of the customer. What would you expect to see as a finished product?
The same may be said of the forgotten zipper, the unseen detail that speaks volumes about the amount of care taken in the upholstery work.
Cushions with zippers are the second item on my list that should be addressed. Again, know where the cushion is located on the boat and how it will be viewed by the customer. For example, when looking up at the flybridge from the cockpit of a sport fish, you should see a finished zipper. However, I frequently see the rough edges of the fabric where the zipper was just stitched on the back of the fabric and the fabric was cut open.
It has become the norm to use this technique on mesh or underlining and then cut the fabric down the center of the zipper. I understand why a boat manufacturer would prefer this method. After all, it is cheaper for both labor and material. I have even used this particular way of installing zippers in certain applications.
Do yourself a favor when you do this type of zipper installation. Don’t get skimpy with the zipper. I will put in the longest zipper I can. A longer zipper will make stuffing the cushion a breeze. This may not seem like a savings at the moment, but when you do the math, it makes sense.
Taking five minutes to stuff a cushion doesn’t seem like a big deal. But multiply that by six cushions. You have spent a half hour wrestling with foam and small zippers. Time is money in this case. A longer zipper may have easily reduced the stuffing process by two or three minutes per cushion. Since I charge the customer per foot for zippers—I even charge for the zipper glides—I am actually coming out ahead. And the customer will appreciate this feature if they should ever want to remove the foam themselves.
If you are making cushions with a finished zipper, think bigger. I like to bring the zipper around the back corners by 6 to 8 inches, depending on the overall size of the cushion. I believe that the larger the opening, the easier it is to stuff and fluff the cushion.
Remember that it is important to have all the seam allowances laying the same way inside of the cushion. If the seam allowances flip from the top of the foam to the sides, your seams will not appear to be sewn straight. If you have welt cord on these seams, this flip flop will be even more evident.
When I am making cushions that may be seen from the back, like the flybridge cushions I mentioned above, I want them to have a finished and attractive look. I also want to protect these cushions from the elements.
The best way to do this is to provide a cover over the zipper.
Cover zippers: Start to finish
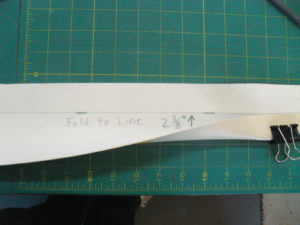
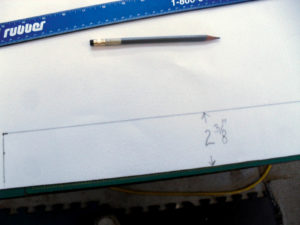
 I allow an extra 1/16-inch to make up for the fold on thicker vinyl. This will be the top of the zipper and the flap that covers it.
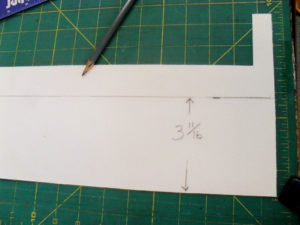
 This measurement will always be the same, no matter how thick the foam is going to be.
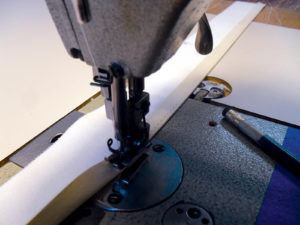
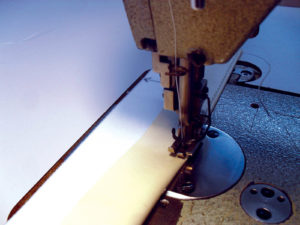 Stitch along the outside edge of the fold. Note that the folded vinyl is the same width as the zipper.
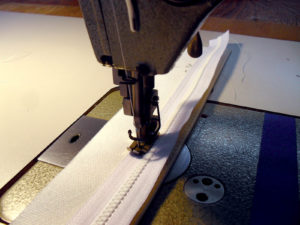 Lay the zipper on the folded vinyl and stitch down along the inside edge of the folded vinyl.
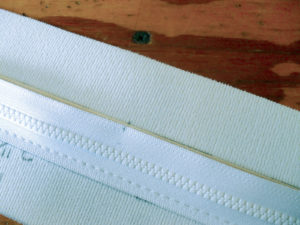
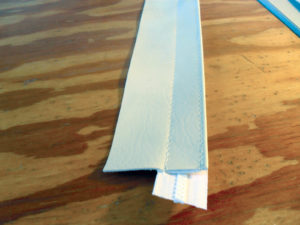 Flip the piece over and you should have something looking like this.
 Cut the other side of the zipper fabric.
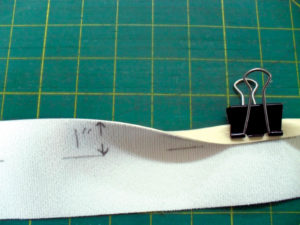 This side of the zipper we are going to fold over ½-inch, so I mark the fold at 1-inch.
 I like to stitch the outside edge of this piece as well. It doesn’t take long to do and it is easier to get the zipper straight.
 A good idea is to put a few matching marks on before sewing.
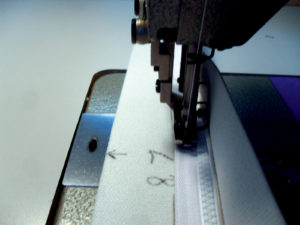 Place the zipper on the folded vinyl and stitch down.
 Put on the zipper glide.
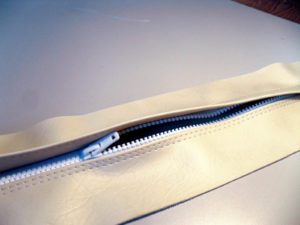
 The result is a protected and invisible zipper. This formula gave me the 3/8-inch seam allowance I was looking for. It’s a good idea to run the zipper a little longer than the fabric to make the zipper glide easier to install.
Carol Racine is owner of Racine Design in Jacksonville, Fla.