TEXTILES.ORG
 Using track-to-track installation for enclosures
Tips and techniques from a veteran fabricator for flawless track-to-track enclosures.
 When using track-to-track installation for enclosures, step-by-step instructions are helpful to achieve a proper fit, which creates a high-quality-looking job. Utilizing a track-to-track technique is necessary for today’s marine fabricator. A standard “snap” enclosure may take away from the look of today’s beautiful, sleek vessels. Some high-end boat builders are even building a track into their windshields that does not allow for the installation of snaps.
Track-to-track installation provides the potential to create an enclosure where the tension pulls evenly from top to bottom, without any wrinkles in the window curtains. Conversely, a snap-in-place enclosure under tension can show pull marks between the snaps, causing wrinkles through the window material.
I am going to take you through a track-to-track enclosure, from installing the track, patterning, cutting fabric and sewing to completion.
First, determine the location of the track to be installed. Is it to be installed on the windshield, on the radar arch or into the fiberglass hull?
Second, determine the type of track best suited for the project. You may be able to use a combination of types for an application.
Track types and their purpose
-
- Flex Rail 11 and keder welt. This is the larger 10 millimeter diameter instead of the original 8.5 millimeter. It’s flat on the bottom so screw heads don’t catch on the welt. The new keder welt will not fit into the old Flex Rail, so make sure to use Flex Rail 11 with Flex Rail 11 keder. Use standard 8.5 or 7.5 millimeter keder welt on the original Flex Rail.
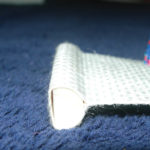
Flex Rail II is a PVC extrusion that is non-corrosive. It can be mounted on the top of a windshield, the edge of fiberglass or a radar arch, and can be bent around corners. Only small amounts of heat are needed to form it.
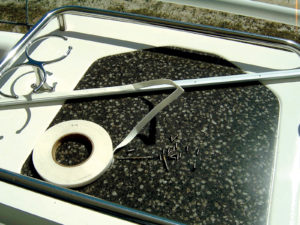
I apply 3M VHB foam tape (found at auto parts stores) to the back of the track to hold it in place while installing. It gives the track extra holding power, and provides a water seal between the track and the boat. To obtain optimum adhesion, the bonding surface must be clean and dry.
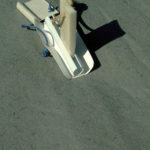
Whether you use Flex Rail, Costa, Flat Flange or Double Track, start the installation by peeling a small area of the foam tape off the track and sticking it to the boat. Drill and install a screw, then move on to the next hole, removing the paper from the foam tape as you go. When you get to curves, secure the last screw before the curve then heat the track. When the track is warm enough it will start to bend. Form the track to fit around the radius.
Use rubbing alcohol to remove residue and dirt from the boat and track. Wipe with a dry cloth. This provides a better holding area for the foam tape.
Stick the foam tape to the track and only peel back the paper on the foam for the area you are working with. Then apply the tape to the back of the track.
Predrill holes into the track just slightly larger than the shank of the screws (I use a 9⁄64-inch drill). Space holes 4 to 6 inches on straight edges and 2 inches on curves. Mount with stainless screws with a flat head and tapered shank.
If drilling into metal or thick fiberglass use #4 by 40 by ½-inch machine screws. In places like the corners of a radar arch where the fiberglass is really thick, drill and tap the fiberglass and install machine screws.
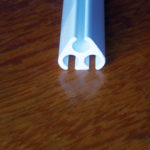
Costa track is a center-mount track with a heavy-duty PVC profile that maximizes load capability for large covers, biminis and track-to-track enclosures. It is designed to replace flange-style track and provides a more aesthetically pleasing result. It’s predrilled every 4 inches and can be heat-formed to most radii. The large channel opening allows the use of #6 stainless steel screws for a more secure attachment. Built-in countersink for the seating of screw heads allows welt to slide through unobstructed.
-
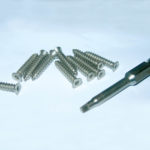
- Tri Vantage and Bainbridge sell screws designed for use with Flex Rail. Screws with #4 head and #0 square drive keep welting from getting hung up in the track.
-
- When installing screws into groove of the Flex Rail you can use a thin piece of starboard to make a wedge to force the flex rail open so the head of the screws don’t catch and damage the edge of track.
-
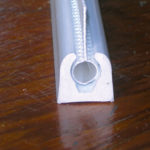
- Costa Track’s rigid PVC construction provides exceptional strenght, yet, when heated, it can be bent. It is available with flat or concave bottom (for windshield or rail mounting).
-
- The back side of the track has a pocket for double-side foam tape, wich eliminates the need for caulking.
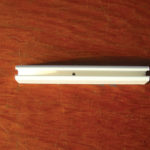
PVC awning molding is UV-resistant, non-corrosive, non-rusting and can be heated to form any shape. Secure it with flathead stainless steel screws.
Single track
Single track is the most commonly used for mounting windows in a track-to-track installation. A zipper is sewn to keder welt, which slides into the track, making an exact fit. Use #8 or #10 screws to fasten single flat flange or double track into the boat.
The anodized aluminum version can be bent, but it’s best used in straight applications. When cold bending aluminum track, I place a stainless spring (about 8 inches long) inside the track at the corner.
Double track
Double track on the aft end of a Tiara, which allows for the door to slide toward the port side of the boat to create an opening for access into a cockpit or cabin.
Double track molding (wall) is used when you want to slide panels past each other. The double track is installed at the top of the boat only, with single track at the bottom.
Triple track
There are times when track can’t be mounted to the boat. Triple track was invented to extend double track capabilities to locations where fasteners are not available, like the crown on a hardtop, or if you want to create a sliding door off a bimini top. Triple track is available from Rainier Industries.
You can heat single or double track with a hot box, available from an electrical supply store. It has a heating element similar to that of an electric stove. It does not take long to heat the track, so be careful. A hot box provides even heating for double track if working in cold weather.
-
- Finish off the back edge of the Flex Rail or Costa Track by cutting the edge on an angle. This creates a cleaner look.
-
- Double Track molding (ceiling) is used when you want to mount a double track to the ceiling so one panel will slide past the other. The best use is when you have rail in the back of the boat and you want to mount it to the hand rail that goes across the aft end of the bridge. Mount the track to the stainless rail, then you can make a separate curtain from the rail to the deck and a separate curtain from the rail up to the top, allowing you to remove the top curtains and still have the lower curtains left in place for security. Drill holes through the track between the two grooves.
-
- There are times when track can’t be mounted to the boat. Triple track was invented to extend double track capabilities to locations where fasteners are not available, like the crown on a hardtop, or if you want to create a sliding door off a bimini top. Triple track is available from Rainier Industries.
When mounting track to a hard top or radar arch into thick fiberglass, I drill and tap the fiberglass to make it easier to install screws to hold track in place.
When installing track around curves in fiberglass or a windshield, I use a heat gun and place a piece of keder welt inside the track after heating so the track doesn’t collapse while bending.
After you have the track installed, place marks on the track where you want to split your vertical zippers, making it easier to pattern the enclosure. Place double-sided tape to the edge of both top and bottom track to hold the patterning material. Cut off enough patterning material to fit one panel at a time, which allows you the ability to reach around the pattern to fit from inside the boat.
Triple track is one piece that goes the entire length of the aft curtain, but the enclosure is split into two or three panels, so when you unzip the vertical zippers you can then slide the door open. When the center panel is on the inside track and the two outside panels on the outside track, you are able to slide the center door port or starboard, and slide either side panel toward the center for ventilation.
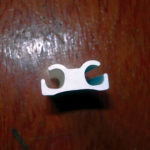
Secure the pattern material tight to the track. Look at it from an angle that it makes a C shape, which is the part your keder goes through to attach to the enclosure. Mark on your pattern on the very edge of the C that is the closest to the other C on the bottom track. Failing to do this can actually make your enclosure panel larger, resulting in a poor fit.
Mark where the vertical zippers go onto the pattern, and mark for necessary u-zippers. Mark the corresponding curtain number and the color of material, and as much other information as possible. Fit all enclosure panels one at a time on the same trip. Then proceed back to the shop. To process your pattern, lay the patterns next to one another to make sure that the top and bottom line up, this way one curtain doesn’t end up longer than the other.
Proceed making the enclosure panel the same way you would do a standard track-to-snap enclosure (except for the bottom edge where the border needs to be at least 2 ½ inches wide). Install your vertical zippers and add u-zippers, if needed.
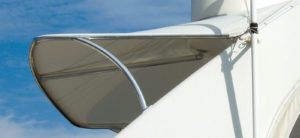
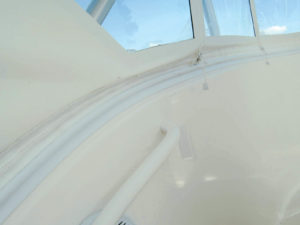
This banded or laceless top is secures to the boat by means of Flex Rail attached to the fiberglass.
On the bottom edge of the enclosure, cut the facing ½-inch longer than the line you have drawn for the track (this will allow your enclosure panel to cover the track for a cleaner look and will make the track last longer).
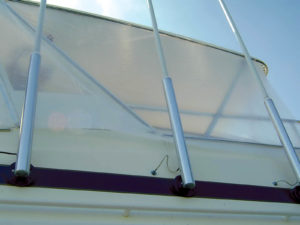
This is a view on the outside of the boat with the pattern material taped into place for making your pattern. You can see the black mark on the pattern material where the track is located.
Zip all your enclosure panels together and lay them on a smooth surface. Pin or staple the enclosure panels to the table with tension between the curtains. Then sew the loop part of the Velcro onto the side of the keder that faces the enclosure panels. Be sure that when you sew the Velcro and zippers that you use the box side of the zipper (with the slider on it) down, and that you have two rolls of stitching on the zipper for added strength. Place ¼-inch double-face tape onto the zipper edge that is going to be sewn to the enclosure panel. Now take your keder that has the zippers and the Velcro sewed to it and lay it on top of the Velcro sewn onto your bottom edge of your enclosure panels. Be sure that the full enclosure is pinned down to the table and is tight.
Stick the zippers into place with ¼-inch double-face tape, unzip the keder from the bottom of the enclosure panel, and sew the zippers onto the enclosure using two rolls of stitches for added strength.
-
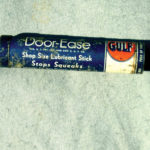
- Apply Door-Ease to the tap and slowly tap the hole with your drill (the door ease prevents the tap from breaking off in the windshield). Purchase this at any home improvement store.
-
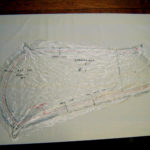
- This is what your pattern should look like when you get it back to the shop.
-
- Sew 1-inch polyester Velcro (I don;t use nylon hook-and-loop because it doesn’t last in marine applications). Sew the Velcro (hook) right on the inside of that line you drew for your bottom track on the boat, and sew down the other edge.
-
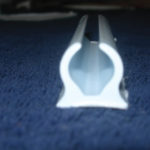
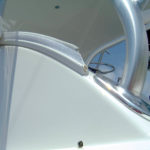
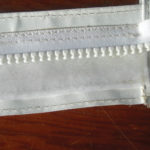
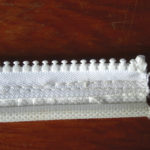
- When installing keder welt at the top, make sure the bead of the welt lies right on the line you drew on your pattern for the track. This picture shows where the edge of your welt should be in relationship to the mark from your pattern. The black line is the mark for the top track, and the bead of the line is right up to it.
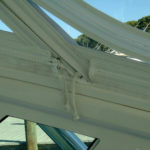
Finish look from the inside with zippers sewed to the track with two rolls of stitches in place.
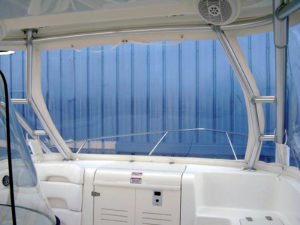
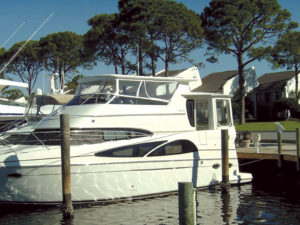
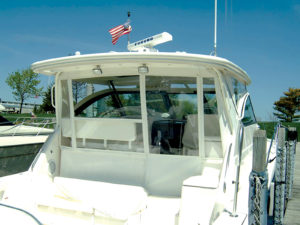
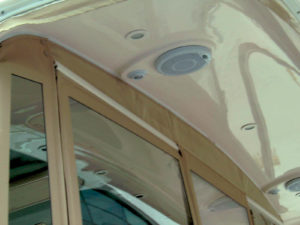
Inside view of a 32-foot Boston Whaler. Notice how the vertical zippers follow the legs of the hard top for greater visibility. Front enclosure panel unzips at the bottom along with both sides to gain access to the bow.
Don’t sew the zipper all the way down to the enclosure at the very beginning. Leave 1¼ inch, which makes zipping the enclosure into place much easier. Sew two rolls of stitches onto the zipper for added strength.
-
- After zipping your enclosure panels together and pinning them to the table with tension, take your keder and lay it out flat on top of the panels where the Velcro is sewn in place (use one long piece of keder for this). Now mark the keder where you want the horizontal zippers to start and stop, then sew on the zippers.
-
- Laying the center of the bead of the keder right on the mark from the pattern of the bottom track will cause tension when you zip the enclosure on the boat. If you do not lay the keder farther up than what was marked as your track line on the pattern, the enclosure panel will be loose. The black line marks the bottom of the track.
-
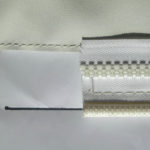
- Inside view with the zippers sew to the enclosures. Bottom is installed into track on the boat. Notice how the beginning part of the zipper is not sewn down, making it easier to zip the enclosure panel to the boat.
-
- This is the outside view of the bottom edge of an enclosure on the bow. Note how the enclosure panel extends to cover the track providing protection to it, along with giving the enclosure a cleaner look.
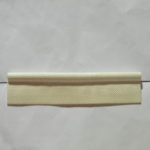
The enclosure panel is longer than the keder welt. This allows the outside of the panel to cover the track, providing a clean look and protecting the track from the elements. PVC track is made to last outdoors, but by covering it you add life to the enclosure.
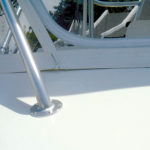
The flat flange track on the inside of this boat is heated, bent and secured to the fiberglass without any screws, creating a very clean look to the inside of the enclosure. A structural adhesive is used to maintain the strength. This method is best left to those with experience creating track-to-track enclosures, and with working with structural adhesive because working time with some adhesives is about an hour. On this application you must heat and form the track to fit the boat before it can be mounted to the boat with adhesive.