Patterning an enclosure
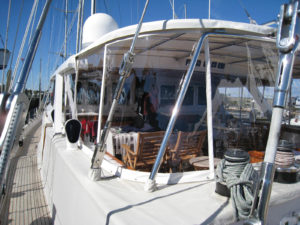
A Hood aft deck salon top and enclosure on the 120-foot yacht “Freedom” at the Newport Shipyard, Newport, R.I.
At Hood Canvas, we always precut our pattern blanks to rough size, including any center lines.
Most custom shops T-pin the enclosure pattern to the bottom half of the zipper on the bimini. We prefer to stay-stitch the bottom half of the zippers onto the top of the pattern blanks and make adjustments to the pattern back at the shop and out of the wind. You simply have to zip on all the patterns as soon as you get to the boat and pull tight against any breeze. It makes the patterning process go quickly and easily.
Start by taking your pattern blanks for the two sides and stay-stitch the zippers from the bimini onto the top of the pattern in a straight line. Be sure to mark them port and starboard. Now take the forward and aft pattern blanks that have the curve on them from the “Flip Trace” technique (discussed in the previous article in the March/April issue). You need to stay-stitch those zippers onto the tops of the pattern blanks following the curves.
Now, on the boat with the patterns all zipped on, start with the forward pattern, where it comes down on an angle and tucks under the windshield, creating some difficult angles to deal with. You might want to add some double-stick seam tape to the top edge of the windshield to hold the top half of the pattern in place while dealing with the bottom half.
-

- Make tucks along the entire bottom edge of the pattern, taking out the extra material between the fasteners. Make hash marks with a permanent marker across each side of the tucks at the bottom of the pattern. Mark the forward edge of the windshield and fasteners. The forward pattern is done.
-

- Using a marker and a ruler, draw two lines for each set of hash marks, forming a point at the edge of the windshield.
-

- With scissors, cut up one side of each dart on the marker line. Using a pin at the top as a pivot, overlap the pattern so the hash marks line up on the bottom, and tape. Do this for all the darts and you will put the belly back in the pattern so it fits the exact contour of the windshield.
-
- Make lettered hash marks along the marker line that follows the edge of the windshield. Cut on the same line with scissors.
-

- You now have two pattern pieces laying flat again with the seam along the edge of the winshield. You also have alignment marks for seaming the two pieces together. In our shop, we add hems to the glass and stick the two pieces of glass together with double-sided seam tape. Then we sew the glass along the belly, and mask the seam on both sides with a fabric strip. We can now pattern the sides. As mentioned previously, the zippers are sewn on straight at the top of the pattern. If you have a very straight edge along the sides of the bimini, you might not need to make any adjustments to the pattern. Unfortunately, this is not usually the case and in most cases we end up making two adjustment darts in the pattern at the points where the two midframe bows touch the sides.
A couple of things should be noted about this process: first, this method can be used to correct imperfect angles on the forward and aft patterns, as well; second, this method works equally well for hard-top enclosures.
-

- The steps to make these long darts are pretty much the same as in the previous six figures. The only difference is that the darts end at the bottom of the sewn-on zipper, and a relief cut needs to be made at the top of each dart.
-

- The top edge of the enclosure is now not straight, but at the angle it needs to be able to fit correctly.
We stitch our keder tape on like we do for zippers, but on a straight line for all four sides and correct angles as necessary.
Note: The large binder seen in the Jan/Feb Shop Techniques article on fabricating enclosures is available for purchase at www.hoodcanvas.com. Mark Hood is available for private consultation and training.
Mark Hood is owner of Hood Canvas in Merrimac, Mass., mark@hoodcanvas.com.
 TEXTILES.ORG


