TEXTILES.ORG
 Designing an inside curve
This piece required a little extra help with a heat gun, but notice how nicely it makes the curve.
While we modify what we can, sometimes by design, we find that we have to follow the original upholstery design and just get through it as best as we can. From my particular point of view, the most difficult portion of an upholstery job is the inside corner or curve.
I always let my customers know about areas that are difficult to make look perfect. If you point out problem areas ahead of time, your customers are more likely to be sympathetic if the project doesn’t end up perfect.
When dealing with inside curves, such as on a bow rider, there are a few things that you can do to help make a tighter skin: If you are able to modify the existing skins, do the designing before you remove the bolster from the boat. Once the boards are removed, they usually do not keep the exact curvature you need. No matter how nice of a job you do when you squeeze the board back into the boat, you will have wrinkles.

When covering an inside corner, be sure the foam is firm enough to keep its shape.
Quite often, the factory will have one piece of fabric pulled over the top and stapled in the back. If you can change anything here at all, try to make a top and bottom cap that follow the curve of the cushion. This will also make the cushion look and feel fuller because you don’t have to squish the foam to get the fabric pulled smooth.
Another way to modify the corner is to add vertical seams and stretchers. This works great if you have thicker foam to work with. I think this is a faster way to get the job done. You don’t have to be so concerned about getting the curve perfect. You will also be able to pull the material over the top and staple to the back of the board without mashing down the foam. This works especially well if you are adding 1/4-inch sew foam to the fabric.
-
- You can’t go wrong with vertical pleats if you want to avoid wrinkles.
-
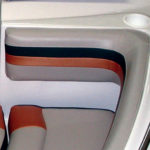
- This inside corner has two vertical seams that give the vinyl a place to bend instead of pucker.
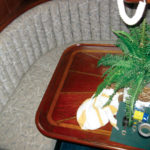
Large pieces, such as pontoon lounges, where you have an overstuffed look, present other issues, especially if you are working with stripes and multiple horizontal stretchers. Because of the overstuffed, plush appearance, you can’t pull the fabric hard enough to pull out all of the wrinkles without crushing the foam. Pay particular attention to the stretcher when you are in the process of tearing it apart. Be sure to make marks on the stretcher and board. This is one time that the stretcher requires serious consideration as to its placement. Also, keep track of how far in it was stapled. And remember to make the stretcher out of a vinyl that stretches. Cutting the fabric on the bias can help give you a little added stretch and may conform easier to the curve.
By not over-stretching the fabric on the top and bottom, the face can be pulled snug without the fear of wrinkles.
When you’ve finished the piece and still have some small wrinkles, a quick blast from a heat gun can shrink those trouble spots. If you have never used a heat gun on vinyl, practice on something other than your customer’s new upholstery. I have heard of people trying to use heat guns to “soften” old vinyl, thinking that this will make it easier to pattern from the old skin. Remember that the heat will shrink the vinyl and, while it may lie down flat, it may not be in the original size or shape. This slight difference could result in the appearance of wrinkles in the finished product.
When covering an inside corner, the last—but not least—piece to consider is the foam. You should have a foundation that is firm enough to keep its shape. You don’t want the foam to collapse and leave a void. That could equal wrinkles.
-
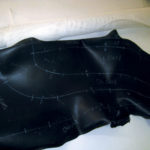
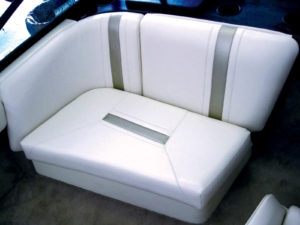
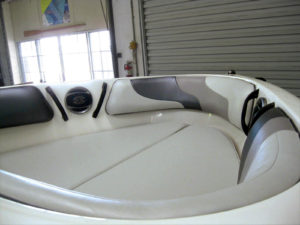
- This had been a stretch-over-and-staple upholstery job. Before removing this piece from the boat, I took a marking pencil and traced the edges of the foam for top and bottom caps. At the same time I made the new design changes ( in the large photo above).
-

- Due to the firmness of the foam, the inside curves on this bench seat looked difficult. But the skin was able to be pulled very tight and fit like a glove.
Carol Racine is owner of Racine Design in Jacksonville, Fla.