Sewing techniques for marine applications
Today’s marine fabricators are expanding their sewing repertoire by utilizing up-to-date sewing techniques and incorporating regular machine maintenance to provide the highest quality end products their customers deserve.

Take Eric Walton, owner of Custom Canvas Alaska LLC, of Fairbanks, for example. Back in 1969, when Walton was a college freshman, he had a part-time job at Josephson Bag and Canvas in Bridgeport, Conn. At that time, they had three or four sewing stations, all with Singer 111s. “Back then the Singers had small bobbins and no reverse feed,” Walton says. As the business grew, the company added some new Juki 563s, similar to the Singer 111, however these new machines had the added design feature of large bobbins and reverse feed.
“How revolutionary,” Walton says. “The Singer 111 workers were all envious of the Juki 563 workers.” Today, in his shop, Walton has three Juki 563s and one Chandler Long Arm, a single-needle, lockstitch, walking foot sewing machine—the workhorse of the custom canvas industry. “We’ve added needle positioning to two of the Juki machines, which has improved our sewing quality—no more missed stitches when turning a corner—and speed, with much less need to hand turn the machine.”
Walton is not alone. Today’s marine fabricators are adapting their sewing techniques and maintenance programs to keep their machines efficient, effective and lasting for years.
Techniques defined
Within the marine fabrication industry, several types of sewing techniques are commonly used.
Frank Henderson, president of Henderson Sewing Machine Co. Inc., Andalusia, Ala., explains that the one-needle lockstitch involves one thread passing through the needle on top and a second thread wound onto a bobbin that is installed into the hook underneath. “It forms what is called a lockstitch, meaning the thread from the needle goes down under the throat plate, the hook picks up that thread, passes all the way around the hook and when it comes back up it actually forms a knot so it locks,” he says.

That same type of scenario can also be a two-needle lockstitch, which simply means there is one needle on the right and one needle on the left with two separate hooks—one that goes clockwise and one that goes counterclockwise. “As the needles descend, the hook starts around picking the thread off of one needle or two needles and then goes all the way around the hook and forms a lockstitch,” Henderson says. “The lockstitch has to be two threads, one passing through the needle, the other coming from the bobbin case, which is inserted into the hook on the machine.”
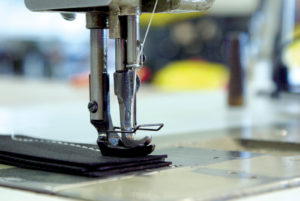
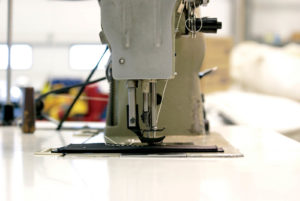
Used by the majority of marine fabricators, the one-needle lockstitch walking foot, also known as the single needle, compound feed, walking foot machine, has the thread passing in the same way as the lockstitch.
“Regardless of brand or model, these machines are characterized by the presence of two separate presser feet,” says Steven Kaplan of S. Kaplan Sewing Machine Co. Inc. in Newark, N.J. “If you observe the motion of a walking foot machine by turning the machine hand wheel towards you, the machine advances the material being sewn by three coordinated actions: the movement of the feed dog (feeder) located below the needle plate, the front-to-back movement of the sewing needle as it descends through the fabric, and the front-to-back motion of the inner presser foot.”
Kaplan further explains, “On a plain drop feed lockstitch sewing machine, the material being sewn is transported past the needle after it leaves the fabric, with only the feed dog advancing the fabric. In a needle feed lockstitch sewing machine, the feed dog is aided by the backwards motion of the needle as it ascends to its up position.”
In the marine fabrication arena, the fabric is being pulled from the top to the bottom simultaneously, which allows heavier goods to be sewn with a one-needle walking foot. “Because of the multiple layers of fabric and how heavy the fabrics are, including vinyl coated and canvas, most are sewn using the walking foot,” Henderson says. “So if you are looking at the weights of goods, the lightest normally is done with the one-needle drop feed. Heavier goods can be run with a one-needle feed and the heaviest type of goods is done with a one-needle walking foot machine.”
Indeed, according to Kaplan, “The correct synchronization of the feed dog, needle motion and presser feet accomplishes the positive feeding action of even the heaviest and most difficult-to-sew materials, without shifting of the different layers of the material being sewn.”
So what are the best techniques for sewing the various types of marine products and materials using the aforementioned machines?
To begin, the size of the chosen needle is key to the machine’s effectiveness and stability. Needle size generally depends on the thickness of the goods. You will probably need a larger needle if you are sewing four or five plys of the same weight of goods, and a smaller needle if you are only sewing two plys.
“The needle size should only be large enough to penetrate the goods, so that it does not pierce a large hole, and not break frequently,” Henderson says. “If you take a very large needle and press that needle through the goods, and the thread that you have can pass through very freely, that can create a problem in cutting the fabric apart, and it makes the thread that is passing through the fabric have too much space. So you want as small of a needle as possible but one large enough so that the thread you are using can pass freely through the needle, and you want a needle that does not pierce too large a hole in the fabric that you’re sewing.”
Generally, Walton and his team at Custom Canvas Alaska use 135×17 #23 needles with bonded polyester thread #138 and a stitch length of 6 to 8 stitches per inch.
“Most of our boat tops are made out of Top Gun,” Walton says. “One Juki is set up as a tape (binding) machine. On this machine we use #92 thread, mainly because the large bobbin will hold more #92 than #138 and the binding is rarely a structural element of the end product. On rare occasions, when a project calls for Sunbrella, we’ll use a thinner needle (#18) and lighten up on the thread tension. We find this helps to reduce seam shrinkage.”
Marine fabricators need to pay attention to the different points within needles, with the standard set point or sharp point being the two most widely accepted for marine-type goods. There are also regular point, ballpoint, and triangular and diamond cut points. There are different points with the needles depending on the type of fabric being used.
Maintaining your investment
The type of sewing machines, needle points, needle positioning and size don’t matter if your machine regularly breaks down because of poor maintenance.
“With sewing machines, cleanliness is next to godliness,” Henderson says. “Machines should be cleaned and oiled daily. If it is operated daily, eight hours a day, it should be cleaned twice a day. Keeping a machine clean and well oiled are the foundations of any piece of equipment lasting for a long time.”
Kaplan recommends cleaning daily with compressed air or a small brush. “The fiber and lint that is generated by some of the fabrics, particularly the acrylics and the vinyls, includes dust that is incredibly abrasive,” he says. “It can destroy machines. Getting it away from your machines by cleaning is critical.”
Depending on their makeup, some fabrics can produce a residue on the machine. “Even underneath the machine, take a lint brush around the hook, where there will be a buildup of fuzz, lint and residue from the fabric that will get into the machine,” Henderson says. “If it continues to be there, it will make the metal wear excessively and much more quickly. It becomes abrasive, just like sand.”
Kaplan agrees, “A clean machine is more easily adjusted to different stitch lengths and different material thicknesses than a machine that is gunked up with all kinds of junk,” he says. “It makes adjustments so much easier.”
For idle machines, namely those unused for two or three days, cover the machine to keep particles from falling onto the machine.
“Some sewing machines do a unique stitch or are set for a unique operation,” Kaplan says. “With your car, lubrication is pressured and it is forced to all areas of an engine, but sewing machines are not like that. Sewing machines rely on drip lubrication, so if you haven’t used the machine in a while you are going to have to lubricate it before you sew.”
Kaplan advises that fabricators use the highest quality materials and threads they can afford to use. “You can’t eliminate the variable of different materials, which depends on the project you are doing,” he says. “But you can eliminate the variable of the thread by using a good, consistent thread by the same manufacturer. People want to skimp on the thread, but that is one of the worst places you can skimp because one of the sources of lubrication in your sewing machine is the lubrication from high-quality thread. As it passes through a machine, you are doing a good thing. But by skimping on thread, fabricators are making a mistake because they are going to spend half of their day adjusting the machine to make a good stitch with a particular thread.”
Kaplan also suggests sizing the needle to the item being sewn. “People think that they have their machine set for a particular size needle and don’t want to change anything,” he says, “and that is a big mistake. All of these walking foot machines take the same style needle. So get into the habit of changing the needle and sizing the needle for the project you are doing. Eliminate as many of the variables because you can’t eliminate the variables of the type of material you are working with.”
Finally, remember to fix the little things while they are little things. “For walking-foot machines, there are a handful of parts you should replace every year, even if they are in working condition,” Kaplan says. “These are mortality parts. If parts wear and get damaged, you can’t compensate by making adjustments in the machine. But people tend to do that. They have a machine that they’ve tricked out to work with the worn parts they have, which will put more stress and cause a machine to wear quickly.”
Out with the old, in with the new
Even though each year technological advancements are seen throughout the industry, most industrial sewing machines are made to last more than 30 years, running for eight hours per day at maximum rpm levels. Your machine may be dated from a technological standpoint, but if it has been well maintained, it could continue to work well within your shop.
When determining if a machine should be replaced, evaluate how much money it costs you to maintain the machine each year. If the maintenance is going to cost more than a new piece of equipment, it should be replaced. If the machine has become obsolete, then the decision becomes about replacing the equipment because you’re interested in the enhancements of the newer models.
When making the decision whether to maintain or replace a machine, remember that manufacturers are not required to make replacement parts after seven years from the manufacture date. So, as your machine ages, it may get harder to find replacement parts.
Kaplan says that the new technologies everyone should take advantage of are automatic thread trimming, needle positioning and servo motors. “For a small shop to remain competitive, they have to put as many items as possible through their sewing machines. These features greatly enhance the ability to produce an item,” Kaplan says. “You cannot remain competitive without them.”
And while manufacturers introduce the latest in sewing technology each year, you certainly don’t have to change your machines as often. “But if your machine is 12 or 15 years old, it may be time for a new one,” Henderson says.
Seek the advice of sewing machine experts to help you evaluate your current maintenance program costs versus the benefits of an updated model.
Maura Keller is a freelance writer and author in Plymouth, Minn.
 TEXTILES.ORG


