TEXTILES.ORG
 Traditional dodger challenges
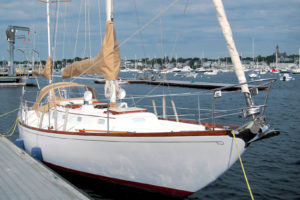
Our project traditional dodger on our customer’s late-60s Hinckley Bermuda 40 in Marblehead, Mass.
At Hood Canvas we fabricate California dodgers as well as traditional dodger styles. The style we use depends on the aesthetics of the boat and the owners’ preferences. In the last article we covered fabricating a traditional dodger forward side panel. In this article, we are going to expand on this same fabrication, but focus on the aft end and the interconnection between the dodger wings and the aft pocket. This is an area that is problematic for many fabricators as we have had requests to write an article that explains this area in detail. It should be noted that these same steps apply to the fabrication of bow dodgers. This article touches on basic fabrication differences without repeating what has been covered in past articles.
Dodger fabrication: Start to finish
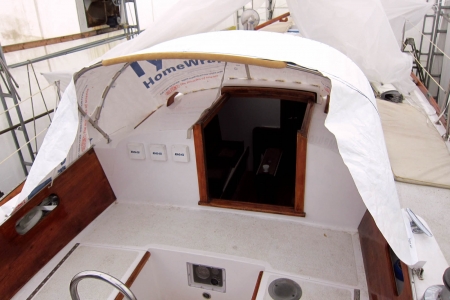
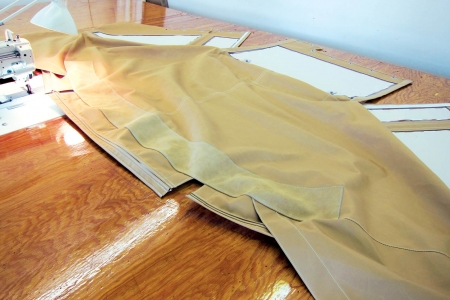
This is an aft view of our traditional dodger patterning setup. Some shops fabricate traditional dodgers using the same 10-inch radius that they use for their California dodgers and bimini tops. At Hood Canvas we use an 18-inch radius with slightly more crown to produce a fully rounded look. We believe this produces a more aesthetically pleasing traditional dodger. We almost always add a welded leather wrapped handle on the aft end of our dodgers. You see in the photo extra pattern material at the top of the wings, which needs to be removed. This is accomplished by first marking the aft bow with the top football panel flat and tight between the two bows. Now release the pattern on the aft bow from the double-sided tape and pull the wing pattern so the extra material is now forward of the aft bow. The wing portion of the pattern should now be tight and smooth. Draw a new line on the top portion of the pattern in the new position. Be sure to hold the same angle that you used to draw the initial line on the aft bow. The line will intersect our original line, forming a dart.
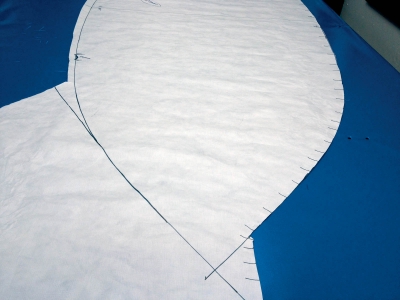
Here is the aft end of the pattern off the boat and on our table. We now have a dart in the upper left-hand corner of the photo. This is the excess material that needs to be removed so our wings will lay smooth and tight on the final product. The lines are our pattern cut lines and represent the finished size of our dodger. Our hems need to be added to the cut patterns along these lines on the fabric. On our traditional dodgers, the seams almost always follow the bows so that they are covered by the bows.
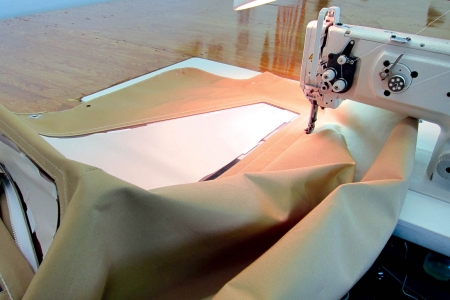
We are topstitching the seam between the top football panel and the forward panel assembly. The seam contains the forward pocket. Be sure when topstitching that the forward pocket faces out under the forward windows.
After topstitching, flip the assembly over and stitch down the forward pocket. It is important to ease off the ends of the forward pocket by ¼ inch—only the center needs to be tight. We have mentioned this before in past articles, but it is so important to do this that it warrants repeating: If you were to stitch this forward pocket down flat along the straight line in the photo you would have diagonal ripples in your top panel.
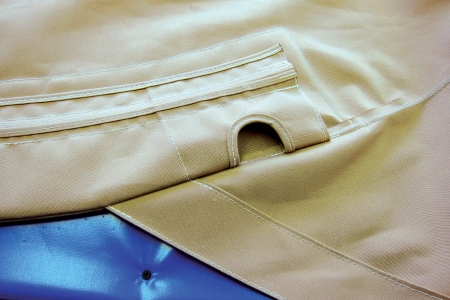
In this step we are joining the aft pocket and the wings in one seam. This is the area of concern for some fabricators. Notice the stacking order of the pieces. Also notice that the pocket extends inside the wing by about 6 inches on each side. This particular dodger has straps instead of bars aft so we have included cutouts just inside the wings to accommodate them.
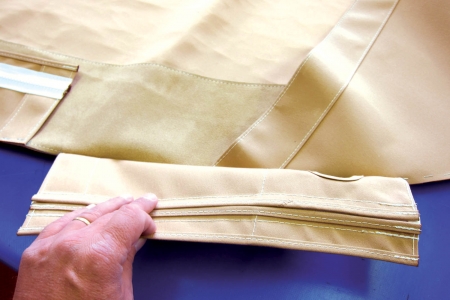
Here is a peek under the lid. Notice that the wing is stapled down first with the pocket on top. Notice that our aft pocket is in three sections with a gap between them. This is so our aft welded handle can pass through and be zipped onto the aft frame.

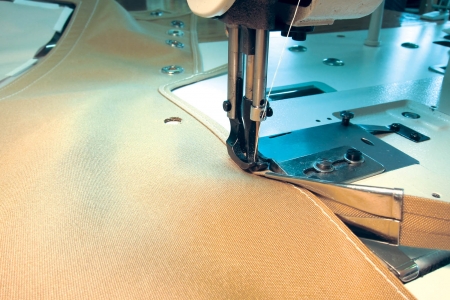
In this photo we are stitching a ½-inch hem along the entire aft edge. We back tack in areas of high stress, such as the bottom edge of the strap cutout that has to bear all the down pressure of the strap.
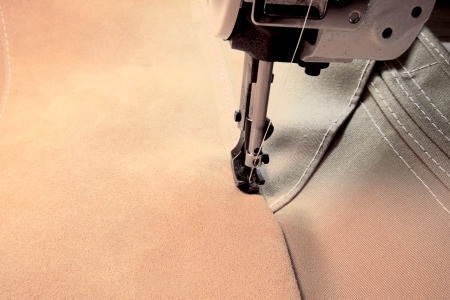
We are topstitching the entire aft seam of the dodger. In the photo we are about to topstitch over the interconnection between the pocket and the wing. Be sure that the aft pocket in this step faces out under the wing.
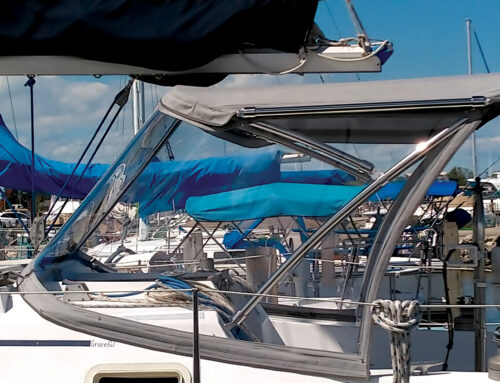
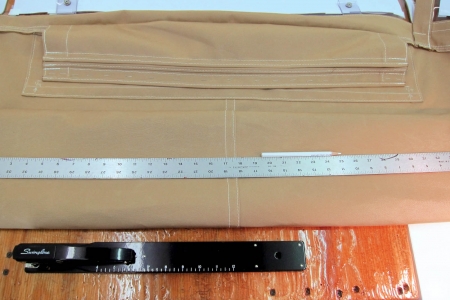
Here is what the nearly completed traditional dodger looks like after topstitching. Notice that the chafe leather on the aft edge extends beyond the ends of the pockets on each side by 1 inch. You can see in the photo that the top panel does have the shape of a football. In many of our traditional dodgers we add windows to the wings and the lower edges of the top football panel to add visibility. Take care to line up the edges of the windows so that they look aesthetically pleasing if the customer desires them.
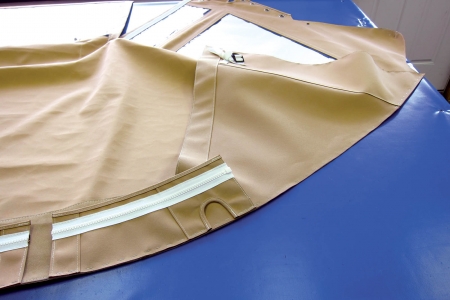
We have flipped the dodger to the backside and turned the pocket to the inside. The aft pocket has been stitched down through the top football panel and leather chafe below it. No need to ease off the ends of the aft pocket becasue it extends far enough down the side of the dodger not to be a problem. Notice that the wings extend out from the middle of the seam between the top football panel and the aft pocket.
This is the final step to complete our dodger. We bind and add our fasteners to the forward window assembly as part of our sequencing. On traditional dodgers, we do not bind all the way to the aft seam on our forward panels. We end the binding on the forward panel at the first corner before the aft seam. In the photo we are completing our binding, starting at the last corner of the forward window assembly. We bind over the completed seam and end at the aft edge of the wing. This way we do not have the bulk of two layers of binding in our seam. We add the final fasteners to the punched holes and our traditional dodger is ready to be installed.
Mark Hood, MFC, and his wife, Deb, own and operate Hood Marine Canvas and Hood Marine Canvas Training Workshops in Merrimac, Mass. For more information and to purchase the large binder seen in these articles, visit www.hoodcanvas.com or email mark@hoodcanvas.com.