Patterning a cushion for the perfect fit
At Kennedy Custom Upholstery, we make cushions in every size and shape and for every use. And they all start with a good pattern. Some customers want to just drop off their old cushions for the fabricator to use as the template for the new ones, but for the most control over the result it is always best to make your own on-site pattern.
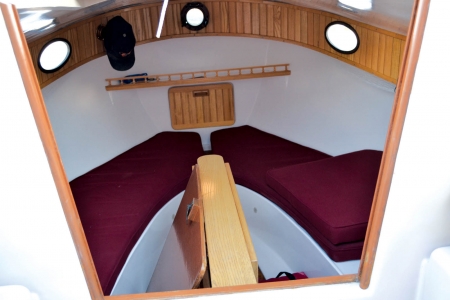
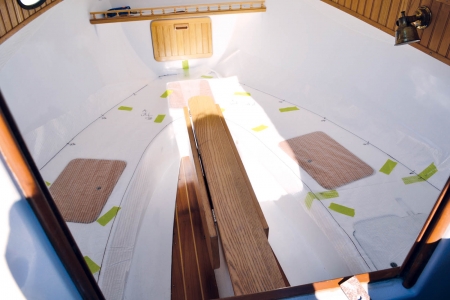
For this article, we are going to demonstrate how Trevor makes his patterns using a cushion project for a 19-foot Menger Cat Sailboat named Steadfast. The boat owners wanted new cushions that fit more precisely than the old set that had a huge gap between them in the bow (photo 1).
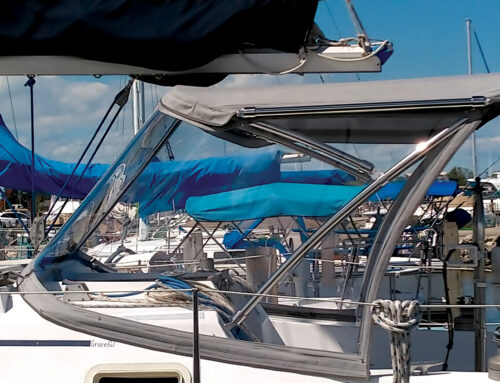
The exterior cockpit did not originally include cushions, but the owners wanted to add them for comfort while cruising (photo 2).

Because of the nature of this project, which included an improvement on an existing cushion style and completely new fabrication, patterning would be critical to its success. Trevor’s philosophy is that the more time you spend preparing your patterns, the less time you spend sewing since all the pieces come together smoothly.
So let’s get down to how to actually pattern. Trevor covers the entire surface of the cushion area with clear-plastic pattern paper that he has secured with tape. Next he traces the outline for the bottom of the cushion and makes notations of things to be mindful of when designing the cushion layout like the location of a locker door or fastener placement (photo 3).
He makes a separate pattern for the port and starboard sides even if they appear to be identical because fiberglass thickness can vary inside a hull (photo 4).
Now that he has the cushion bottom patterned, he must make periodic measurements to map out the top of the cushion with consideration to the curve of the hull (photo 5). 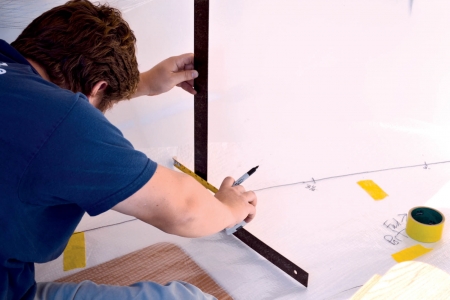
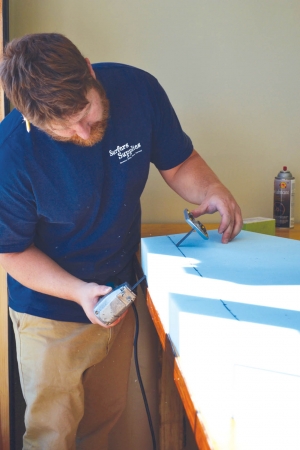
At this point, Trevor has already decided that he will use 3-inch foam in the cushion, so that is the height at which he measures the distance to the hull (photo 6).

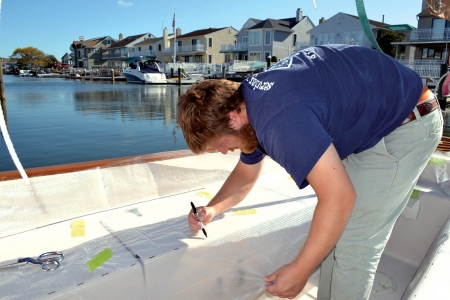
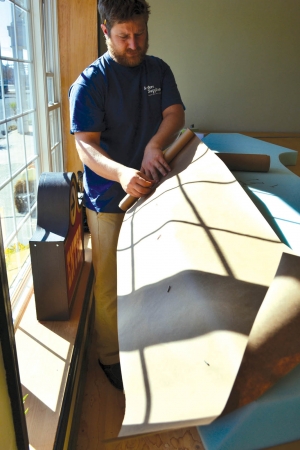
Back at the shop, Trevor “cleans up” his patterns. He begins by trimming the plastic pattern to finish size, transferring it to craft paper and adding his selvage allowance (photo 7).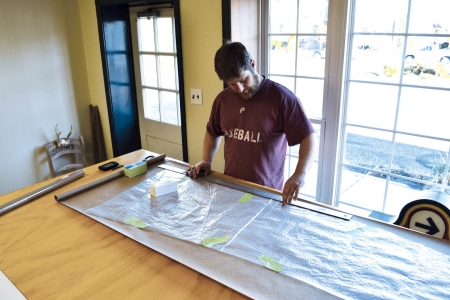
This is the finished pattern for the bottom of the cushion. To make the pattern for the cushion top, Trevor must trace the bottom pattern except the “hull edge” where he will use the series of measurements to create the curve.
Once Trevor has the top and bottom patterns, he must cut the cushion foam in order to make a pattern for the “shaped” zipper band. First, he transfers the top pattern onto the foam and cuts this outline (photo 8).
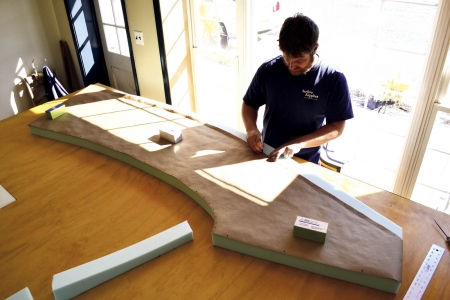
Trevor next flips the foam and traces the smaller bottom pattern onto it in order to cut the angle for the hull edge (photo 9).
Now that the foam is cut, Trevor pins a strip of craft paper on the angled hull edge and traces the top and bottom of the foam to pattern the shaped band (photo 10).
Now that all the tricky pieces have been mapped out, Trevor can use his patterns to go ahead and cut the fabric for the cushion and get ready for some smooth sewing.
Rebecca and Trevor Kennedy are the owners of Kennedy Custom Upholstery of Ocean City, N.J.
 TEXTILES.ORG