TEXTILES.ORG
 Top tips for better upholstery and fewer headaches
Beach Upholstery, Virginia Beach,Va., specializes in custom boat covers, bimini tops and boat upholstery renovation and repair. It was recently awarded the “Best of 2018 Gold Award for Upholstery Repair” in the Virginian-Pilot newspaper’s Readers’ Choice Awards.
Beach Upholstery was started several years ago by Linda Beach, who has 30-plus years of experience in the marine upholstery business. Most Beach Upholstery employees have between 10 and 20 years of general sewing experience. With our collective experience exceeding 50 years, we at Beach Upholstery have discovered many terrific tricks and techniques that have saved us time, money and headaches.
We are pleased to share some of our creative solutions for overcoming marine upholstery difficulties.
Use steam heat
Photos 2-3: Although you may not have heard of this device, a Hoffman pressure steamer makes marine upholstery a breeze. The steamer isn’t cheap (it will run you between $1,600 and $2,000), but it will pay for itself many times over. It is not widely available, but you can find one at either www.hoffman-newyorker.com or www.perfectfit.com.
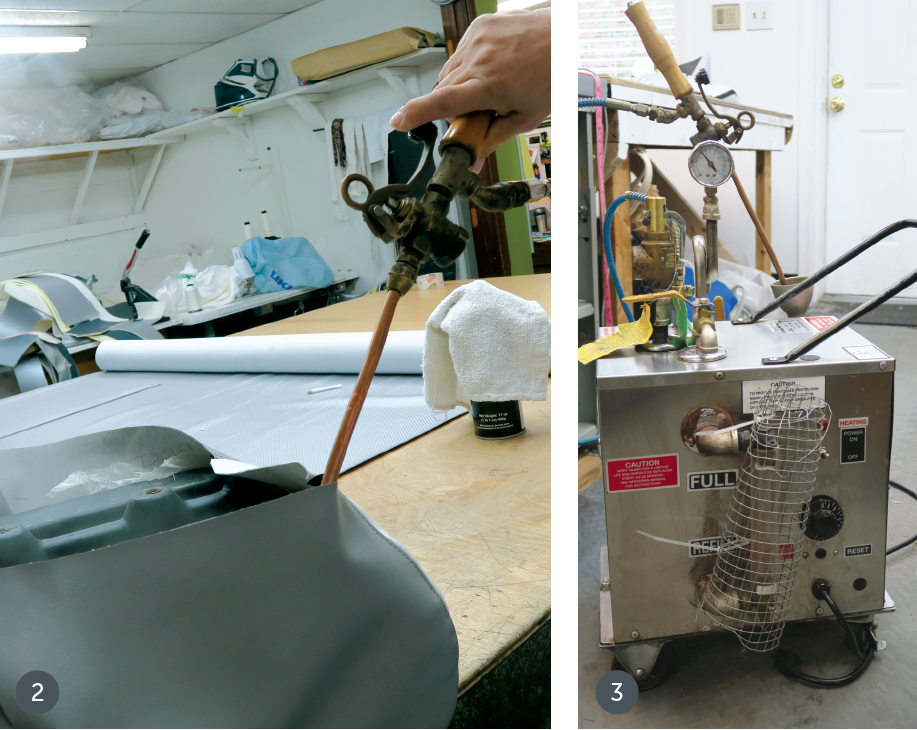 We use this pressure steamer several times during each re-upholstering project. Initially, we use it on the underside of a PVC or wood board. The steam will soften the PVC and it expands the wood, which allows us to remove the staples with very little effort in about one fifth the time. As you know, when foam is exposed to the elements, it condenses over time and loses its optimal shape. To rectify this, we use steam to puff up the foam to its original size. Lastly, we use the steamer to soften the fabricated vinyl product; however, be aware the steam is under pressure and will melt the vinyl if you expose it for too long. This is especially helpful when the vinyl is on ¼- or ½-inch sew foam or when the vinyl must be stretched around a 90-degree (or more) corner. We cannot stress this caution enough: Please use extreme care when operating any pressure steamer. Our steamer has a well-earned nickname: The Skin Peeler! Again, be very careful when handling the steamer.
 Pneumatic staple remover
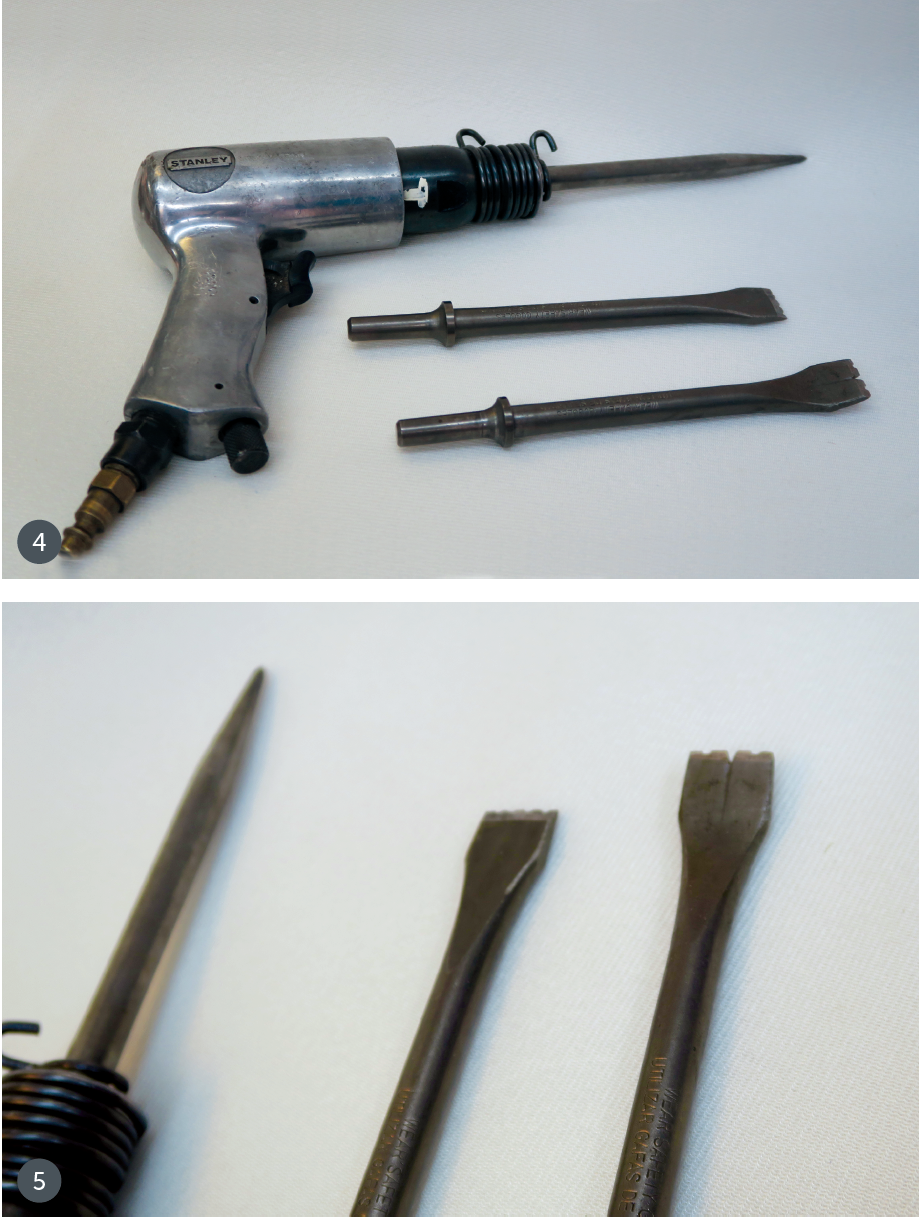
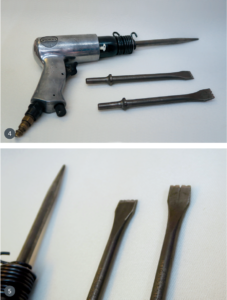
Photos 4-5: To make staple removal quicker and easier, we use an air hammer (which can be found at any local tool supply store). We modify the chisel bits by cutting and filing wedges out of the tips to allow the bits to slide under the center of the staple more easily. Total cost, including the air hammer, is under $60.
 Pull-to line
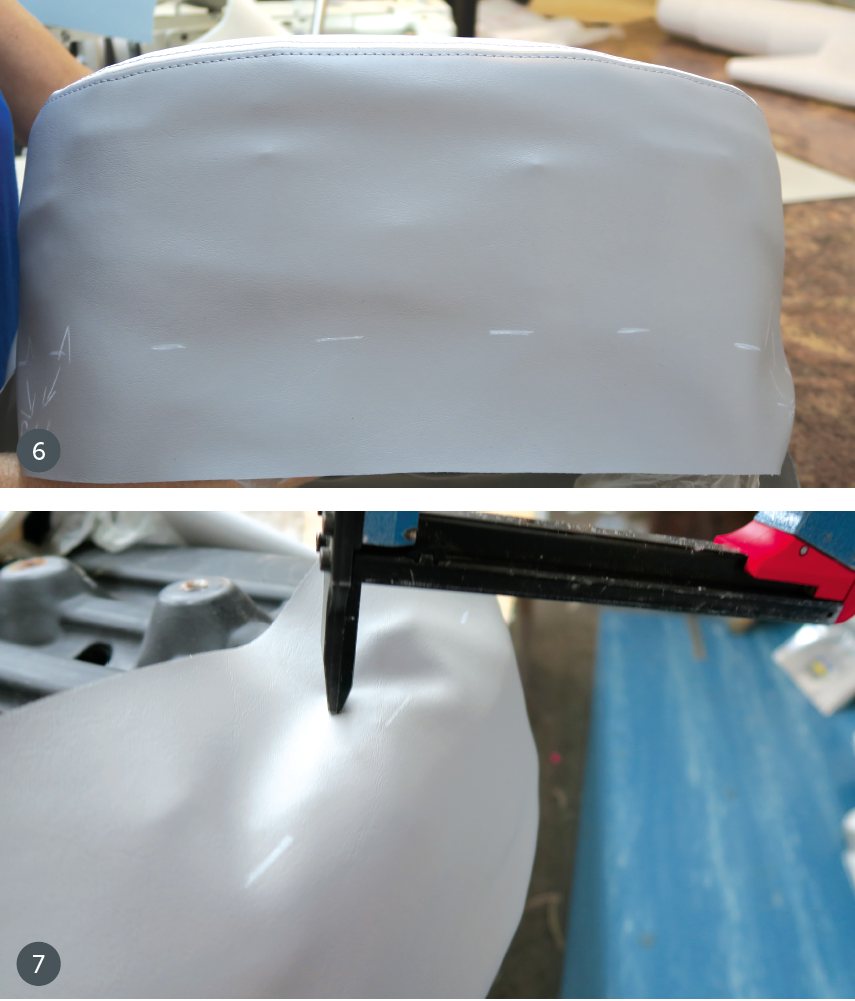
Photos 6-7: Another one of our simple solutions is called a “pull-to line.” Even a novice can follow a line, so when we lay out a new cushion we always mark a pull-to line. We find the pull-to line on the original cushion cover, which is the crease the board makes in the old cover. This eliminates guessing, pulling out staples when it doesn’t fit properly, guessing again and so forth. It’s easy—all you do is pull to the line and staple. It’s something simple that saves a lot of time.
Straightedge rulers rule
Photo 8: To keep our final product more precise, we use a variety of straightedge rulers. Quilting rulers are ½ inch wide and can be found in most local fabric and hobby stores. They are very helpful in marking exact ½-inch seam allowances. A 24-inch quilting ruler is used to mark zipper plates and pulls (or listings) with accuracy and speed. When we are marking out long lengths of boxing, we use 6-foot-long plexiglass templates cut into various widths to ensure consistent boxing. We make our own covered welt so we have found a 60-inch-long 1½-inch-wide ruler to mark out the vinyl, which saves some time too. We are always looking for ways to shave minutes off our projects without compromising the quality.
 Use presser foot attachments

Photo 9: Specialized presser foot attachments can be real time savers and we use one in particular quite frequently—a French stitching foot. Several years ago we purchased one from Sloan Machinery. It is available in 3/16 inch and ¼ inch. No more eyeballing the line of stitch. The French stitching foot helps keep the stitch line straight without “hiccups”—just keep the guide lined up with the seam and it’s a breeze. We like them so much we now have one for each machine in the shop.
Troubleshoot thread burrs
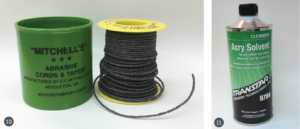
Photo 10: Sometimes you’re sewing along and the thread breaks. You replace the needle, but the thread breaks again and again. There could be a burr on the presser foot, but how do you find out for sure? Thread the needle in the opposite direction, lift the presser foot, and slide the thread back and forth under the foot. If there is a burr, the thread will begin to shred. You can solve this by using a kind of sandpaper thread to file it off. The brand we recommend is Mitchell’s Abrasive Cords and Tapes. It comes in various sizes, grit and diameter, and can be found at some Wal-Mart stores and online starting at under $10.
 Magic cleaning product

Photo 11: Inevitably, someone will accidentally brush up against your brand-new cushion with a pencil or pick up the cushion with dirty hands. We have found a product called Acrysol (by Kent®) that will remove almost any kind of smudge or mark (except permanent markers). We found Acrysol at a local automobile paint suppliers shop. It’s also sold at some hardware stores. It’s some amazing stuff!
Linda Beach, owner of Beach Upholstery in Virginia Beach, Va., has more than 30 years of experience in various upholstery specialties, including automobile and canvas. Deborah Hamilton has been working with Linda for five years. She worked as a costumer and sewing instructor before finding her way to marine upholstery.