TEXTILES.ORG
 Shade sail savvy
When fabricating shade sails, the first thing to consider is, What are you trying to accomplish? This is where communication with the customer is key. Your customers are coming to you wanting some shade on their boat for when they are hanging out at the sandbar or sometimes while cruising at a moderate speed. They may think it is just a piece of tubing and a rectangular piece of fabric—something very easy to do and cost effective (i.e., cheap).
If you go out to the sandbars, you will see many boats with no shade and others with a tarp or a beach umbrella, neither of which work well or stand up to the slightest breeze. What you need to do is educate your customers and help clarify when and how they are going to use this shade sail to help set appropriate expectations.

Rod holder smarts
You can find rod holders in stainless steel starting at $19.95 and going up to and beyond $150 each. Stay away from the cheap rod holders. They will rust in less than six months of saltwater exposure. Also, the top half of the cheaper ones will break with a little pressure on them from the shade sail poles.
If you are installing rod holders in the aft end, they are typically placed at a 30-degree angle, the same angle of rod holders for fishing. If you are installing rod holders in the bow, use a 15-degree angle facing forward and outward, the same for the rod holders at the midpoint on the bow (see center console shade sails).

Installing rod holders
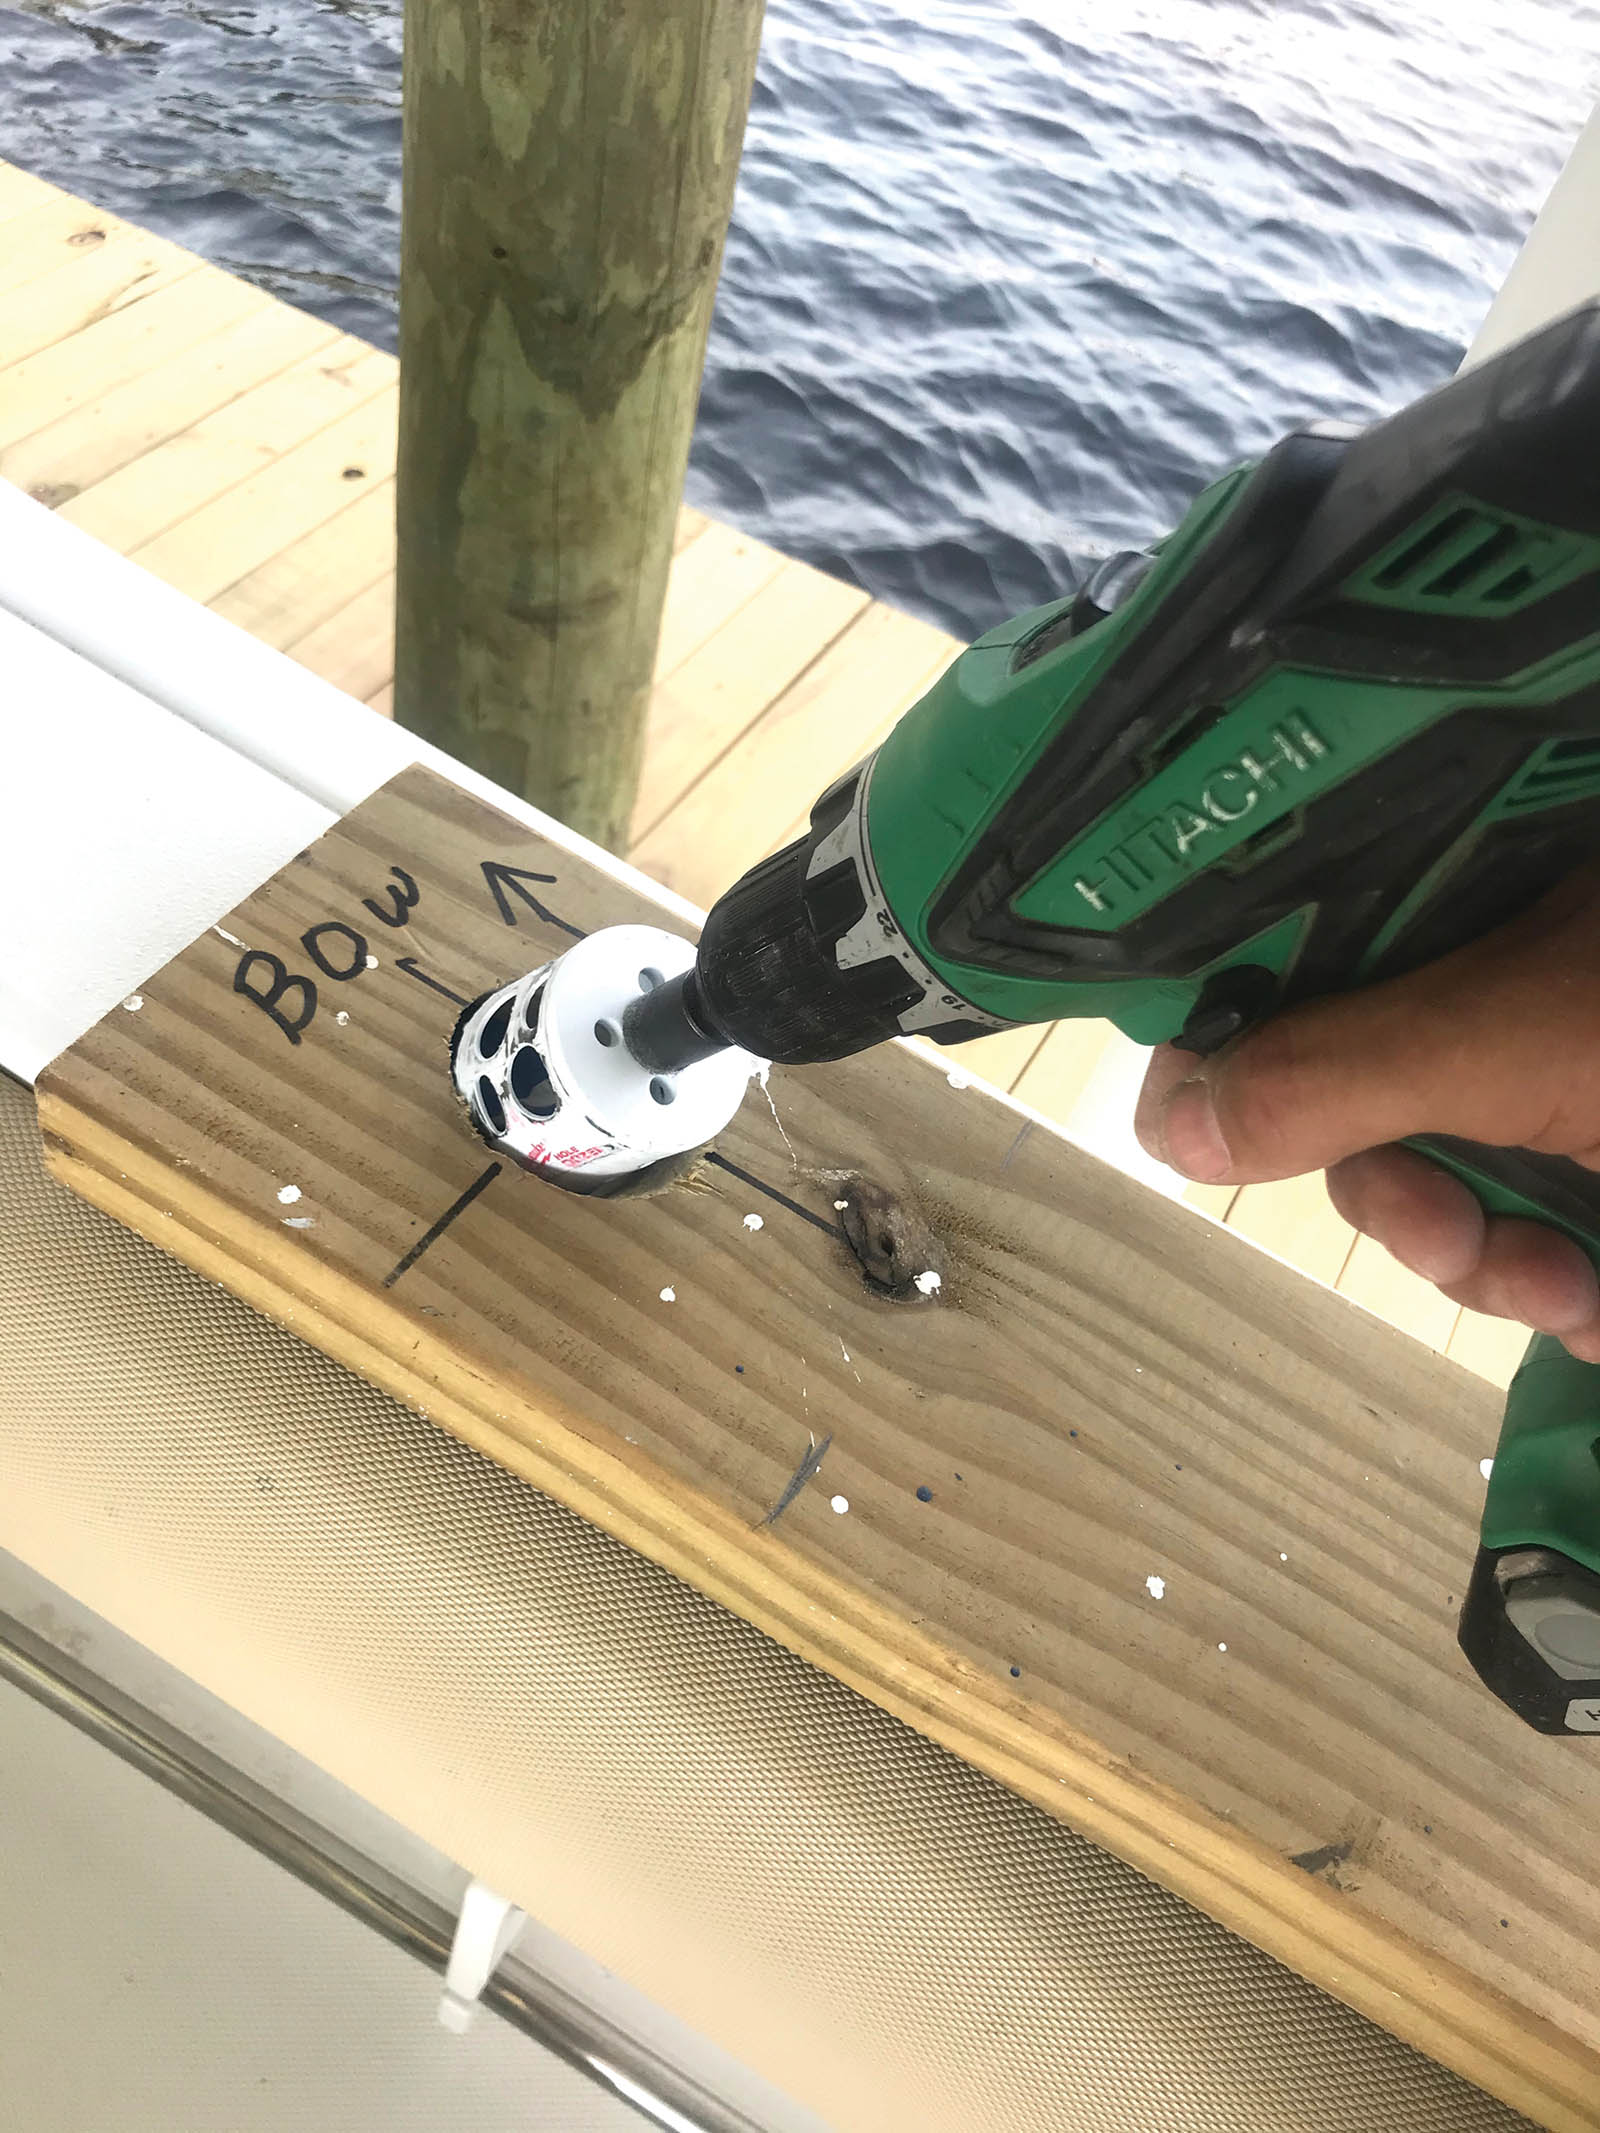
Estimate one hour of labor to drill and install each rod holder. Look under the gunnel before you drill a hole because there are often electrical wires mounted just under the gunnel. Once you have determined where to mount the rod holders, use some blue masking tape to mark your center (Photo 1). This will prevent the fiberglass from chipping.
Make yourself a rod holder jig, which is very easy to do (Photo 2). I use a 2-foot piece of 2-by-6 lumber. This is stable and easier to hold while drilling through the fiberglass. Place the rod holder upside down and line up your drill to follow the same angle on your jig that you want the hole to be drilled at. The size of the hole saw bit you need will vary depending on the size of the rod holder.
Place your jig on the gunnel and apply a little pressure to keep it from moving while you are drilling your rod holder hole. Make sure the angle of the drill is facing the correct direction (Photo 3). The rod holders should be facing outward, not toward each other. Drill halfway through the gunnel, remove your jig and finish drilling your hole.
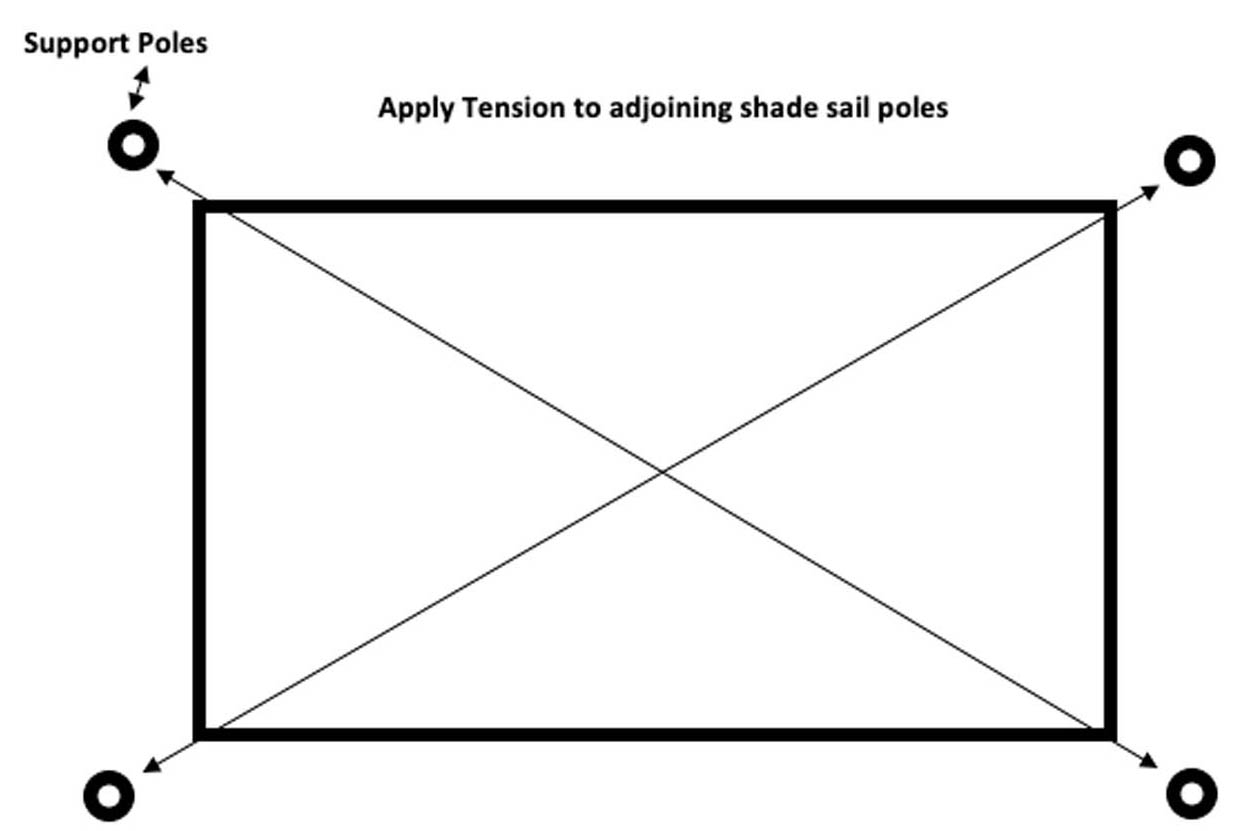
Tensioning shade sail poles
After your rod holders are installed, slide your shade sail poles into each of the rod holders. Use strapping tape to tension the poles by pulling them toward the opposite pole or connection point. This does not need to be super tight; you just want some tension on the shade sail poles so that the shade sail is taut (Photo 4).
Mounting to hardtop or T-top
Boaters want something that is fast and easy to put up and take down. You can mount your shade sail connection to the hardtop with snap hooks that are easy for the boater to install, or use a grommet in the fabric and secure it to a mounting point like a handrail.
Center console shade sails
Center console boats are getting larger every year, ranging from 40 to 60-plus feet in length, and boaters are requiring more shade protection in this area. If you are doing a bow-installed shade sail, you can provide more shade by adding four shade sail poles and installing new rod holders at the midpoint of the boat’s bow area. This will give you a six-sided shade sail instead of the traditional four-sided, and you will be providing more shade in the bow area (Photo 8).

Fabrics
You can use a lightweight fabric. For solids, use MarineTyte Lite, Banyan, Stamoid™ Light and Stamoid Top or use an acrylic like Tempotest®, Sunbrella® and Sattler. WeatherMAX® is not an acrylic but a good material for shade sails. Use the widest material possible to avoid seams. That’s why I use Stamoid; it is up to 102 inches wide.
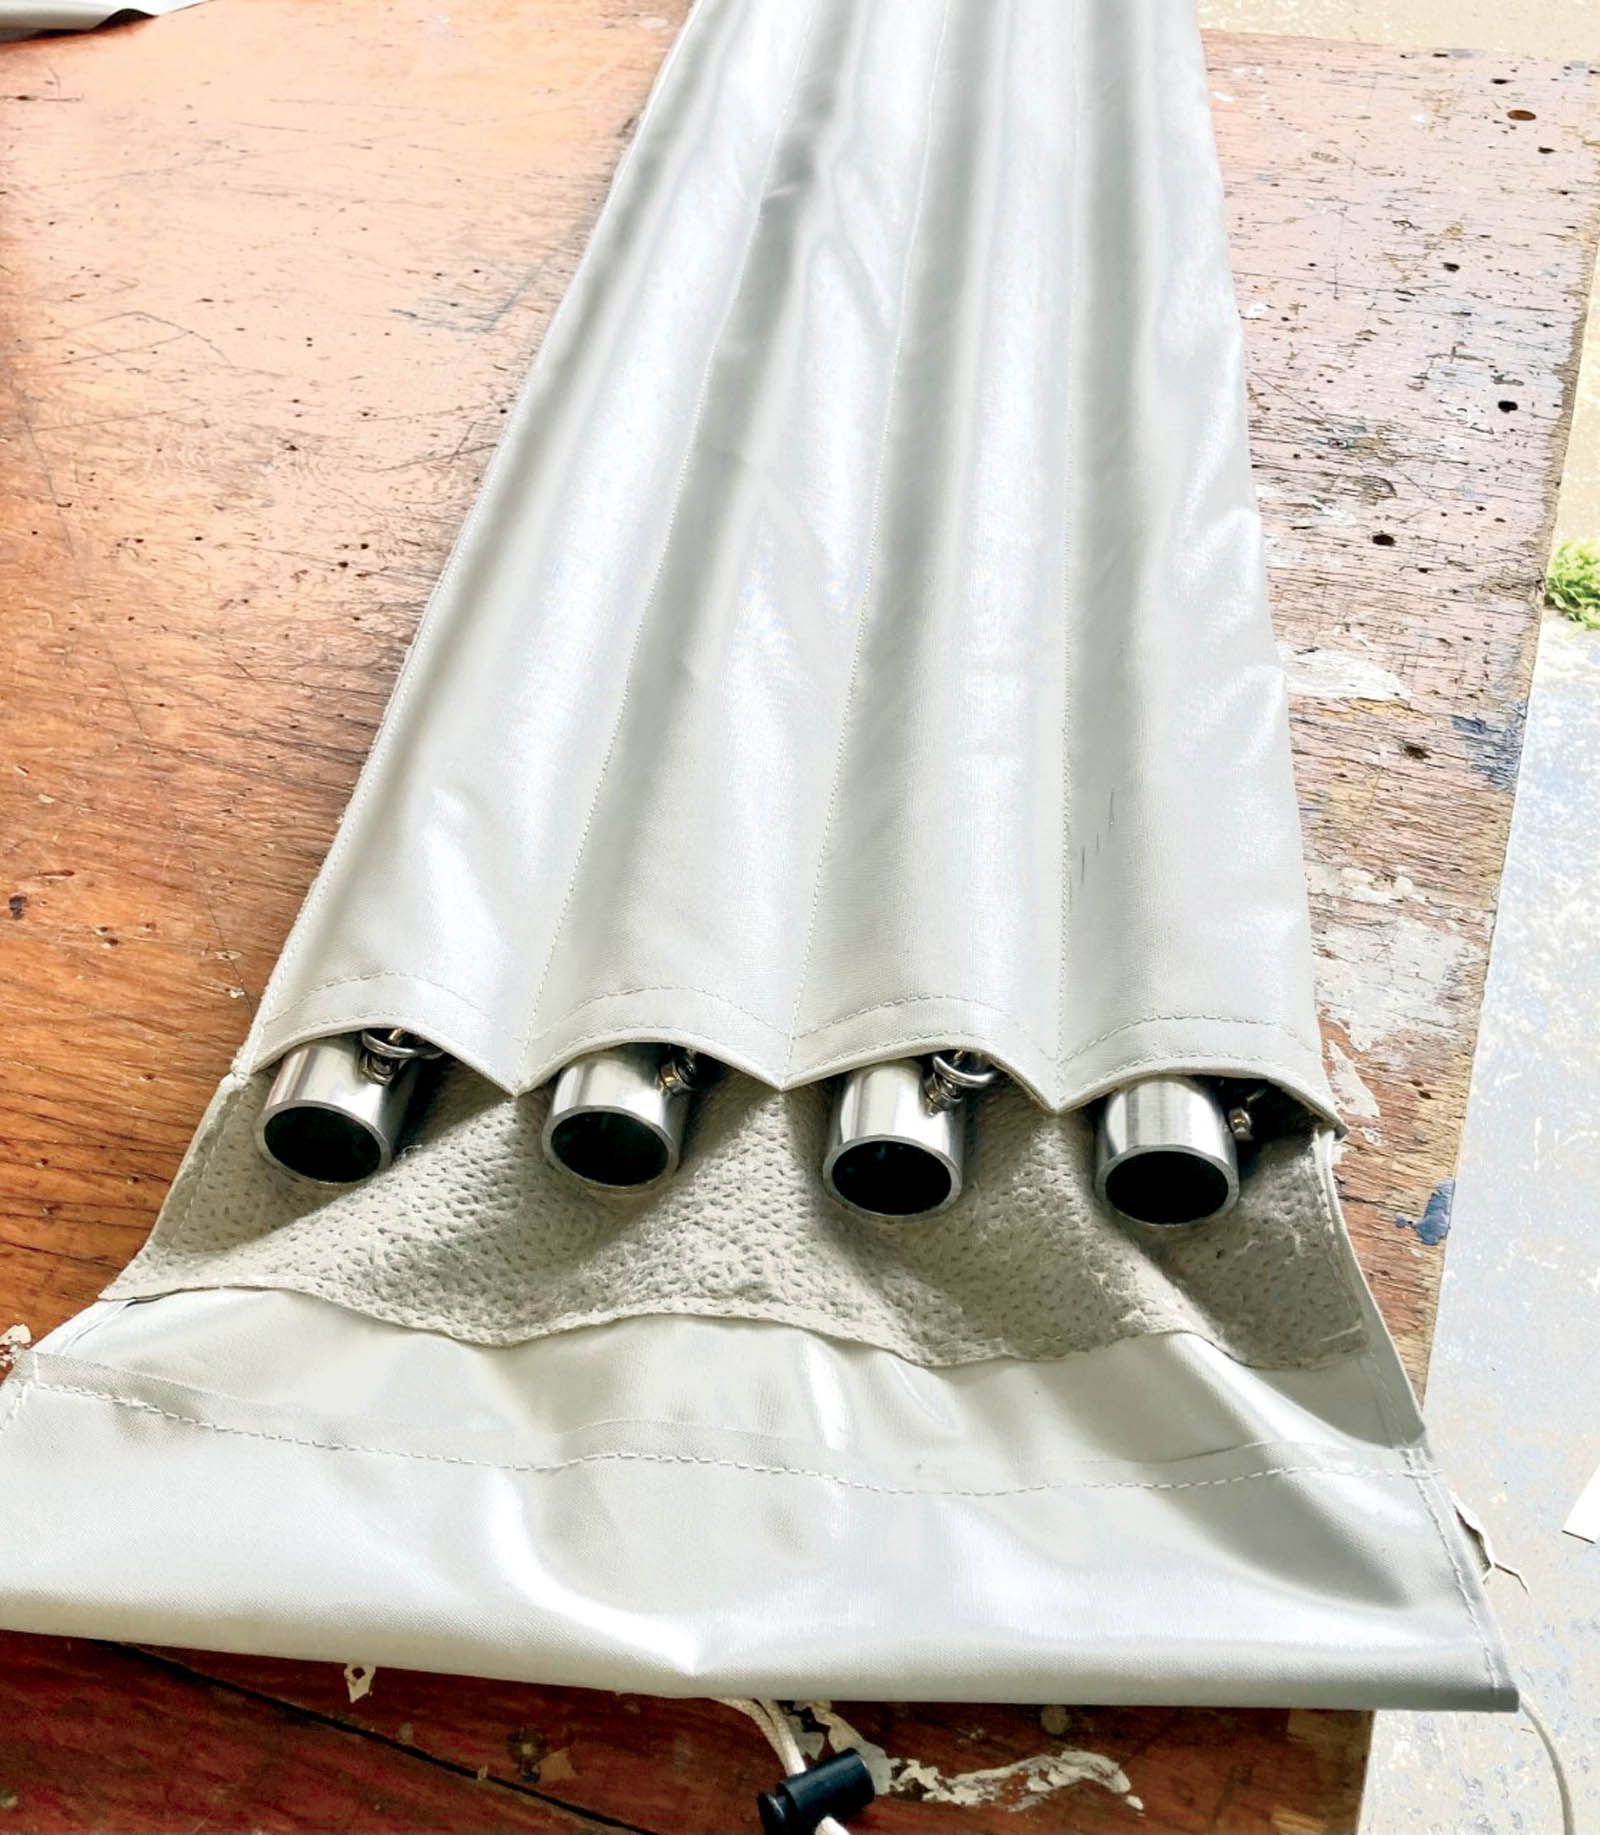
Storage bag for poles
Provide a storage bag for the shade sail poles to protect them (Photo 9). Some storage bags will be for two poles, depending on each customer’s boat. Take some heavy-duty material and line it with a softer material like Evolution® or a soft-back vinyl. Depending on the diameter of your support poles, you will have to sew individual pockets for each pole. Make them loose so that they are easy for the boat owner to stow away.
Steve Szenay, MFC, is Marine Education Specialist for the Miami Corp. A well-respected international expert in marine canvas and upholstery fabrication, he has been active in the marine canvas industry since 1974 and has been with the Miami Corp since 2022.
SIDEBAR: Use triangulation to create your pattern
Using triangulation measurements can help you create a perfect pattern for your shade sail. If you have never done triangulation, here is a simple explanation.
- Draw out your shade sail measurement from one pole to the other, and do this with each fixed point that you are going to use (Photo 5). Measure in triangles to get the image of your pattern on paper or pattern material.
- Subtract at least 3 inches (and sometimes more for very large shade sails) because the fabric will stretch from each pole measurement, and you want to have some room to tension the shade sail.
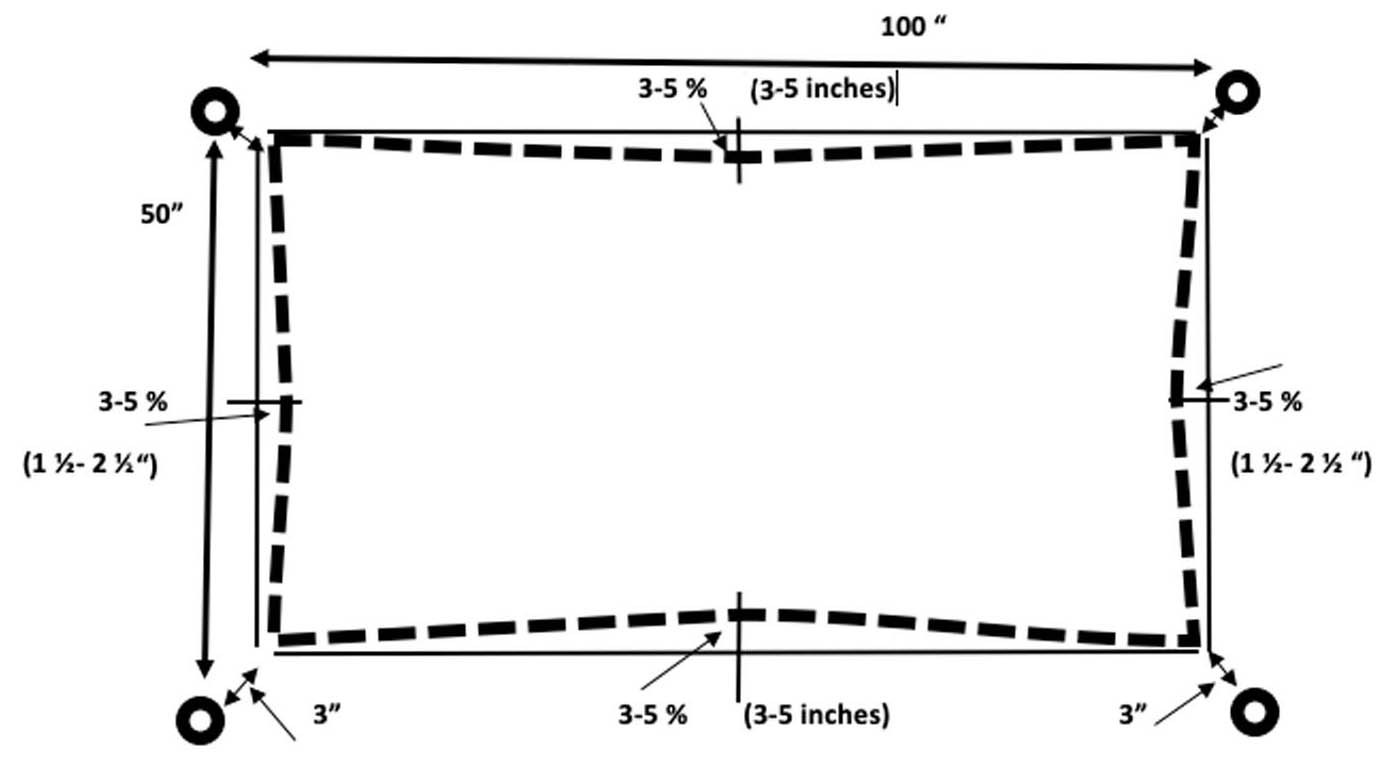
- Lay out and clamp your fabric to the worktable and start placing your marks. To create your luff in the edge (Photo 6), measure your straight edge and if it is 100 inches, take 100 x 3–5 percent. This will equal 3–5 inches at the center of your 100-inch side. Go to the center and measure up 3–5 inches, depending on the fabric and the size of the shade sail. If it is small, 3–5 percent is enough to mark your luff. On larger shade sails, you will cut a luff of 5–7 percent.
- Take a small piece of PVC pipe or batten, and lay it on the finish edge in the corner. Push it up in the center to your 3–5 percent luff (Photo 7), mark it, and put the other end of the pipe or batten on the other outside corner and draw your curve on the fabric. If you’re adding a folded edge, add the extra material (say 2 inches if that is what you want), and draw the extra for the fold onto your fabric. Cut this out. Go to the corners and measure up 3 inches from this point. This is where your reinforcement for the grommet or D ring will go (Photo 10).