TEXTILES.ORG
 Pattern darting

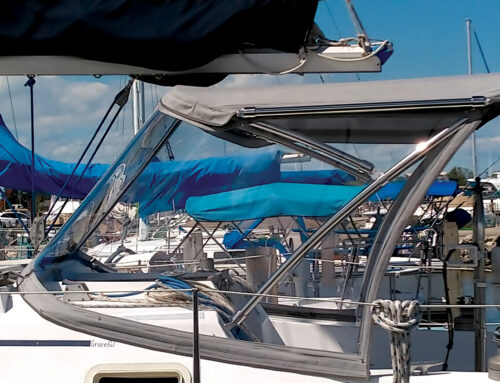
Pattern darting is a useful technique to have in any marine fabricator’s toolbox. This article will provide an example of this technique using a series of forward enclosure panels that tuck under the windshield to a line of fasteners.
Pattern darting speeds patterning on the boat using a single piece of Tyvek®, heavy craft paper or plastic. No cutting of the pattern is necessary; the darts are created using folds in the pattern below the windshield. These folded darts eliminate the extra pattern material generated by tucking the pattern into the fasteners. In effect, using darts in the pattern helps you avoid using darts in the finished fabrication.
When fabricated, the forward panels will not be flat, but rather, they will have a “belly” custom fit to the contour below the windshield and will be tucked in to align with the fasteners. The following steps show how to eliminate all extra pattern material and how to transfer the seam line to the edge of the windshield where it can be hidden by fabric strips.
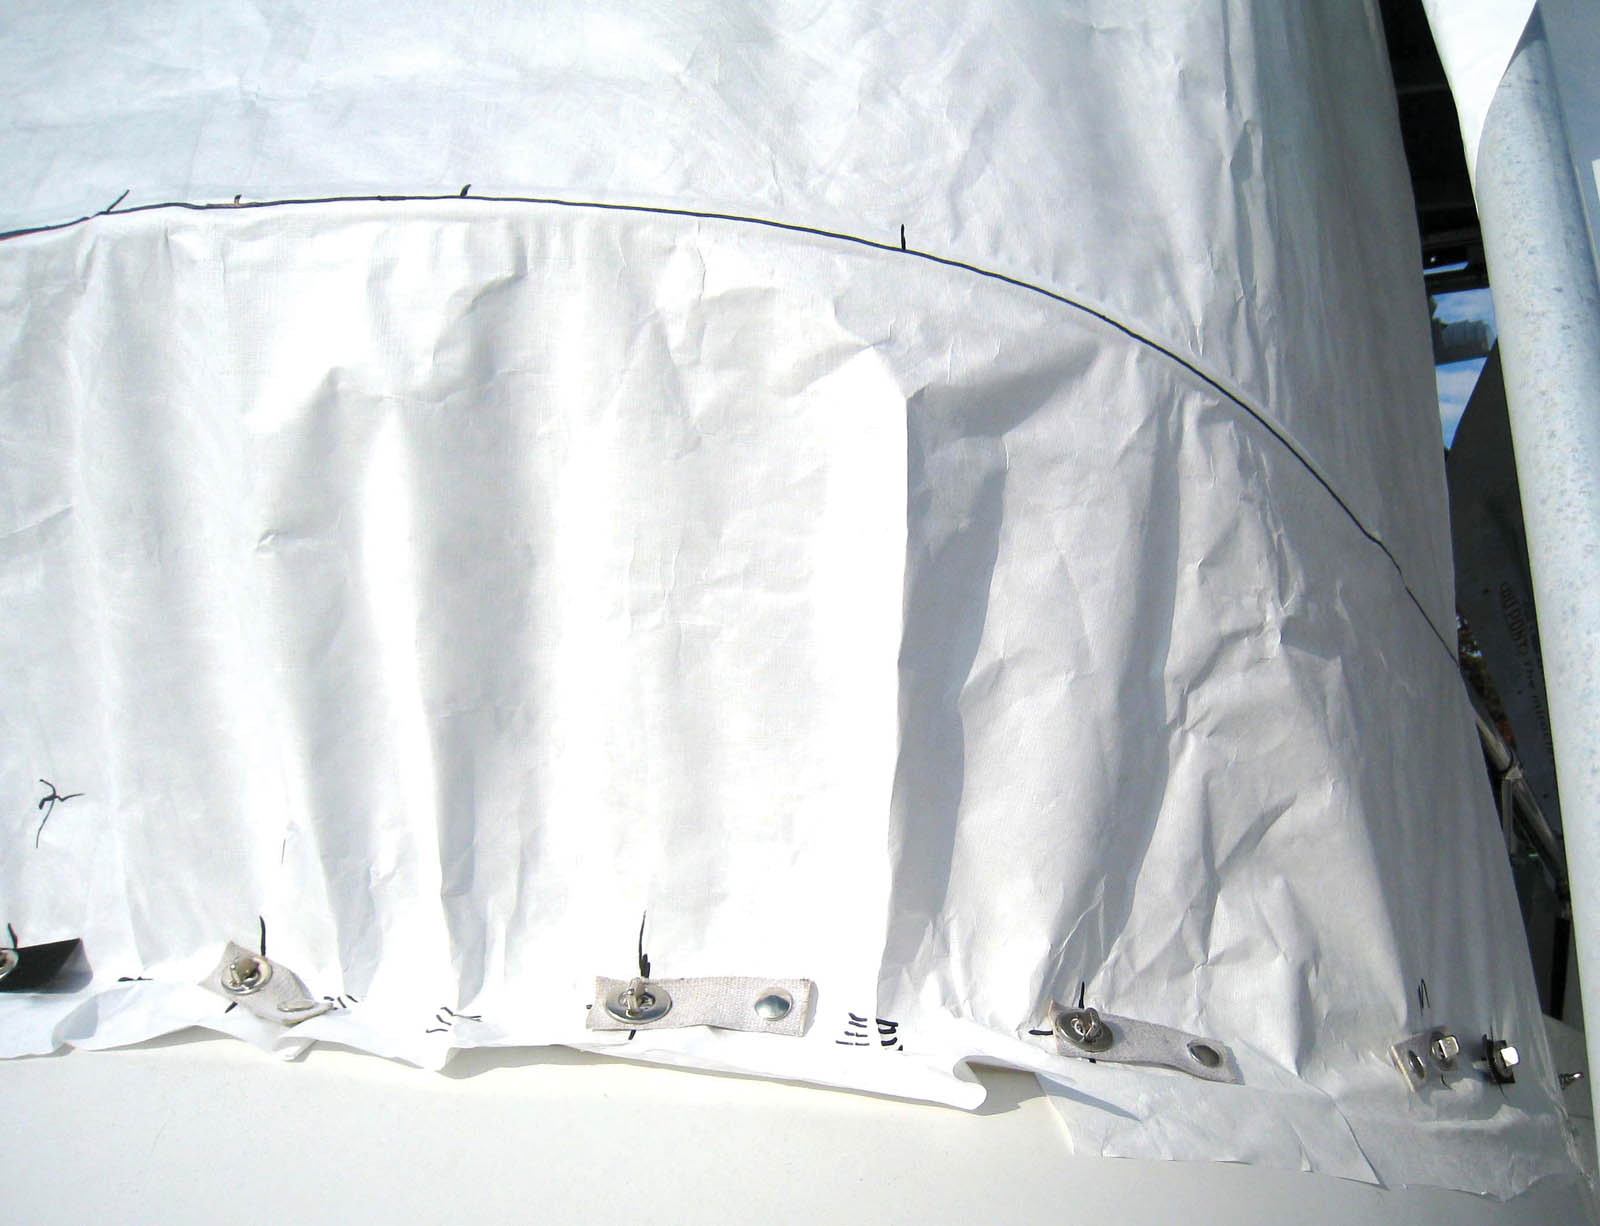
Photo 1
Start by fitting the pattern area above the windshield. Use seam tape to secure the bottom edge of the pattern material to the windshield. Mark the horizontal edge of the windshield pattern with a permanent marker right where the pattern falls over the edge. Below the windshield, the pattern must be tucked into the fasteners. This will create excess pattern material that will need to be removed by darts.
Directly above each fastener, find a small neutral position in the pattern by holding onto and rocking a small section of the pattern back and forth until it is at its flattest. Attach the pattern to each fastener at this flat, neutral position. Notice that the folded-over Tyvek has a crease to make the pattern tight between the fasteners. Use a marker to make several hash or alignment marks bridging the folds in the Tyvek between each fastener. Make sure these hash marks are directly between and in line with the fasteners. Remove the pattern and head back to the shop.
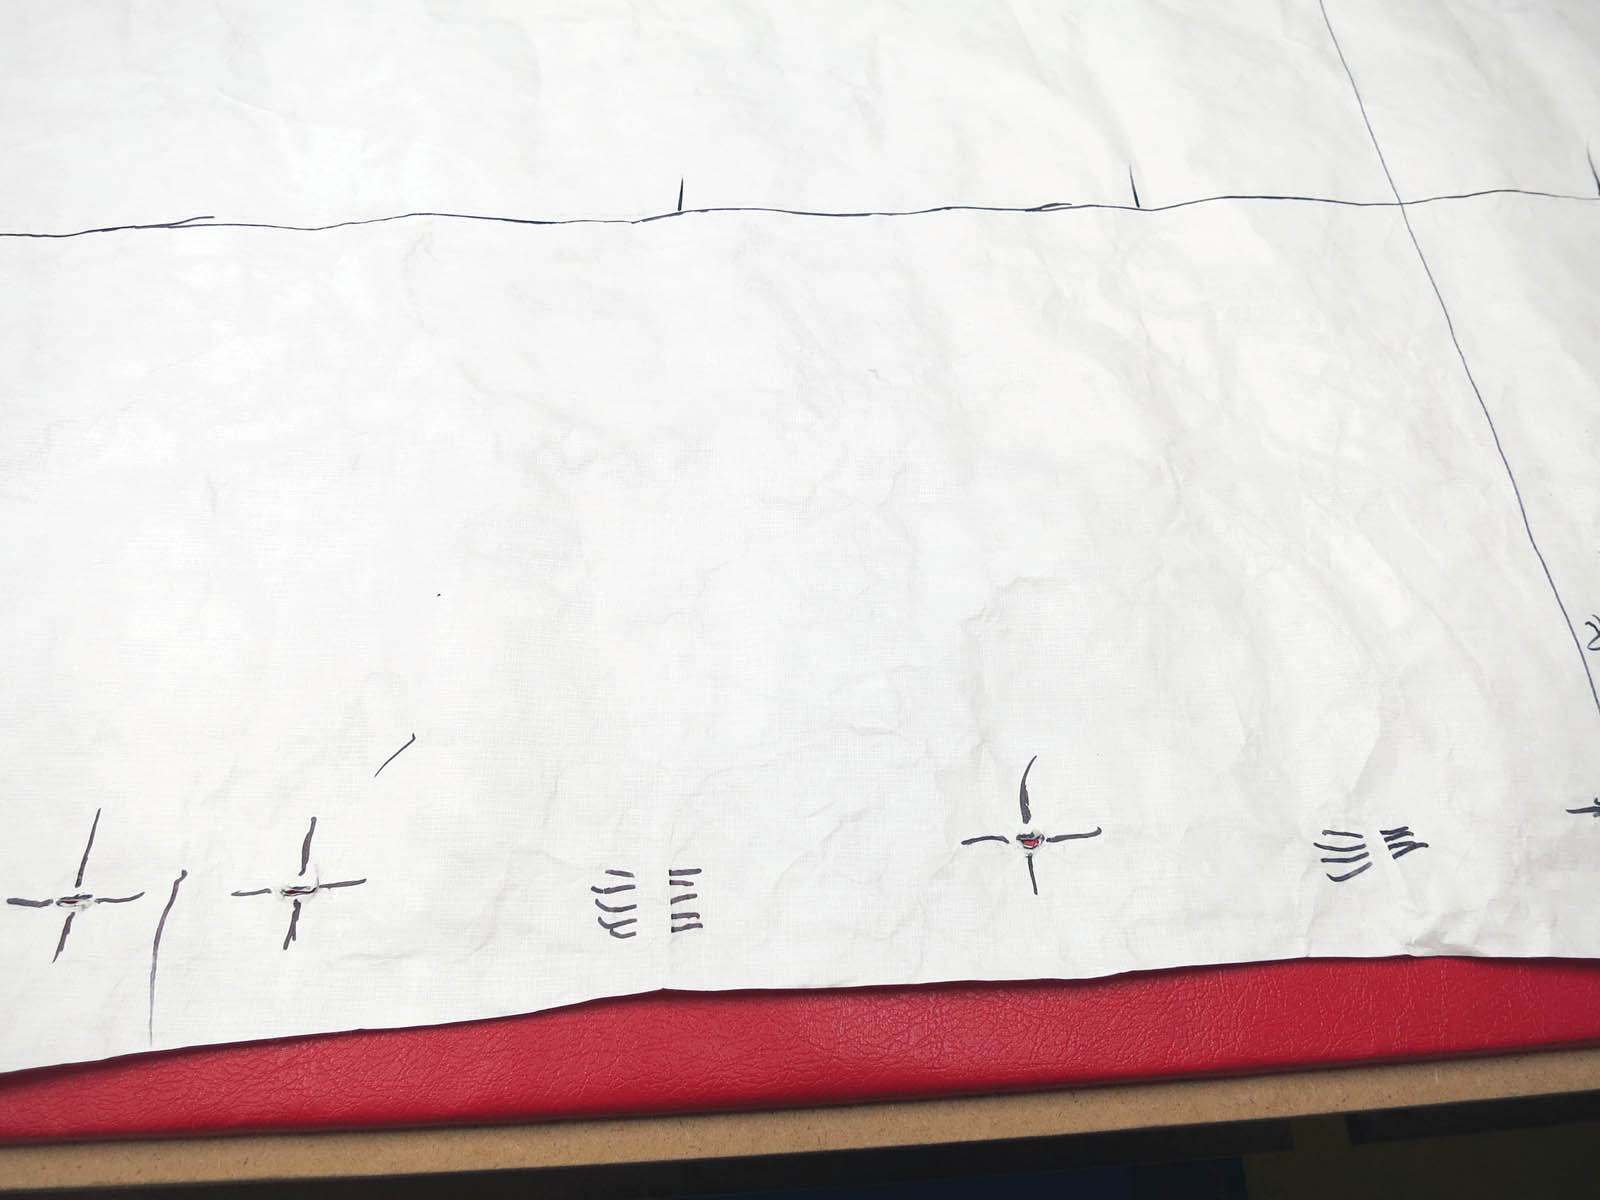
Photo 2
Lay the pattern flat on the table so the hash marks are visible. The area between the inner edges of the hash marks is the excess pattern material that needs to be removed with a dart. The horizontal line at the windshield is where the tip of the dart in the next photo will end.
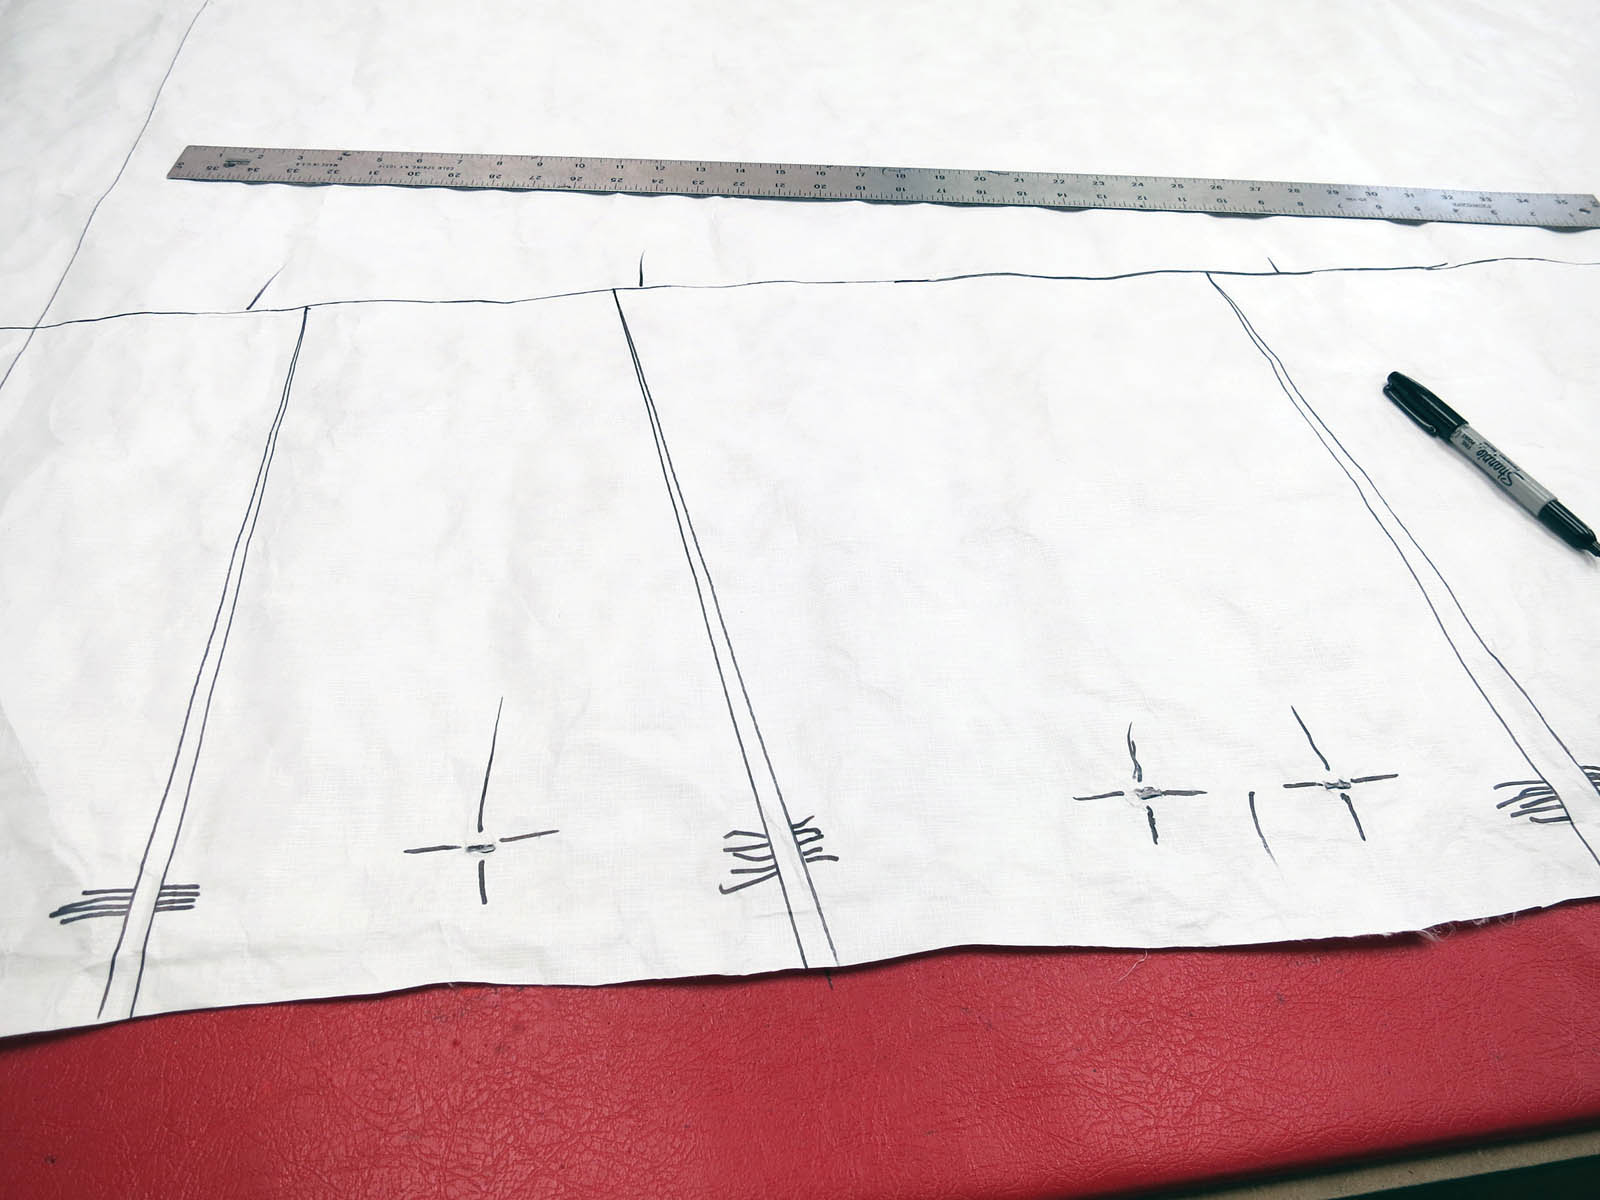
Photo 3
Use a ruler aligned with the inside edges of the hash marks to draw two marker lines up to the horizontal windshield line. Both lines should converge at the windshield line. It does not matter where they land on the line; just follow the inside edges of the hash marks.

Photo 4
Cut one of the two dart lines up to the horizontal line. Insert a pin at the top of the dart to serve as a pivot point.
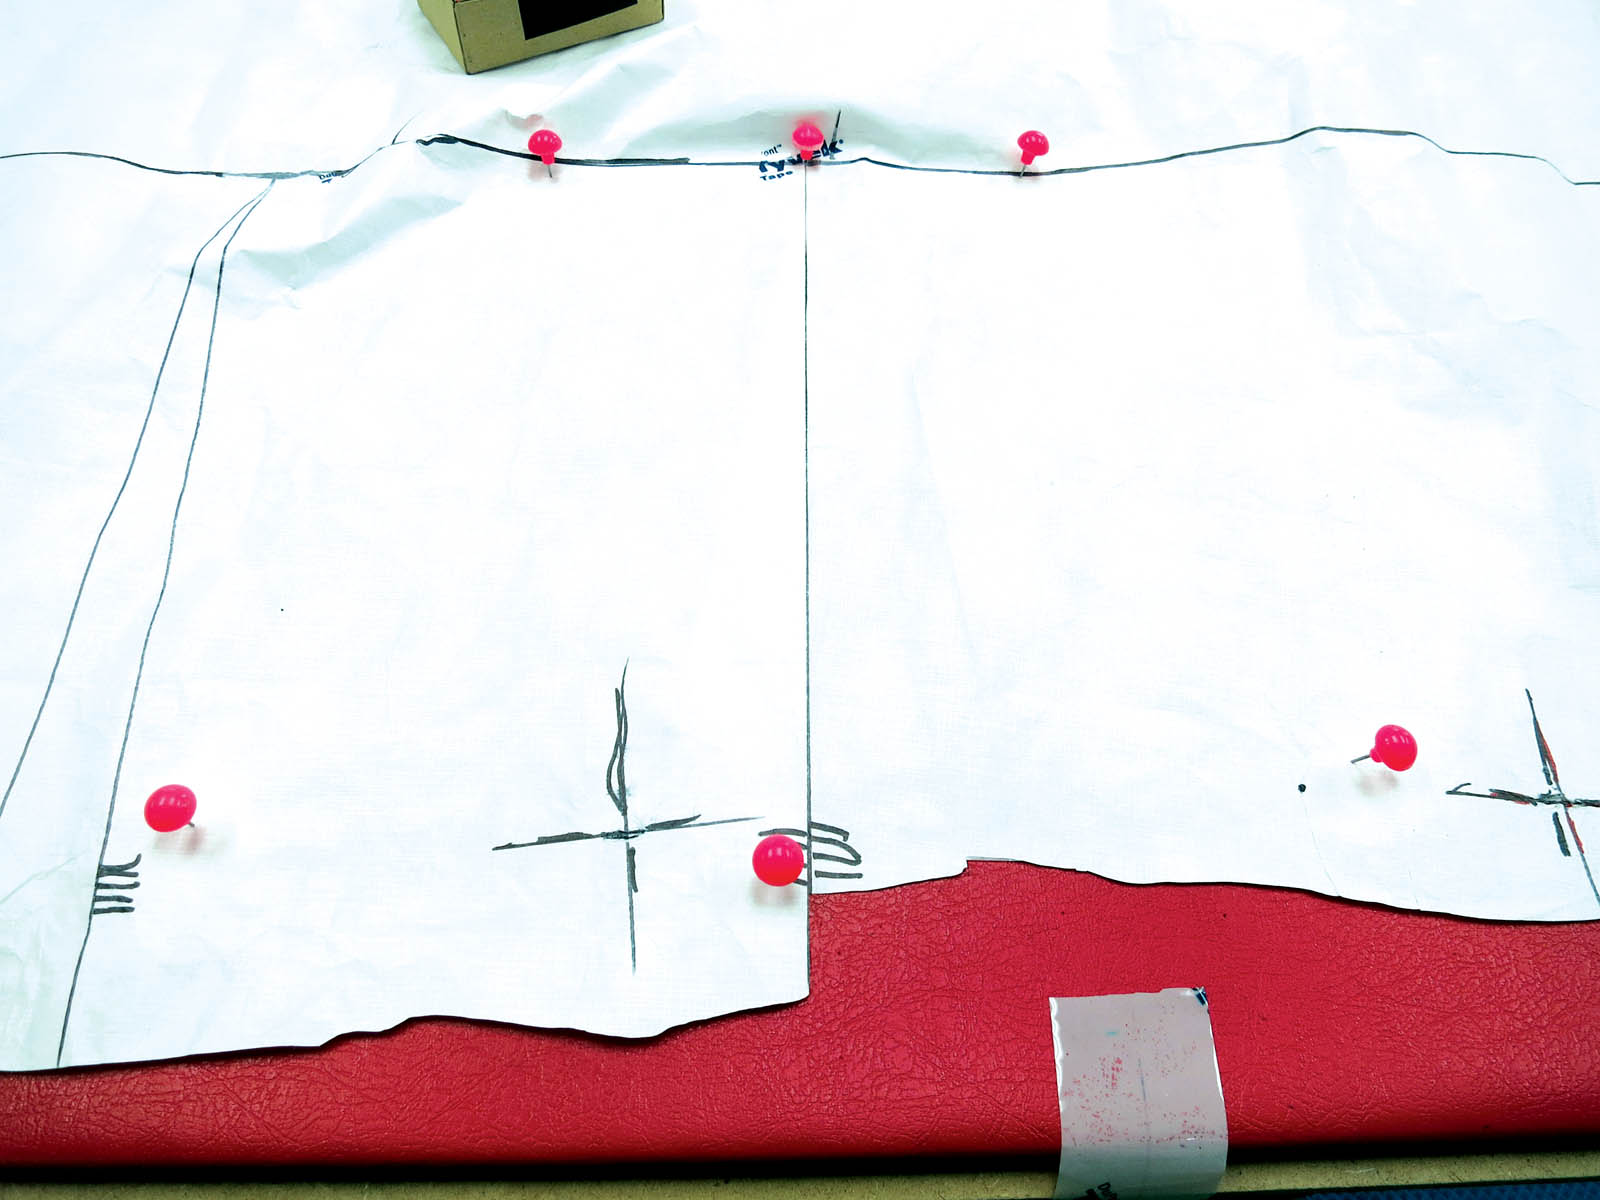
Photo 5
Move the cut line over so it aligns with the inside edge of the other hash mark. This will create a distortion at the top of the dart that needs to be pinned out flat as shown.
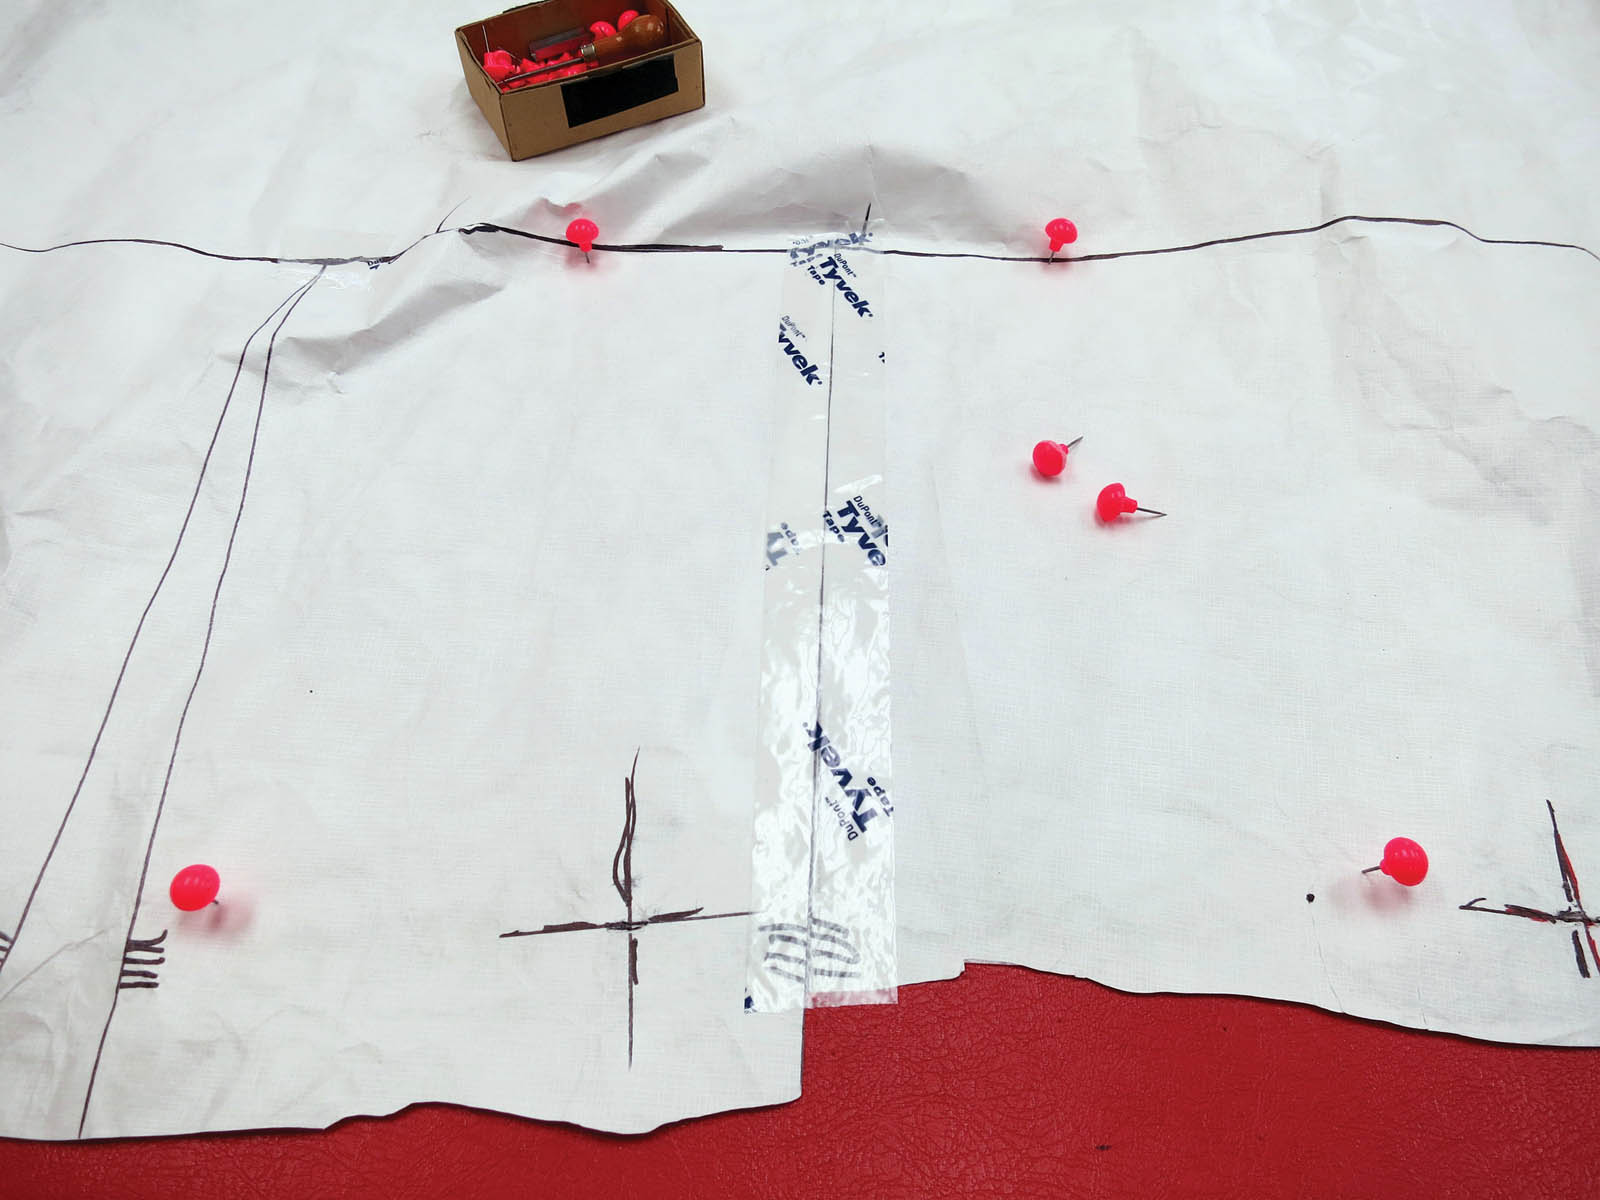
Photo 6
Tape the dart up to the horizontal windshield line and repeat with all the other darts along the forward edge.

Photo 7
As each dart is taped, the pattern will no longer lie flat; it will have a belly. If the pattern was returned to the boat at this stage, it would fit the contour below the windshield perfectly and align with all the fasteners with no extra material between the fasteners. The dilemma is that to lay out and cut the fabric and window material, the pattern needs to be flat and not have a belly in it.

Photo 8
The next step is to add hash marks across the horizontal windshield line at uniform intervals. Use letters such as AA, BB and CC on each side of the hash marks so the pieces can be aligned correctly. This is important as the top and bottom pieces will have a belly when joined together. This also identifies which top piece goes with which bottom piece in the coming steps.
In the photo, the pattern is being cut apart along the horizontal windshield line. The pattern is again lying flat and can be seamed along the edge of the windshield where it can be hidden by fabric masking strips on each side of the enclosure.
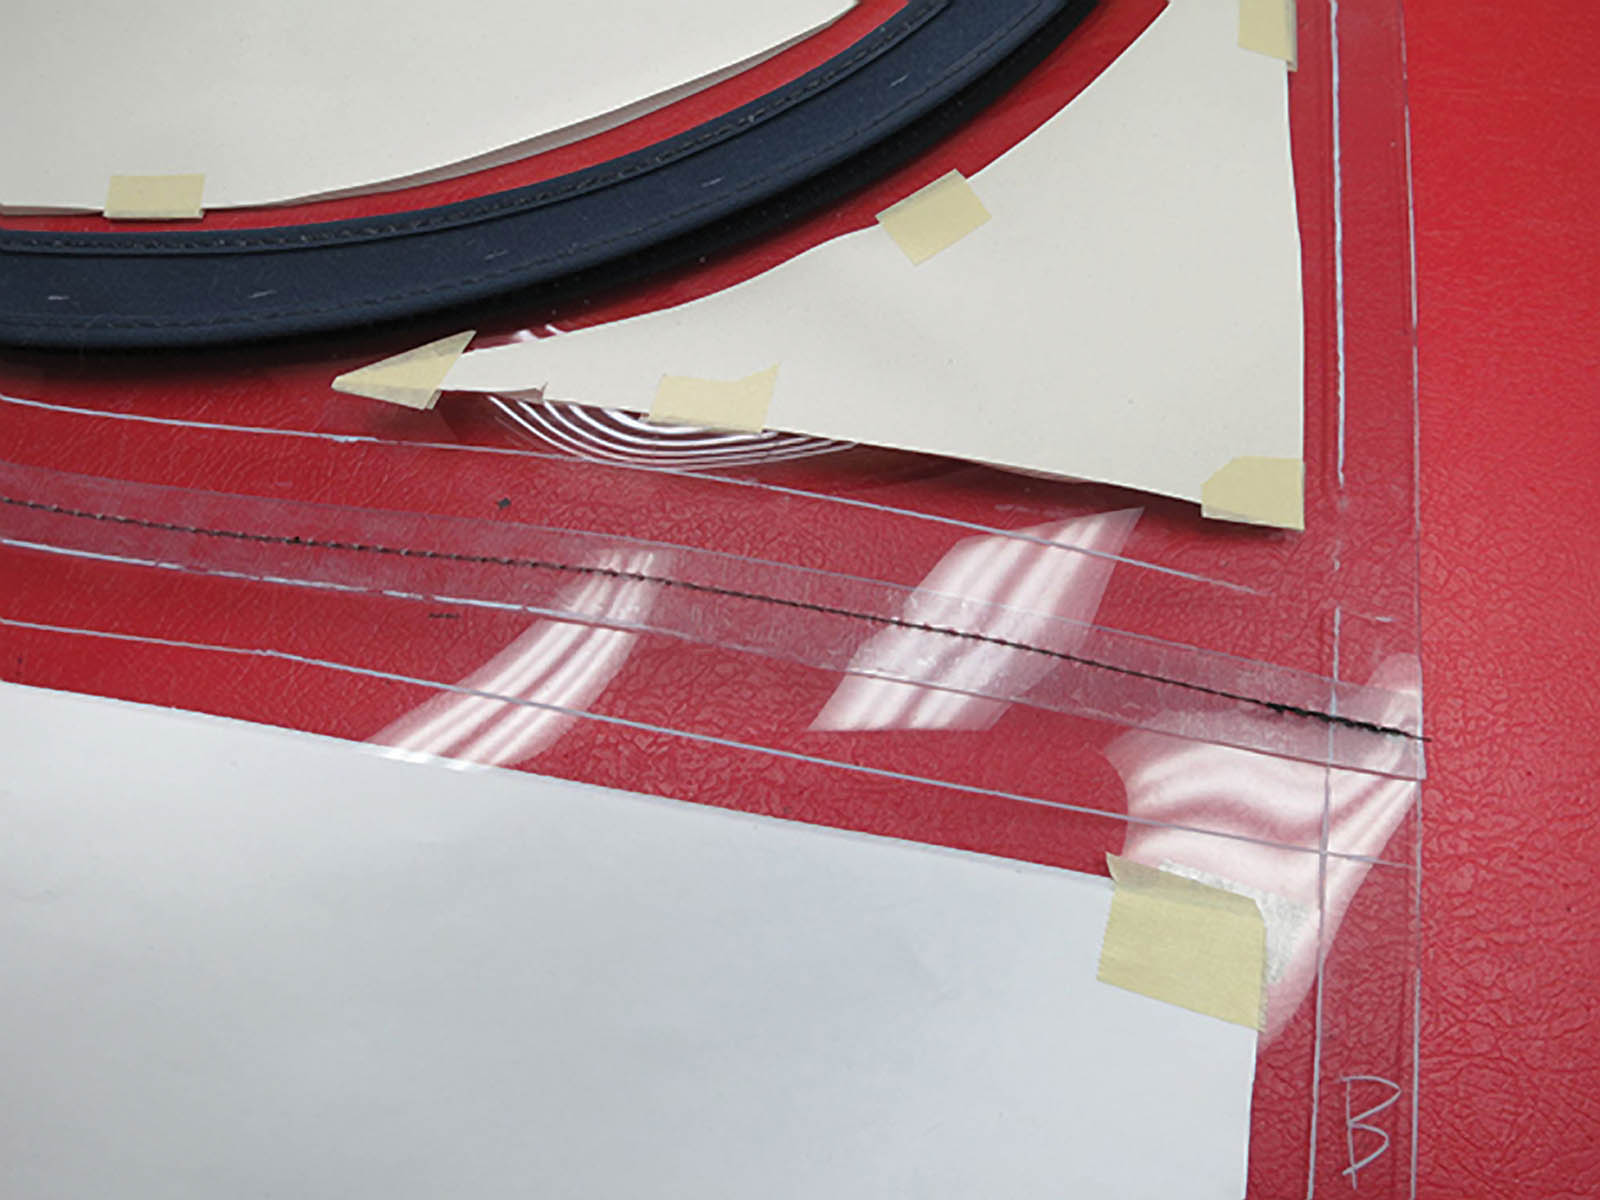
Photo 9
Here, the cut enclosure tops and bottoms have been joined with a single hidden stitch down the middle. We have added 3/8 inch of extra window material to each side of the cut pattern where the two pieces of window material are joined.
Align the hash marks and letters. Use ¾-inch seam tape to hold the material in place while stitching an overlapped seam. The combined 3/8 inches on each side creates the ¾-inch overlap, which happens to be the width of ¾-inch seam tape. Now, fabric masking strips can be applied to each side of the seam to hide it. The panels will once again not be flat but will fit the forward curve and tuck under to the fasteners perfectly.
Pattern darting can be used in many patterning situations. It allows the fabricator to save time and achieve a better fit without the need to cut the pattern at the boat. The key to darting with patterns is the tip of the darts. Whatever line this dart point hits is the changeover point. After taping up the darts, this other line can be cut so the pattern will again lie flat.
Mark Hood, MFC, along with his wife, Deb, have owned and operated Hood Canvas LLC in Merrimac, Mass., for the past 40 years. For the last 10 years, they have trained students from around the world in quality marine canvas fabrication in their training workshops. Mark is the author of the new book Bimini Enclosure Fabrication Step by Step available at www.hoodcanvas.com.
SIDEBAR: Other useful instances for pattern darting
- On the sides of a bimini or hardtop to adjust an angle where there is a zipper or keder cord sewn onto a pattern along a straight marker line at the top. After darting and taping, the top straight line will no longer be straight, but instead will be at the angle needed so the pattern will again be flat.
- On a fitted boat cover where you want to fit the contour of the hull perfectly from the gunnel down using darts. Transferring the seam to the horizontal gunnel line.
- On a small cover that has a dart on each side of the pattern. Rather than having to sew up a dart on each side, connect the dart tips with a straight line. Now the darts are incorporated into a seam and are eliminated.