TEXTILES.ORG
 Advanced sewing tips and techniques
Sewing has always been a part of my life. It’s second nature to me, much like playing music or singing is for others. And as with playing music and singing, it often takes practice to set yourself apart from the rest. Interestingly, the things that push you to a different level can often be quite subtle. There are small, unflashy and even invisible actions that create “aha” moments to help you move through projects with ease to achieve your desired results.
The following are some time-tested tips and techniques that will make your fabric construction process easier, more efficient and more predictably successful. Many of these come from discussions on the different forums I belong to. These forums include a broad spectrum of how-to topics that span multiple industries.
When sewing fabrics, remember the table drag. The heavier the fabric, the harder the drag on the table will be. My tables are constructed of 1/4-inch mahogany coated with marine spar varnish, which makes a huge difference. On occasion, I lightly spray these tables with silicone to create less friction when sending materials through the machine.
When sewing materials, keep in mind that the sewing needle is the fulcrum point. Pulling too far forward or too far back will create distortion at your needle point.
When sewing a seam, the fabric does not come out of the back of the machine in a straight line. It has a gentle curve, usually to the left of the needle. You can see it most clearly when doing welt for cushions, but remember that there’s a subtle curve in everything you send through the machine.
When sewing layers of material and to keep a straight line with an accurate seam allowance, gently pull on the fabric. Pulling it away from the machine or toward your body will give you more control over the fabric when sewing. Pulling gently is key.
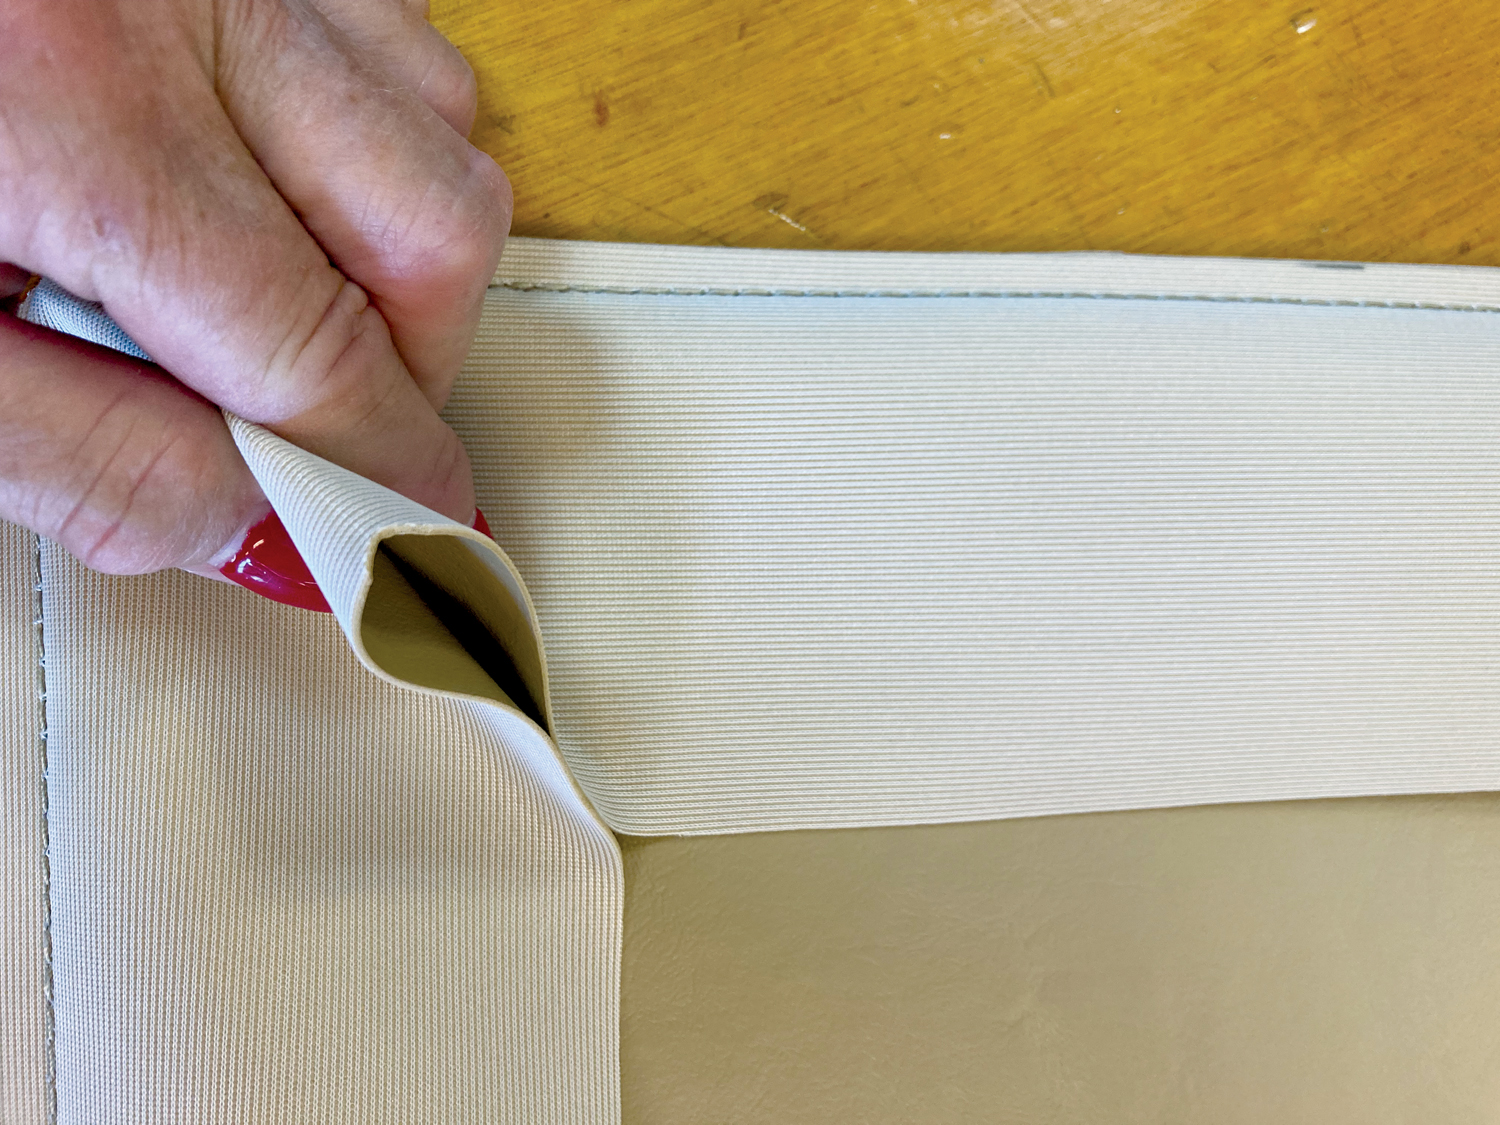
When sewing upholstery, it can be a struggle to find the corners of cushions. After sewing the boxing to the top with the welting already sewn in, fold the boxing flat onto the inside surface of the cushion. Align both edges until they are even. Make sure the boxing is flat, as the welting will want to distort the angle. Hold down the surface and run your hand to the top of the fold. Notch here, and you have found the corner (see lead photo above).
When building cushions, be sure to clip the inside corners so that when you reverse the cushion right side out, you don’t have bulky fabric bunching up at the corners.
When sewing welt onto cushions or multiple layers with welting such as front, back, stretcher and welt, flip the fabric over to sew on the reverse side along the welt to keep your stitching invisible. This also works well for corners as they are notorious for unprofessional, exposed stitches.
Faith Roberts, MFC, IFM, is the owner of Banner Canvas, a 4,000-square-foot shop in Ham Lake, Minn. She travels throughout the United States working on special-project boats. Roberts holds a degree in apparel design.
SIDEBAR: Sewing seams inside long, small-diameter items
For an item 6 inches in diameter by 5 feet long: After cutting the material, join it together with aggressive seam tape. Use a 1/2-inch seam allowance. Position the fabric cylinder in front of the machine with the seam face down on the table and the first third of the plane closest to the needle. You will be sewing the inside of the cylinder. As you sew, the fabric will start to corkscrew around the head of the machine, twisting the seam in a counterclockwise direction. As the material twists, pull the cylinder in the front to access more of the seam (Photos 1 and 2).
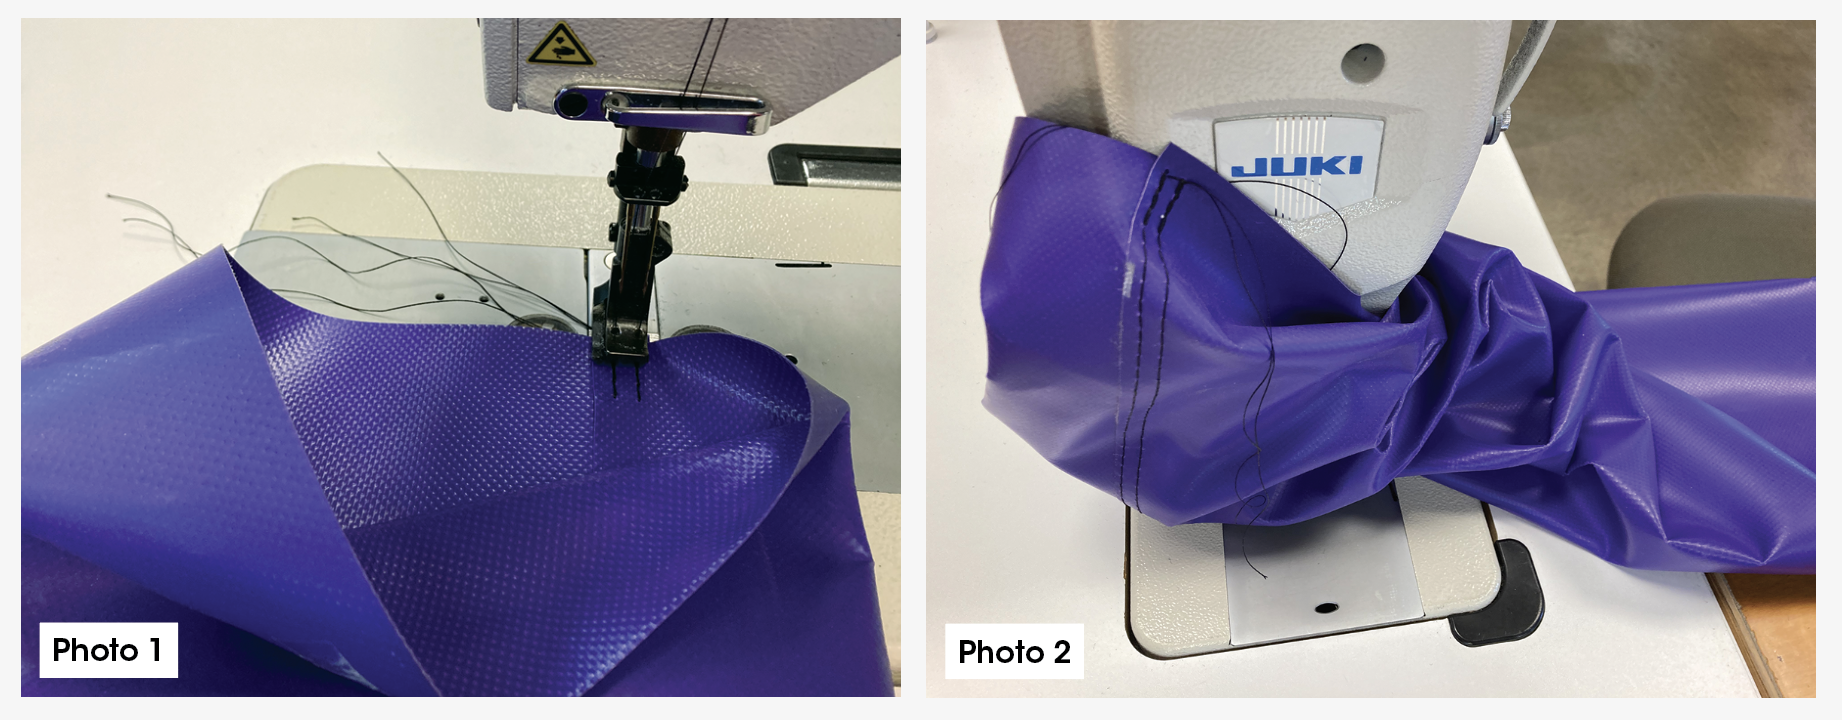
If the diameter is too tight, try to sew one-half the length of seam, pull the material out of the machine and reposition the unsewn seam, feeding it in from the back. This is where aggressive seam tape helps to keep the seam from splitting. Pull up to the point you stopped and sew down the rest of the seam.
If the diameter is simply too small, a French seam is your only solution. Fold the material in half and pull the material back enough to mark 11/4 inch on the inside. Align the material along the marked edge and sew 1/8-inch along the edge. Fold the opposite raw edge to align it with the edge you just sewed. Fold it again over your 1/8-inch seam, sealing the raw edge, and stitch along the 1/4-inch fold. This provides a seam along the edge without having any raw edges, and it’s on the outside of the sleeve.
SIDEBAR: Sewing a 90-degree corner with a straight piece of material
Some industrial work applications call for a fabric “flex” connecter that bolts to two pieces of equipment. It can be of any configuration, and most often it has square corners. Here is how to do it:
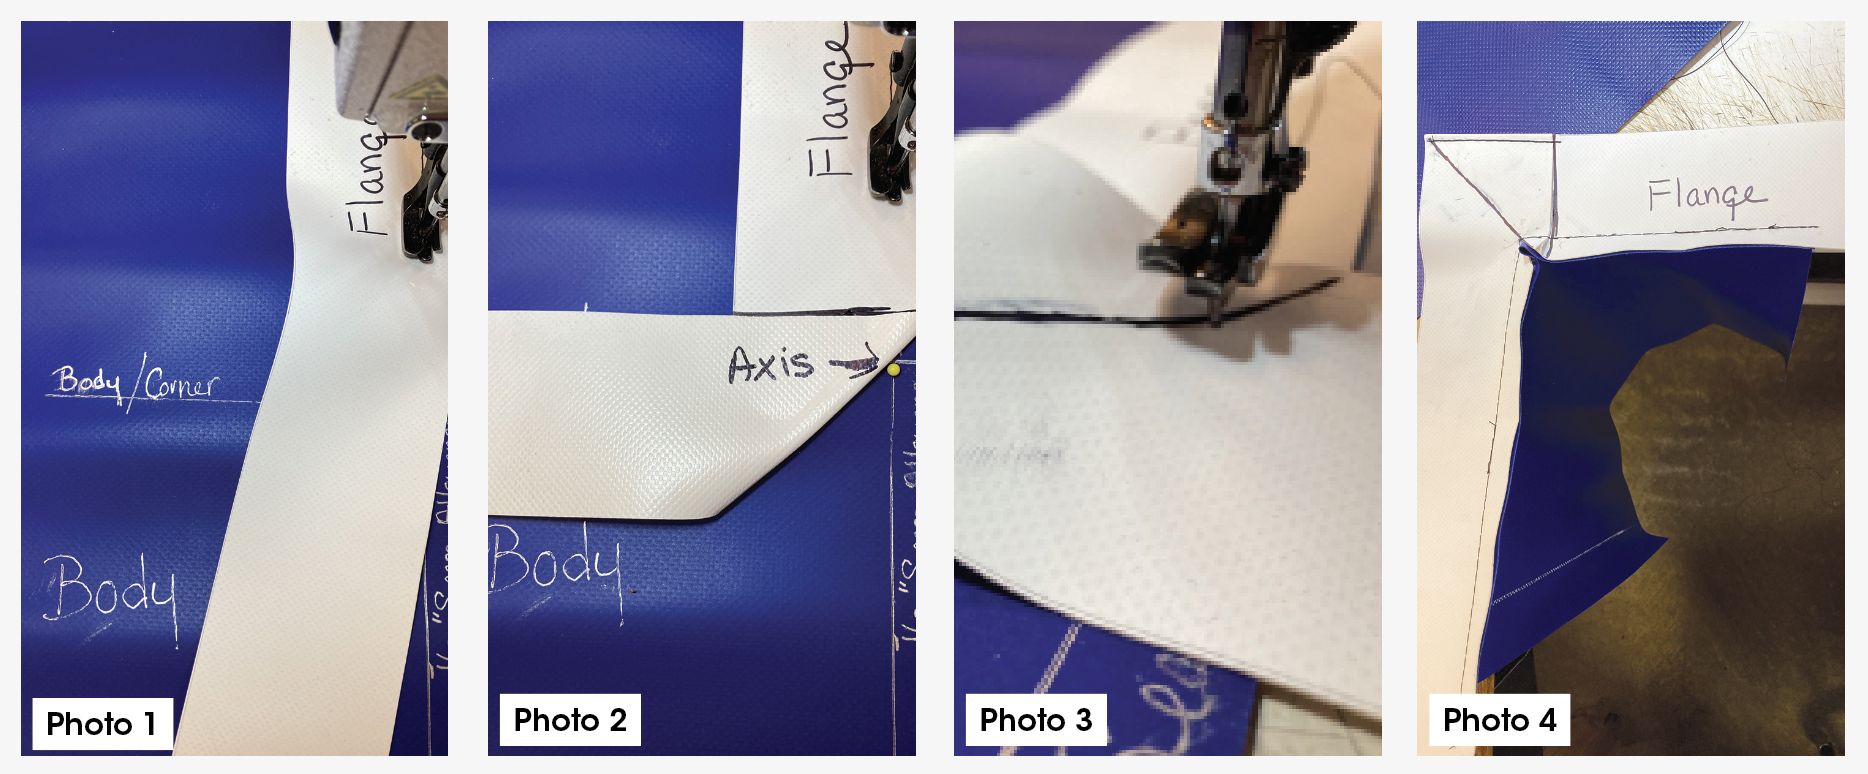
Let’s say your flange (pictured in white) is 2 inches and your seam allowance is 1/2 inch. So, your straight piece is cut at 2 and 1/2 inches. Mark the corners on the body of your flange. Lay both edges of body and flange together, with a 1/2-inch seam allowance. Start away from the corner, as that’s where all the folds go (Photo 1).
As you approach the corner, which is marked on the body, fold the flange 90 degrees to where the fold of fabric is at the axis of the 1/2-inch seam allowance and the corner mark of the body (Photo 2).
Fold the flange back onto itself, then stitch to and sink your needle at the access point. If you have folded it correctly, your needle should not be in the fold on the inside but right next to it (Photo 3).
Lift your presser foot and spin the whole piece to where you can make a relief cut in the top flange only up to the needle that is sunk in at the axis (Photo 4).
Lift the presser foot and spin the flange to align with the body once again, then start sewing your 1/2-inch seam allowance. Stitch down the outside edge of the flange, which will give you a true 90-degree corner.