 TEXTILES.ORG
 The forgotten weatherproof screened frown
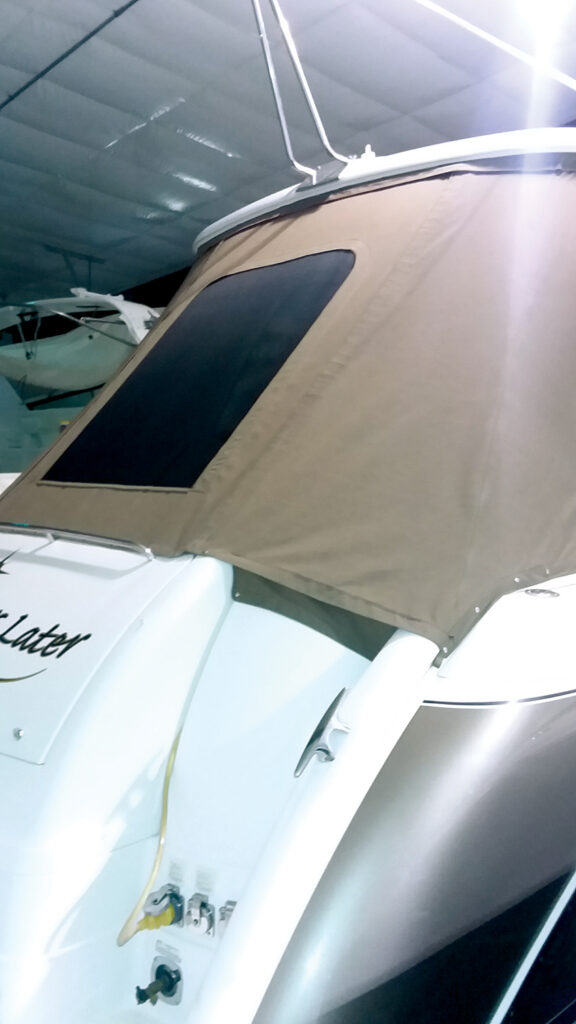
There are so many marine canvas-related products, like the weatherproof frown, which have almost faded into the past. This is primarily due to mass producers taking shortcuts by creating cheap imitations of the original.
As time passes, new boaters and young canvas makers have only been exposed to the cheap imitations. Neither have seen the authentic version. Sewing a frown-shaped zipper into glass hardly classifies as a true frown window, as far as we old boaters are concerned.

The cheap imitations leak like a sieve—just ask any boat owner who has one! The zipper is exposed to the weather and the screen provides a reservoir of water to seep in, even hours after the rain has stopped.
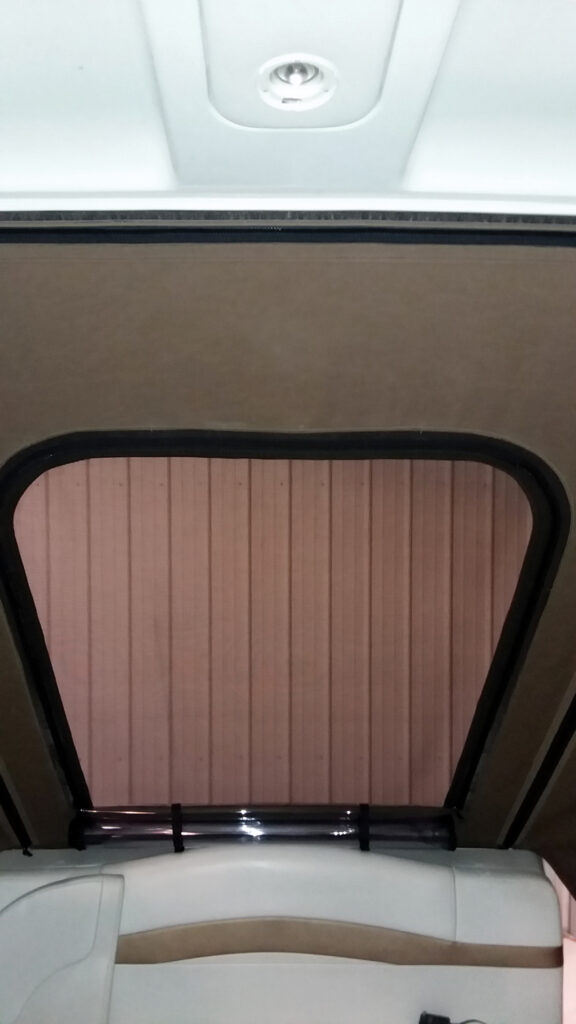
An authentic frown window has three characteristics that make it weatherproof:
- The zipper is not exposed to the elements. Fabric protects the zipper from ever getting wet.
- The screen is sewn around the frown shape as an extra barrier against wind-driven rains. This barrier prevents unwanted rain, dirt or twigs from getting between the glass and the screen.
- Lastly, the bottom 3/4 inches of glass and screen transition from the inside of the enclosure panel to the outside. This transition prevents rain runoff from collecting along any fabric border edge. It also prevents any water trapped in the screen from finding a way through the stitching along the bottom.
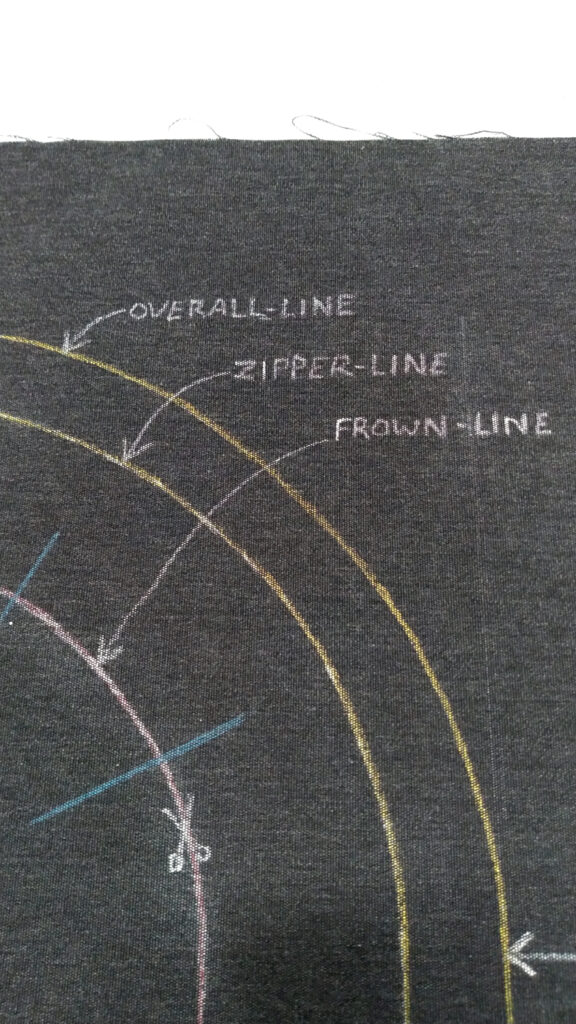
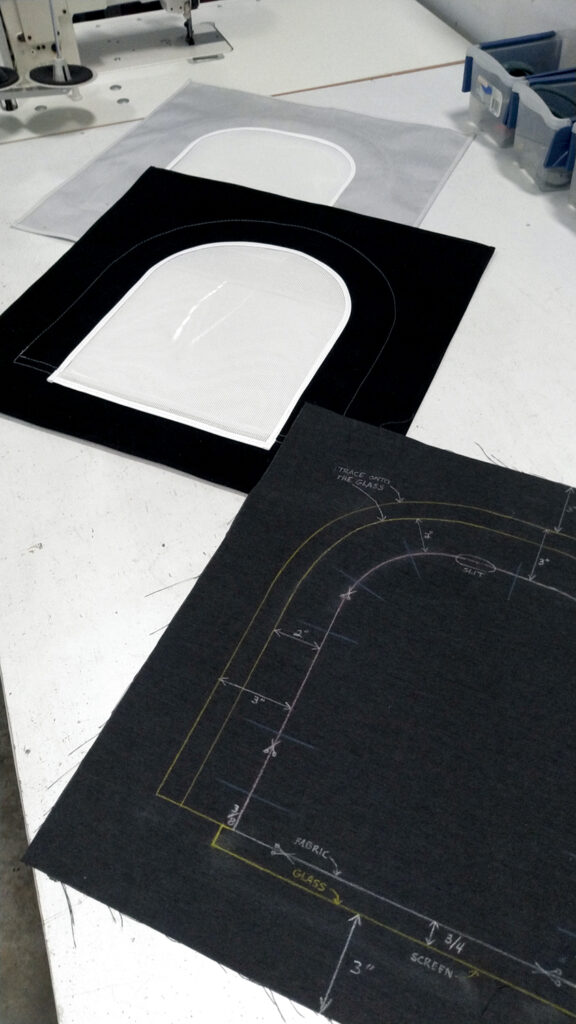
To simplify the process in this how-to guide, I have created a 24-inch square enclosure panel with a weatherproof screened frown window placed in it. Whether full sized or scaled down, the steps are all the same. I have used black and white materials so that you can distinguish between different parts of the assembly. Like many products that we regularly make, I keep a Master Instruction sample on hand to speed up the layout process.

Step 1.
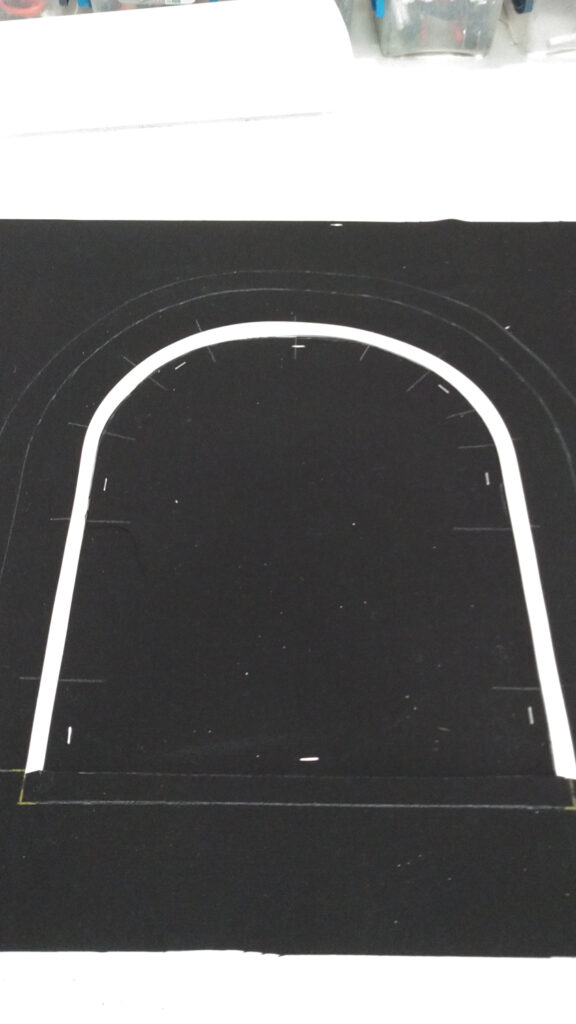
Begin by sizing the frown opening (inner-most line), the zipper offset (middle line) and the outside parameter (outer line) of the glass edge. Draw these onto your fabric. You may want to use multiple colored pencils to distinguish which lines are glass, which are fabric cut lines and which simply get transferred onto glass.

Once the initial shapes are drawn, make hashmarks across the frown line. Make a small 2-inch slit on the frown line so that you can insert scissors and cut on this line later. Staple the inner frown shape to the table for later reference.
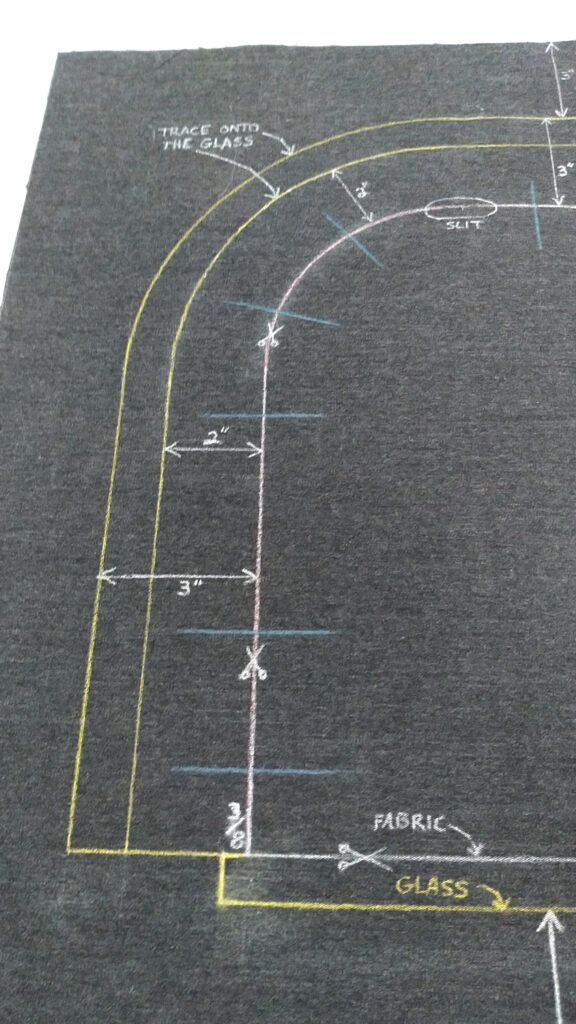
Step 2.
Lay clear window material over the fabrication area. Trace the outside parameter line onto your glass. This is a cut line, which will give you the overall shape of the glass. Notice that the glass is notched and extends 3/4 inches below the frown line at the bottom.

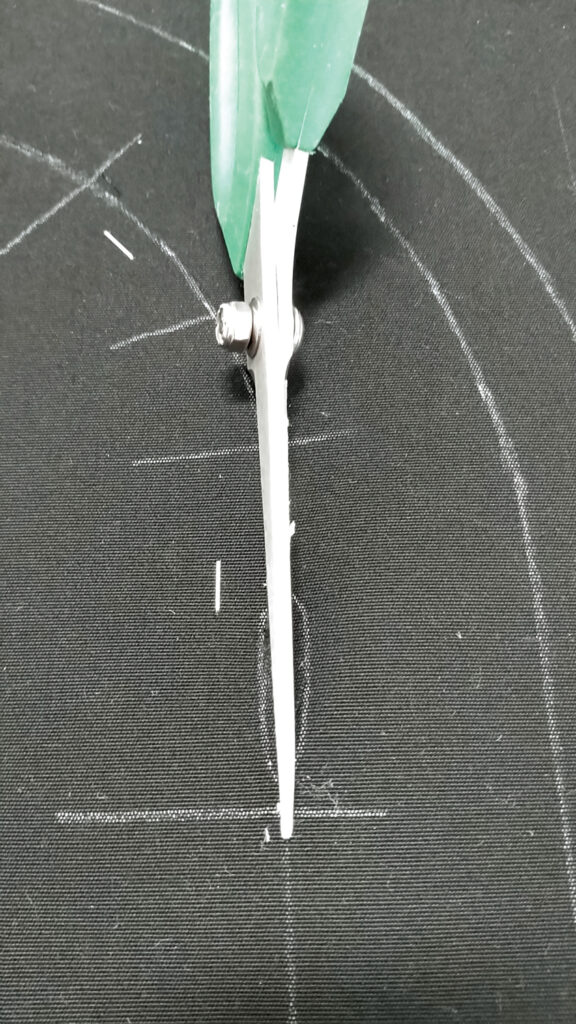
Trace the zipper offset line onto the glass. The zipper offset line represents the outer edge of your zipper. Proceed to trim glass along the outer perimeter line. Place and sew the zipper onto the glass, add sliders and cut the glass along the centerline of the zipper.
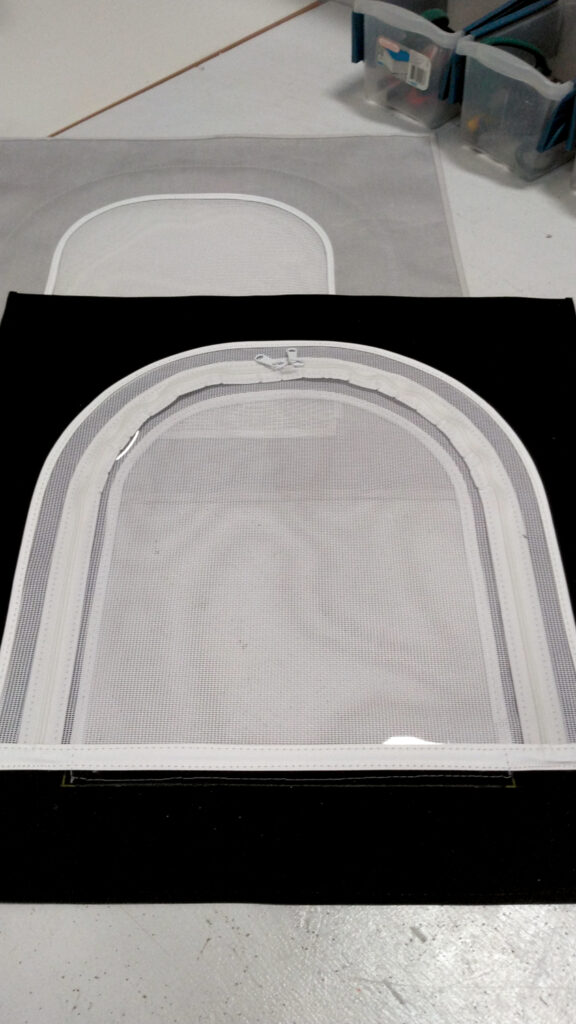
Using the shape of the trimmed glass, duplicate this shape in screen by laying the glass on top of the screen. After trimming the screen, bind them together along the top edge (arc and sides) and along the 3/4 inches extended bottom edge.

Step 3.
Cut along the frown line and separate the outer portion of the enclosure panel. The inner-frown shape will remain stapled down for now. Bind the arc and sides of the frown, using the outer portion of the panel and return it to its original position. Use the hashmarks to get proper alignment and re-staple the outer portion of the panel.
Step 4.
Now to finish up! I used white thread on black for instructional purposes only. Tape the glass into position. Sew through the binding along the arc and sides only. At the bottom, flip the extended 3/4 inches of glass to the outside of the opening. You may need to snip the inside corners of the glass by 3/8 inches (width of the binding when folded) so that the binding edges align.
Bind the ends of the extended glass portion, aligning the lower binding to the upper binding on the outside. Turn the panel with the inside facing up and position a strip of binding across the fabric’s cut edge and sew down.
You can now unzip and open the glass portion of the frown. Sew through the binding and through the screen around the arc and sides while the glass is open and out of the way.
Russ Griffin is co-owner of Northcoast Marine Specialties LLC, which operates a training facility in the art of canvas making in Port Clinton, Ohio.


