TEXTILES.ORG
 Fabricating a Navy top
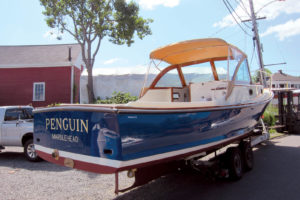
Our Wasque 32 project boat with Hood Canvas leaving CW Hood Yachts in Marblehead, Mass. This boat was featured on Channel 5 Boston’s Chronicle News Magazine.
In the last article (July/Aug issue), we patterned a Navy top in one step at my brother Chris Hood’s boat building facility, CW Hood Yachts, in Marblehead, Mass. In this article, we head back to our shop in Merrimac, Mass., to develop our pattern and fabricate the top and side curtains together.
We have received numerous inquiries as to why we use Tyvek for our patterns. It is tough and it is easy to distinguish the inside from the outside. It has zero elongation and does not know hot or cold. This enables us to install fasteners in the shop, go to the boat and have a perfect, tight fit. When we install a job, we go to the boat with no tools and the job snaps right on. Brown paper has the same properties, but is not as tough, and sometimes we need to sew zippers onto our patterns.
Fabricating a Navy top: Start to finish
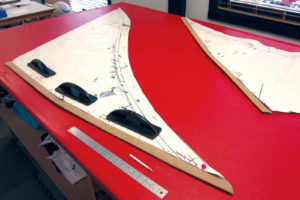
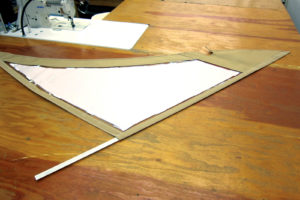
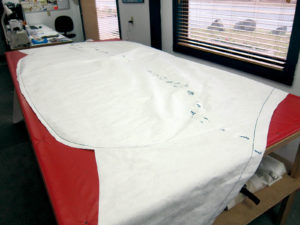 Here is the rough pattern as we removed it from the frame in the last article. Notice that it does not lay flat on the table as there was extra material removed from the forward section.
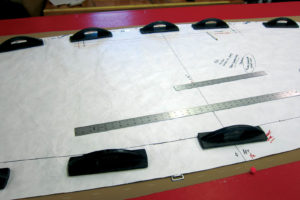
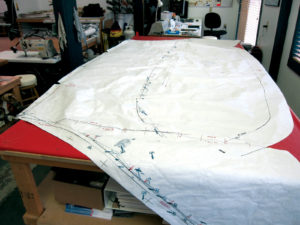 This is the same pattern worked up, but not cut apart yet. We normally cut the pattern apart as we go, but in this case we did not for the benefit of our readers. Notice that everything has been marked, including the aft pocket and mid pocket with its associated reinforcing patch. The fasteners have been marked below the line indicating the top of the windshield. Normally, we install the fasteners in the shop, but in this case the windshield was in the process of being restored, so we installed them when we put the job on.
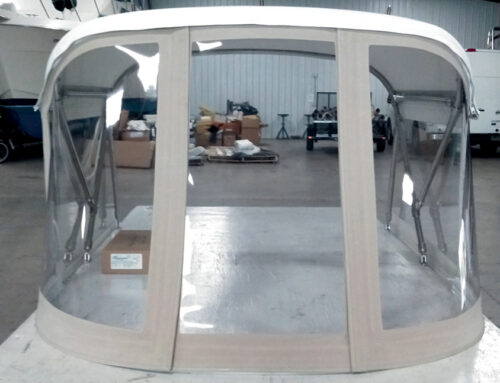
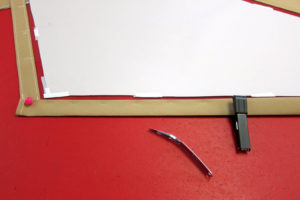
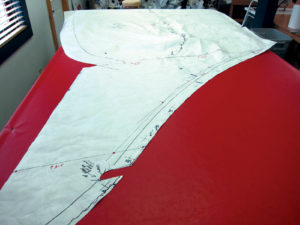 A close-up of one side curtain is shown here. We have punched holes where the fabric bottoms join the clear vinyl. This is done in two sections: the bottom piece and the piece that runs forward along the windshield. This facilitates fabrication in that no one joining piece is wider than the width of the fabric.
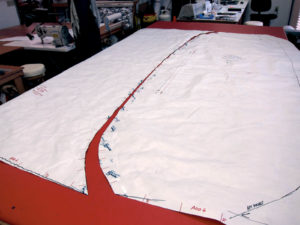 In this photo we have cut the side curtains off the pattern and cut the top mid seam apart on the pattern along the marking on the underside for the secondary bow. We transferred this line from the underside to the outside by using a rolling pounce wheel to make perforations. Notice that there are hash marks for seam and zipper alignment where the pattern pieces are separated.
 Here we are laying out the top aft panel. Notice that we have pinned out the seam to put it in its natural state before placing the pattern on top with weights. We use a strap adjuster buckle under the edge of the pattern to mark our ½-inch seam allowance.
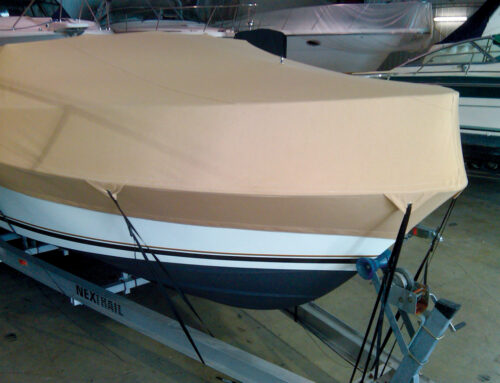
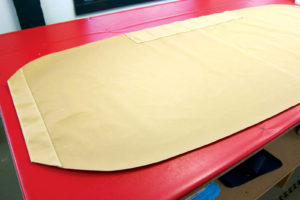
 This photo shows the forward section of the Navy top with the sides folded in and the forward reinforcement in place, stapled and ready for stitching. We will add rubber spray welt and binding to the forward edge where the snaps will go.
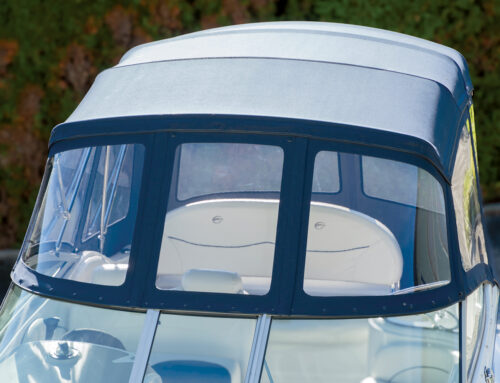
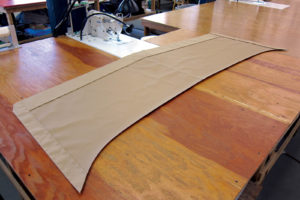
 This is the aft section of the Navy top with the side reinforcements folded in and stitched. The mid-pocket reinforcement is also stitched in place. On the aft end of this component piece, we will add the bow pocket and visor. We fabricate the aft bow pocket to finish 1½ inches up from the sides of the bimini to allow the 1½-inch wide side curtain zippers to pass to the corner of the bimini. Since our customer did not want an aft angle back at this time, we did not use our one-step flip trace method to establish the perfect visor angle. Instead, we used a generic straight visor to give our Navy top visor a 45-degree angle in case the customer wants to add an angle back in the future. The forward Navy top component is joined to this aft section at the forward edge with the mid pocket in the seam. To do this, we align the match marks, staple and stitch to complete the Navy top.
 In this photo we have the side curtain patterns on top of the side curtains in order to transfer the hash marks for proper side curtain alignment with the Navy top. First we stitch the zips onto the Navy top and then we transfer the hash marks to the bottom of the zipper from the hash marks on the Navy top. Finally, we remove the bottom half of the zips and align and stitch them to the hash marks on the top of the side curtains.
 These are the almost-complete side curtains. We have used our large binder to finish the top edges. We need to add the aft sleeves that hold 1-inch flat battens to stiffen the aft edge from flapping while underway. We also need to bind the bottom edge, but first let’s go over the fabrication of the aft sleeve.
 Cut two 60-inch strips 6 inches wide and hem the top edge. Now fold in half and fold the sides to the middle crease. Fold again to make a 1½-inch four-layer strip.
 Now, slide the 1½-inch folded strip onto the aft edge of the side curtain with the hemmed edge at the top to the ¾-inch mark on the curtain. Staple and stitch the inside edge only, but do not stitch the hemmed edge at the top.
 This is the aft edge of our completed side curtain, except that we have not yet installed the zipper on the top edge. Notice that the batten slips in from the top and can be removed for servicing. Our zippers have a 1½-inch overlap to hide them. Our method provides a clean look, smooth operation and speeds production when utilizing our large binder. Our zippers are stitched on the inside edge, not the outside edge as butted zippers are. This enables us to use our batten feature on any vertical division that needs a zipper, without hampering the smooth operation of the zipper.
Mark and his wife, Deb, own and operate Hood Marine Canvas and Hood Marine Canvas Training Workshops in Merrimac, Mass. For more information and to purchase the large binder seen in these articles, visit www.hoodcanvas.com or e-mail mark@hoodcanvas.com. For more information on CW Hood Yachts visit www.cwhoodyachts.com.