TEXTILES.ORG
 Reinforce dodger top panels

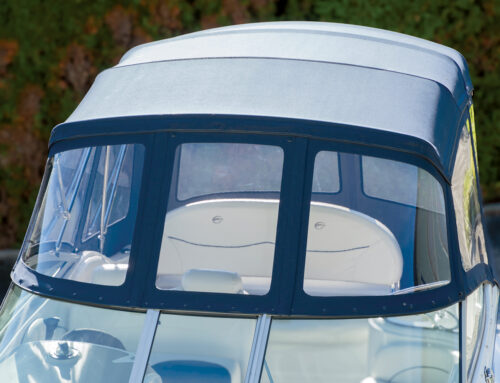
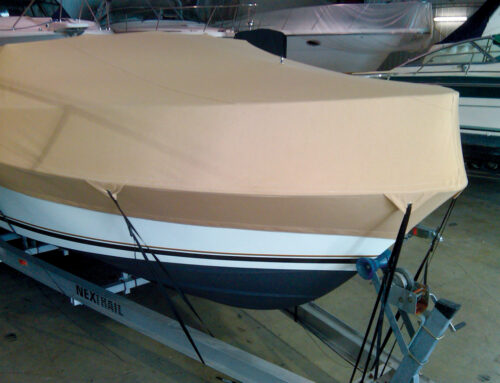
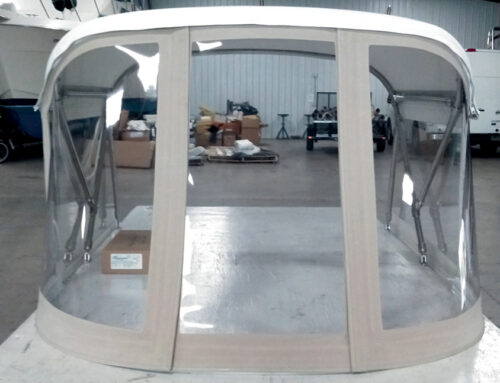
Two new Hood California- style dodgers cross paths in Beverly, Mass., Harbor. Our side reinforcing method is used in the dodger top panels.
At Hood Canvas we developed a method of folding in the sides of our California dodger top panels to reinforce the edge. We did not like the look of binding on the sides of our panels. We prefer a crisp folded edge instead. We chose to show the procedure on a Navy Top because it details adding a forward reinforcement under the folded edge. Otherwise, the procedure is the same for our dodger and bimini top panels, but without the forward reinforcement. We had several requests from readers for more detail on the way we fold our edges. So let’s get started folding edges.
Our method of folding extensions and trimming edges has many other uses for the marine fabricator that are beyond the scope of this article. Next issue, by request, we will look at the details and steps we use to hide the raw edges of our smaller windows.
Reinforcing top panels: Start to finish
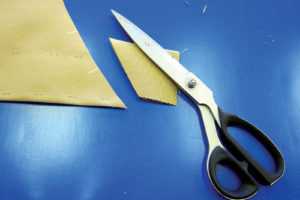
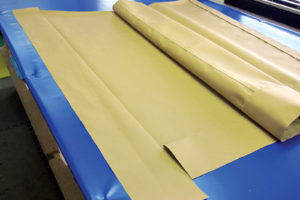 Notice that we are working on a Navy Top that has reinforcing already stapled onto the forward edge. Our wide forward reinforcement extends to just inside the fold line that will become the finished side of our top. You will notice that a square 6-inch extension of the top fabric has been added to the side of our top blank. This large extension tab must extend well past the ends of our top sides fore and aft. We are going to double fold this 6-inch tab onto the back side of our top blank to finish 3 inches.
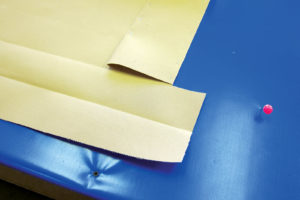 You will notice that we made two creases in the fabric to facilitate the folding process.
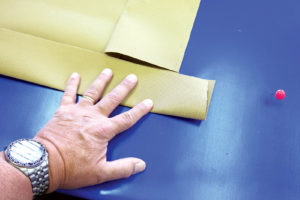 First we fold inward to the fold line that will become the finished side of our top.
 We fold again so that we now have a 3-inch reinforced edge that is three layers thick.
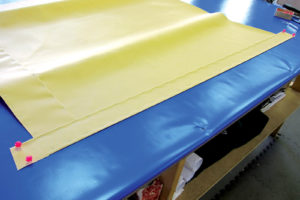 We now pin the folded extension tabs out tight like they will be on the boat under tension.
 Staple to hold everything in place for stitching. Notice the fabric extension piece that extends beyond the cut edge of our top. There is an extension on the other end as well.
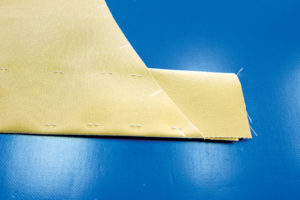
 Cut the extensions off even with the top fore and aft. In this way, our reinforcing always extends to the edges at the correct angle. The forward reinforcing for our Navy Top is now under this folded edge.
 We are stitching our folded and stapled Navy Top. First we stitched both the folded sides with back tacks at the start and end of each pass. Without a back tack to start our stitch, we reinsert our needle into stitching ahead of the corner. Now we stitch to the corner and turn the corner onto the inside edge of the forward reinforcement as in the photo. Stitch across the inside edge of the forward reinforcement onto the stitching of the inside folded edge on the other side of our Navy Top. Turn the corner again and continue stitching on top of existing stitching and end without a back tack. We believe this method produces a cleaner look to our reinforcements.
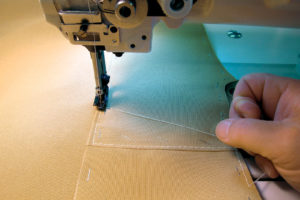 In our Navy Top, we have a seam in the middle of the forward reinforcing piece. As in the photo, we turn the corner and stitch down the seam. Now turn the corner again and end the stitch on the forward edge of the top. Then, without a back tack, we reinsert our needle into the stitching ahead of the first corner and continue on straight to the folded reinforcement on the other side.
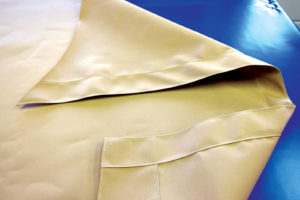 Our stitched top panel. We have stay stitched the forward edge, where our Navy Top snaps to the windshield. Finish the forward edge by adding binding. If the top has multiple panels, each piece needs to have its edges folded and stitched separately before being joined.
Mark Hood, MFC, and his wife, Deb, own and operate Hood Marine Canvas and Hood Marine Canvas Training Workshops in Merrimac, Mass. For more information and to purchase the large binder seen in these articles, visit www.hoodcanvas.com or email mark@hoodcanvas.com.