TEXTILES.ORG
 Simple, leak-free U-zip
By Keith Purves, MFC
One of the most useful, purposeful and absolutely frustrating features on a clear vinyl enclosure is the simple U-zip.
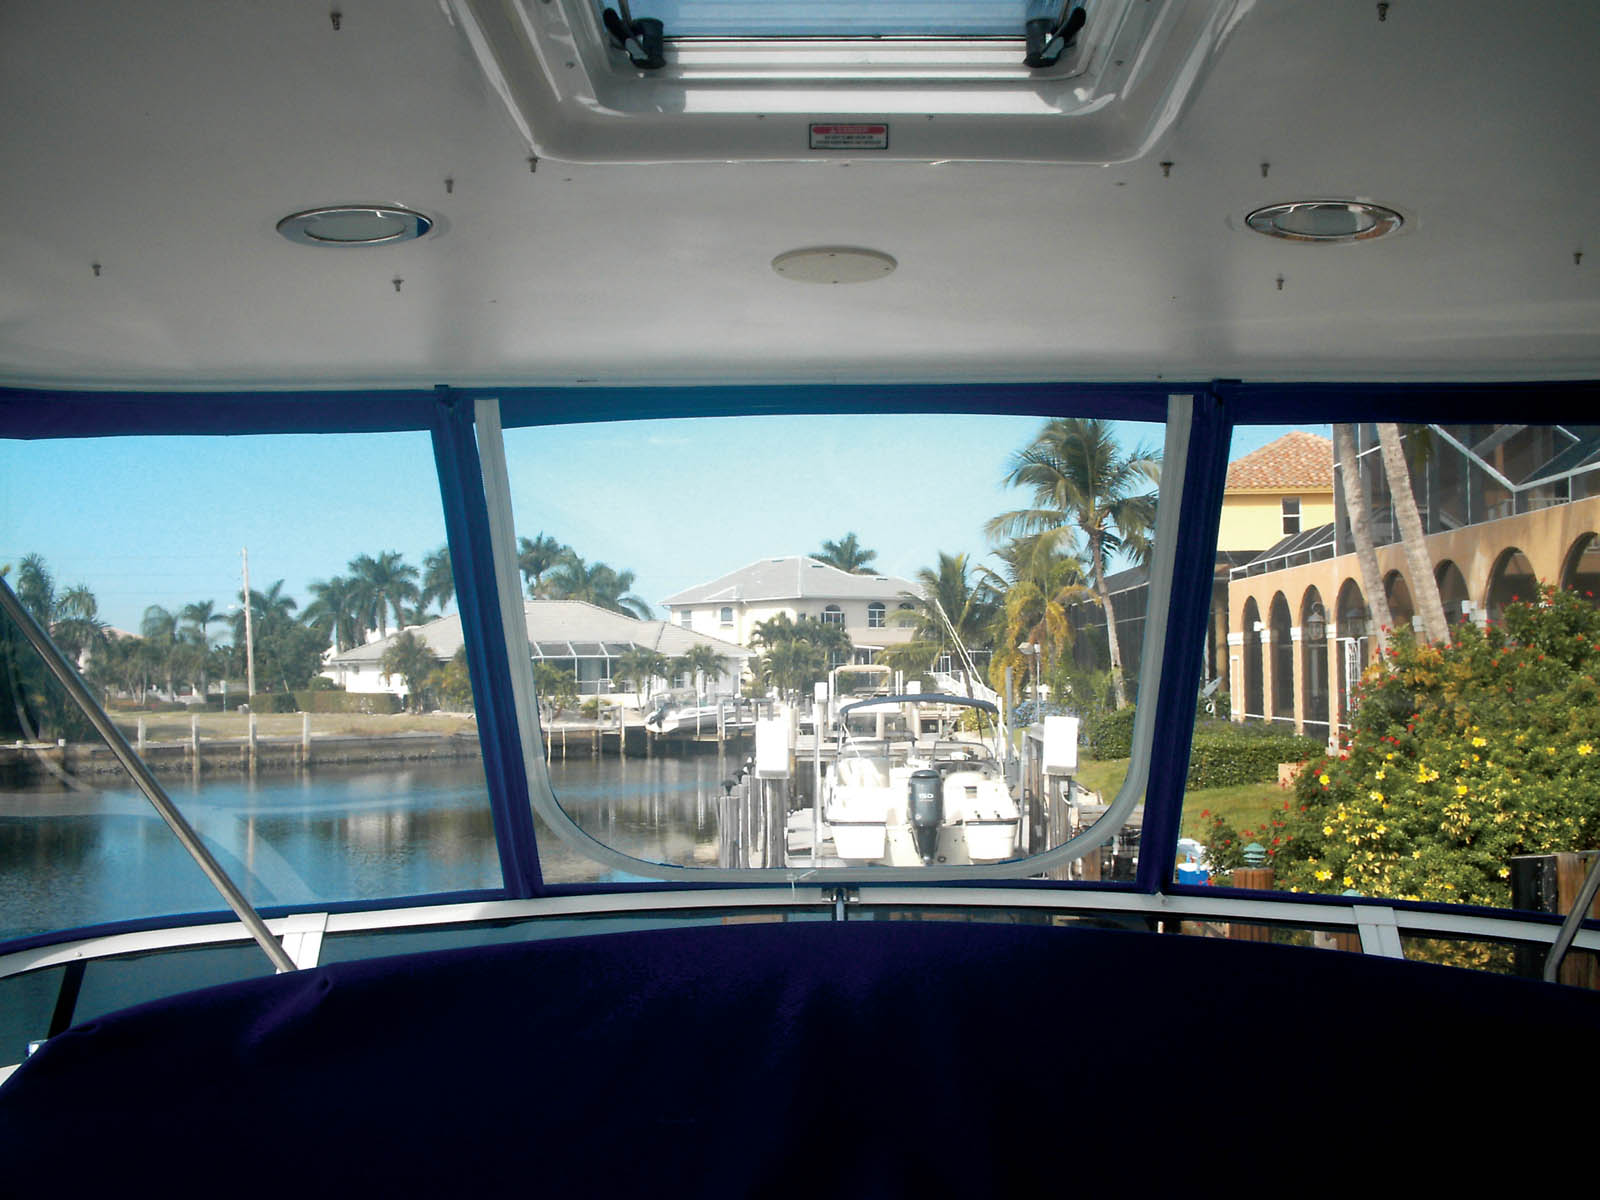
A properly built U-zip looks good, opens and closes easily, and allows boaters the freedom of having the wind in their hair or the full protection of an enclosure when Mother Nature brings her worst. One that is poorly built, on the other hand, can be difficult to use, cause distorted windows and leak like a disgruntled White House staffer.

There are several things to consider when designing and fabricating an enclosure panel with a zippered opening—and sometimes when U-zips should be avoided altogether. U-zips can be found on virtually any style of enclosure and are easily fabricated using common materials.
Types and placement
U-zips can face either up in a smile or down in a frown. Smiles are most common, but their drawback is they are either all up or all down. A frown-shaped U-zip can be opened just a little at the top of a curtain for ventilation without having to go full open (for those rainy or cold days).
U-zips can be designed as narrow and tall, square and uniform, or large and unusually shaped, but they must have a few key elements to work properly. They should never be positioned in a curve where they will not roll properly and should never be wider at the bottom than at the top.
When planning a zippered opening in a panel, it’s a good idea to roughly draw the shape onto the pattern during the templating process.
When you have your shape drawn, try to envision where it will be when rolled up or hinged. Most soft window applications will use a roll-up with straps to secure the panel in the rolled-up position, but in some situations, it’s better to hinge them and secure them to the top or tower with fasteners or straps.
U-zips should also be placed where they will accentuate and complement the lines of the enclosure rather than distract from the overall look of your project. For me, this means pushing the edges of the zipper tight up against the vertical trim or facing. Personally, I don’t like seeing a gap between the U-zip and vertical zips because too many vertical lines start to look like jail cell bars!
Preventing leaks is key
Although U-zips are quite common on enclosures, they can be difficult and challenging to fabricate if you don’t know a few simple tricks to make them lie flat. What’s even more daunting than making them lie flat is making sure they don’t leak. After all, when boaters get a brand-new enclosure, they’re expecting the inside of the boat to stay dry, even when it’s really wet outside.
The technique I’m describing has a “rain flap.” This doesn’t mean it will be completely waterproof or that water will never find its way over, under or around the flap. But this simple flap is easy to make, looks good and keeps most of the rain out.
I once had a customer complain about a leaking zipper. When I went to inspect the enclosure, I had my assistant spray a garden hose at the enclosure while my customer and I stood at the helm. There wasn’t a drop of water leaking in. The customer said the leak occurred when he was running offshore in inclement weather and the waves were breeching the deck. Water was running up the windshield and “right through the zipper.” He proceeded to show me by shooting the hose full blast on an angle coming up the windshield and under the flap (thus causing the leak). This was a clear case of one of us not understanding what the other was expecting. From that day on, I never sold a U-zip and flap combo without mentioning that it was intended to keep out rainwater—not to convert a weekend warrior cruiser into a submarine.
Keith Purves, MFC, became involved in the marine fabrication industry at an early age by learning the trade working in his family’s shop in Fort Myers, Fla. In 2013, he sold the family business and joined Trivantage as an account representative serving the West Coast of Florida. He is an active member of the MFA and currently serves as vice chair of the Marine Fabricators Advisory Board.
SIDEBAR: Checklist
Tools and supplies checklist:
- 1/4-inch super sticky transfer tape (rubber-based adhesive)
- 3/4-inch bias-cut binding
- 1 and 1/4-inch bias-cut binding
- #10 coil zipper (Ziplon®)
- #10 coil sliders (Ziplon)
- Sharp razor blade (Olfa® art high-carbon)
- Skinny sewing machine foot (modified with a grinder so it’s the same width on both sides)
SIDEBAR: U-zip fabrication prep

General considerations
- Butt the outside edges and bottom of the U-zip to the facing borders, when possible, for a cleaner look.
- Have no less than a 9-inch radius (a larger radius ensures a smoother zipper/flap).
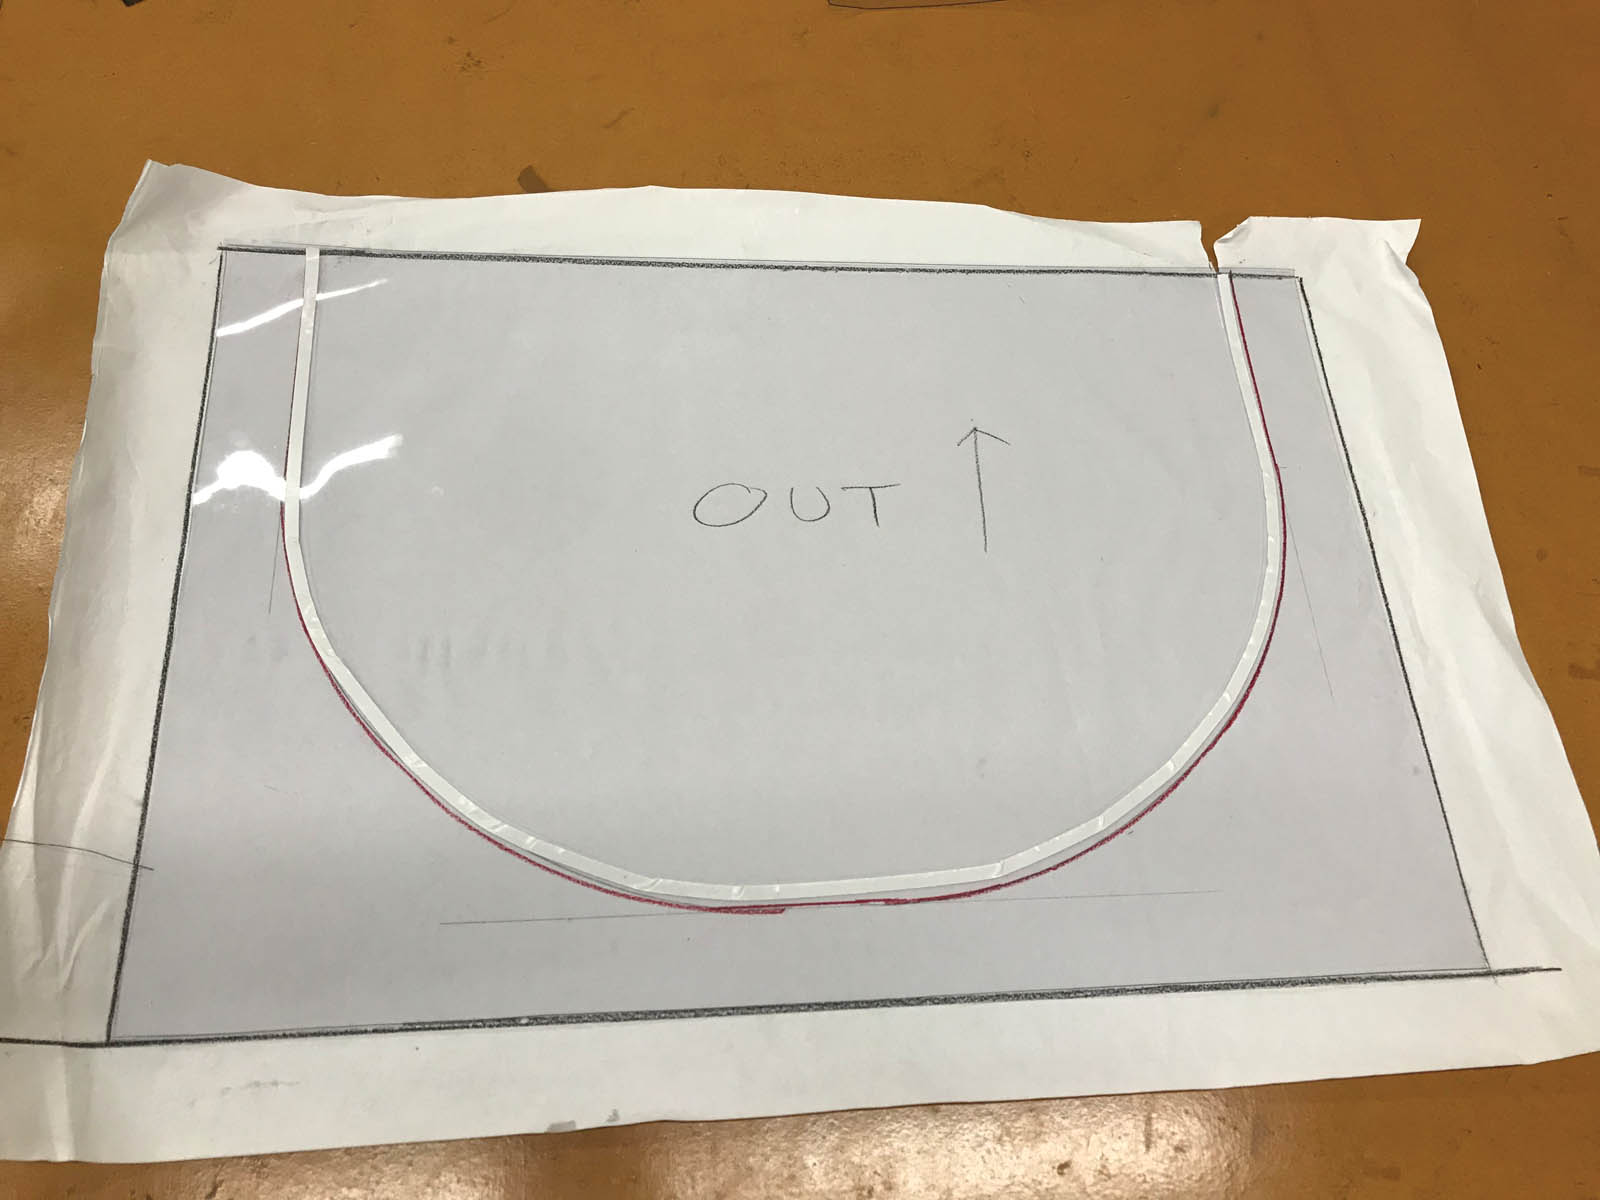
- Draw the U-zip shape on the outside of the pattern.
- Build a U-zip pattern out of a stiff, durable material so you can maintain consistency and duplicate your desired shape from panel to panel.
Vinyl prep
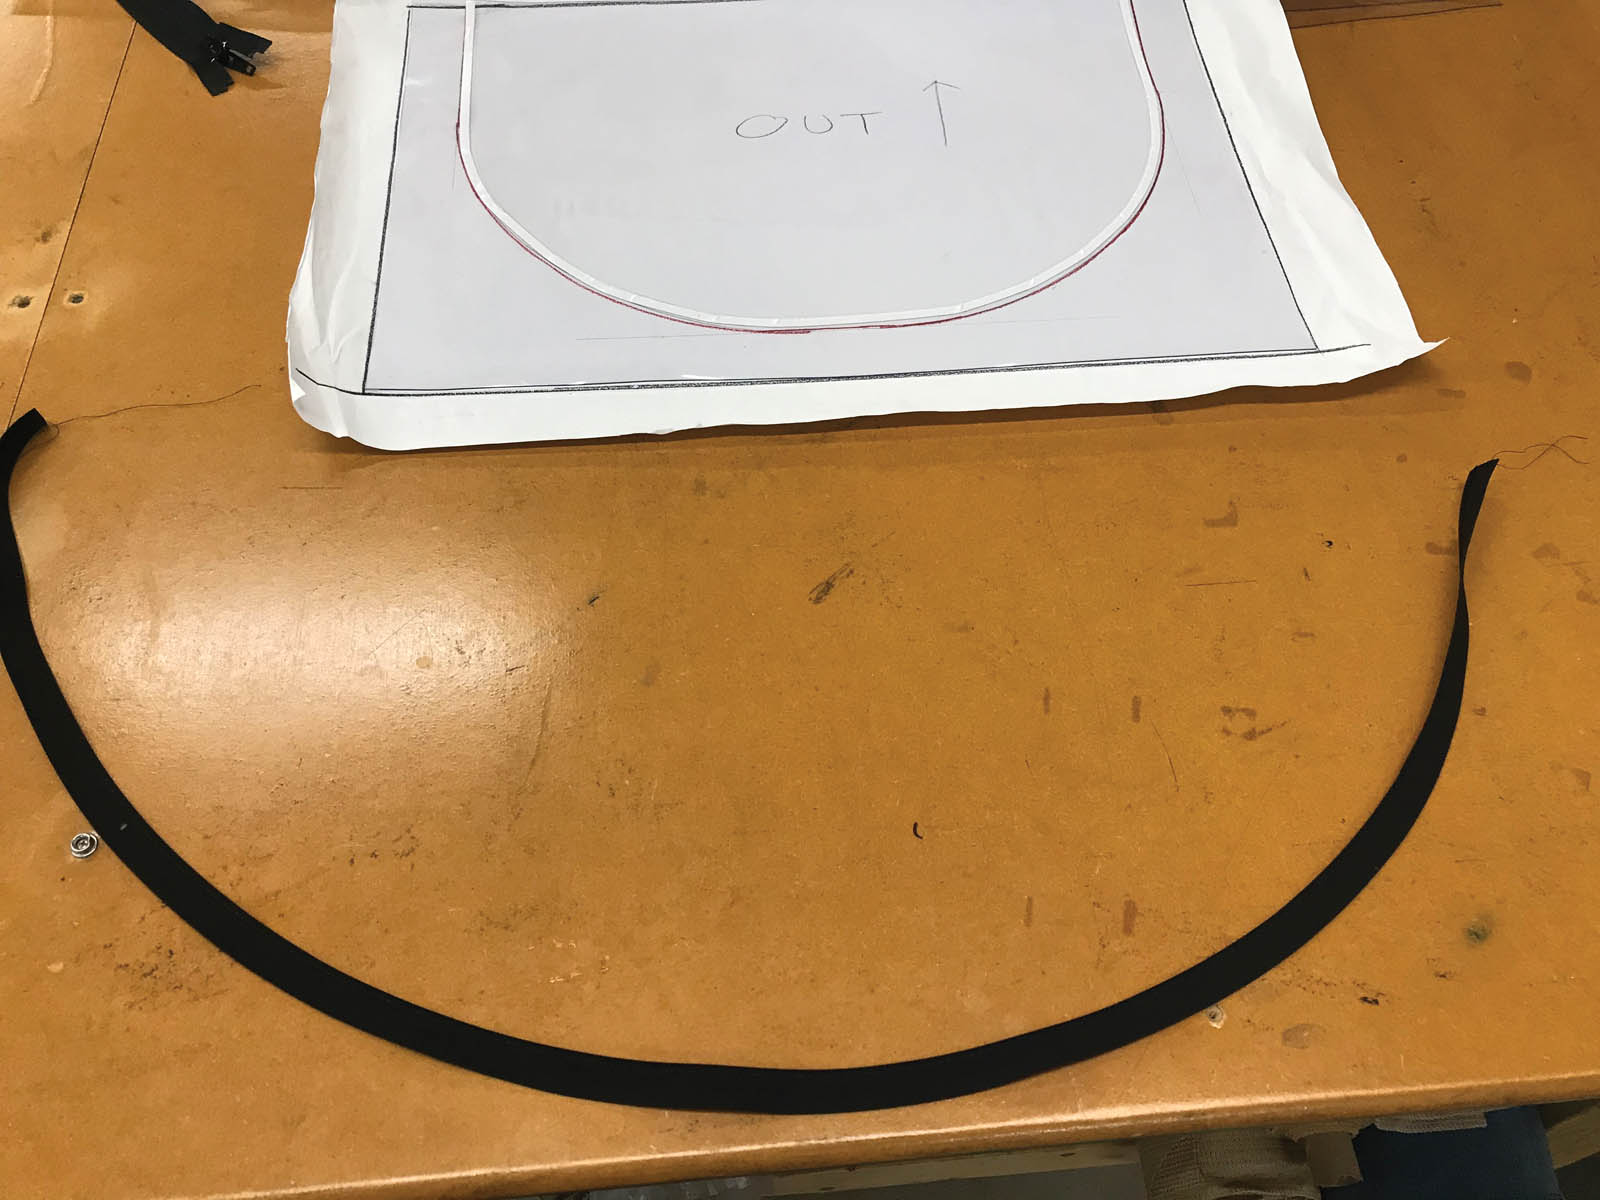
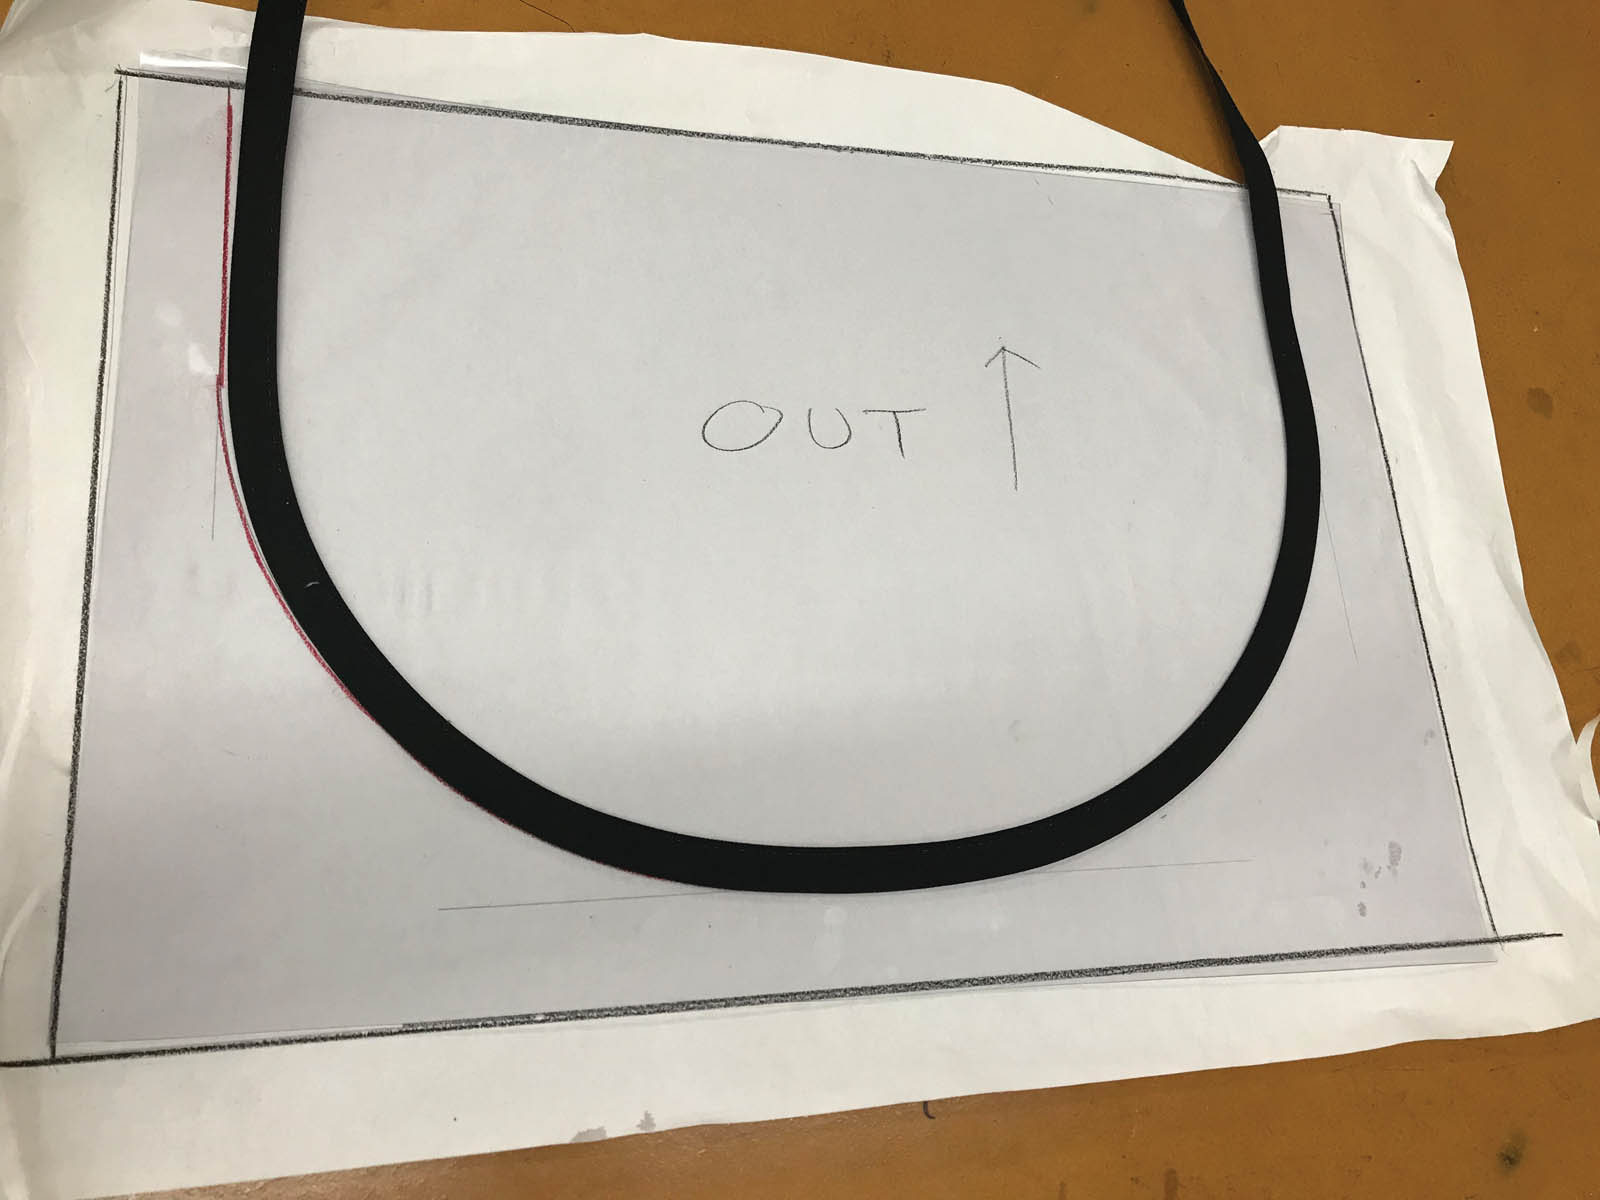
- Place clear vinyl on the outside of the pattern and lay ¼-inch tape just inside of the outside edge of the U-zip (Photo 1).
- Be careful not to stretch the tape as it’s applied because this will distort the vinyl.
- Be careful not to let the tape hang over the edge.
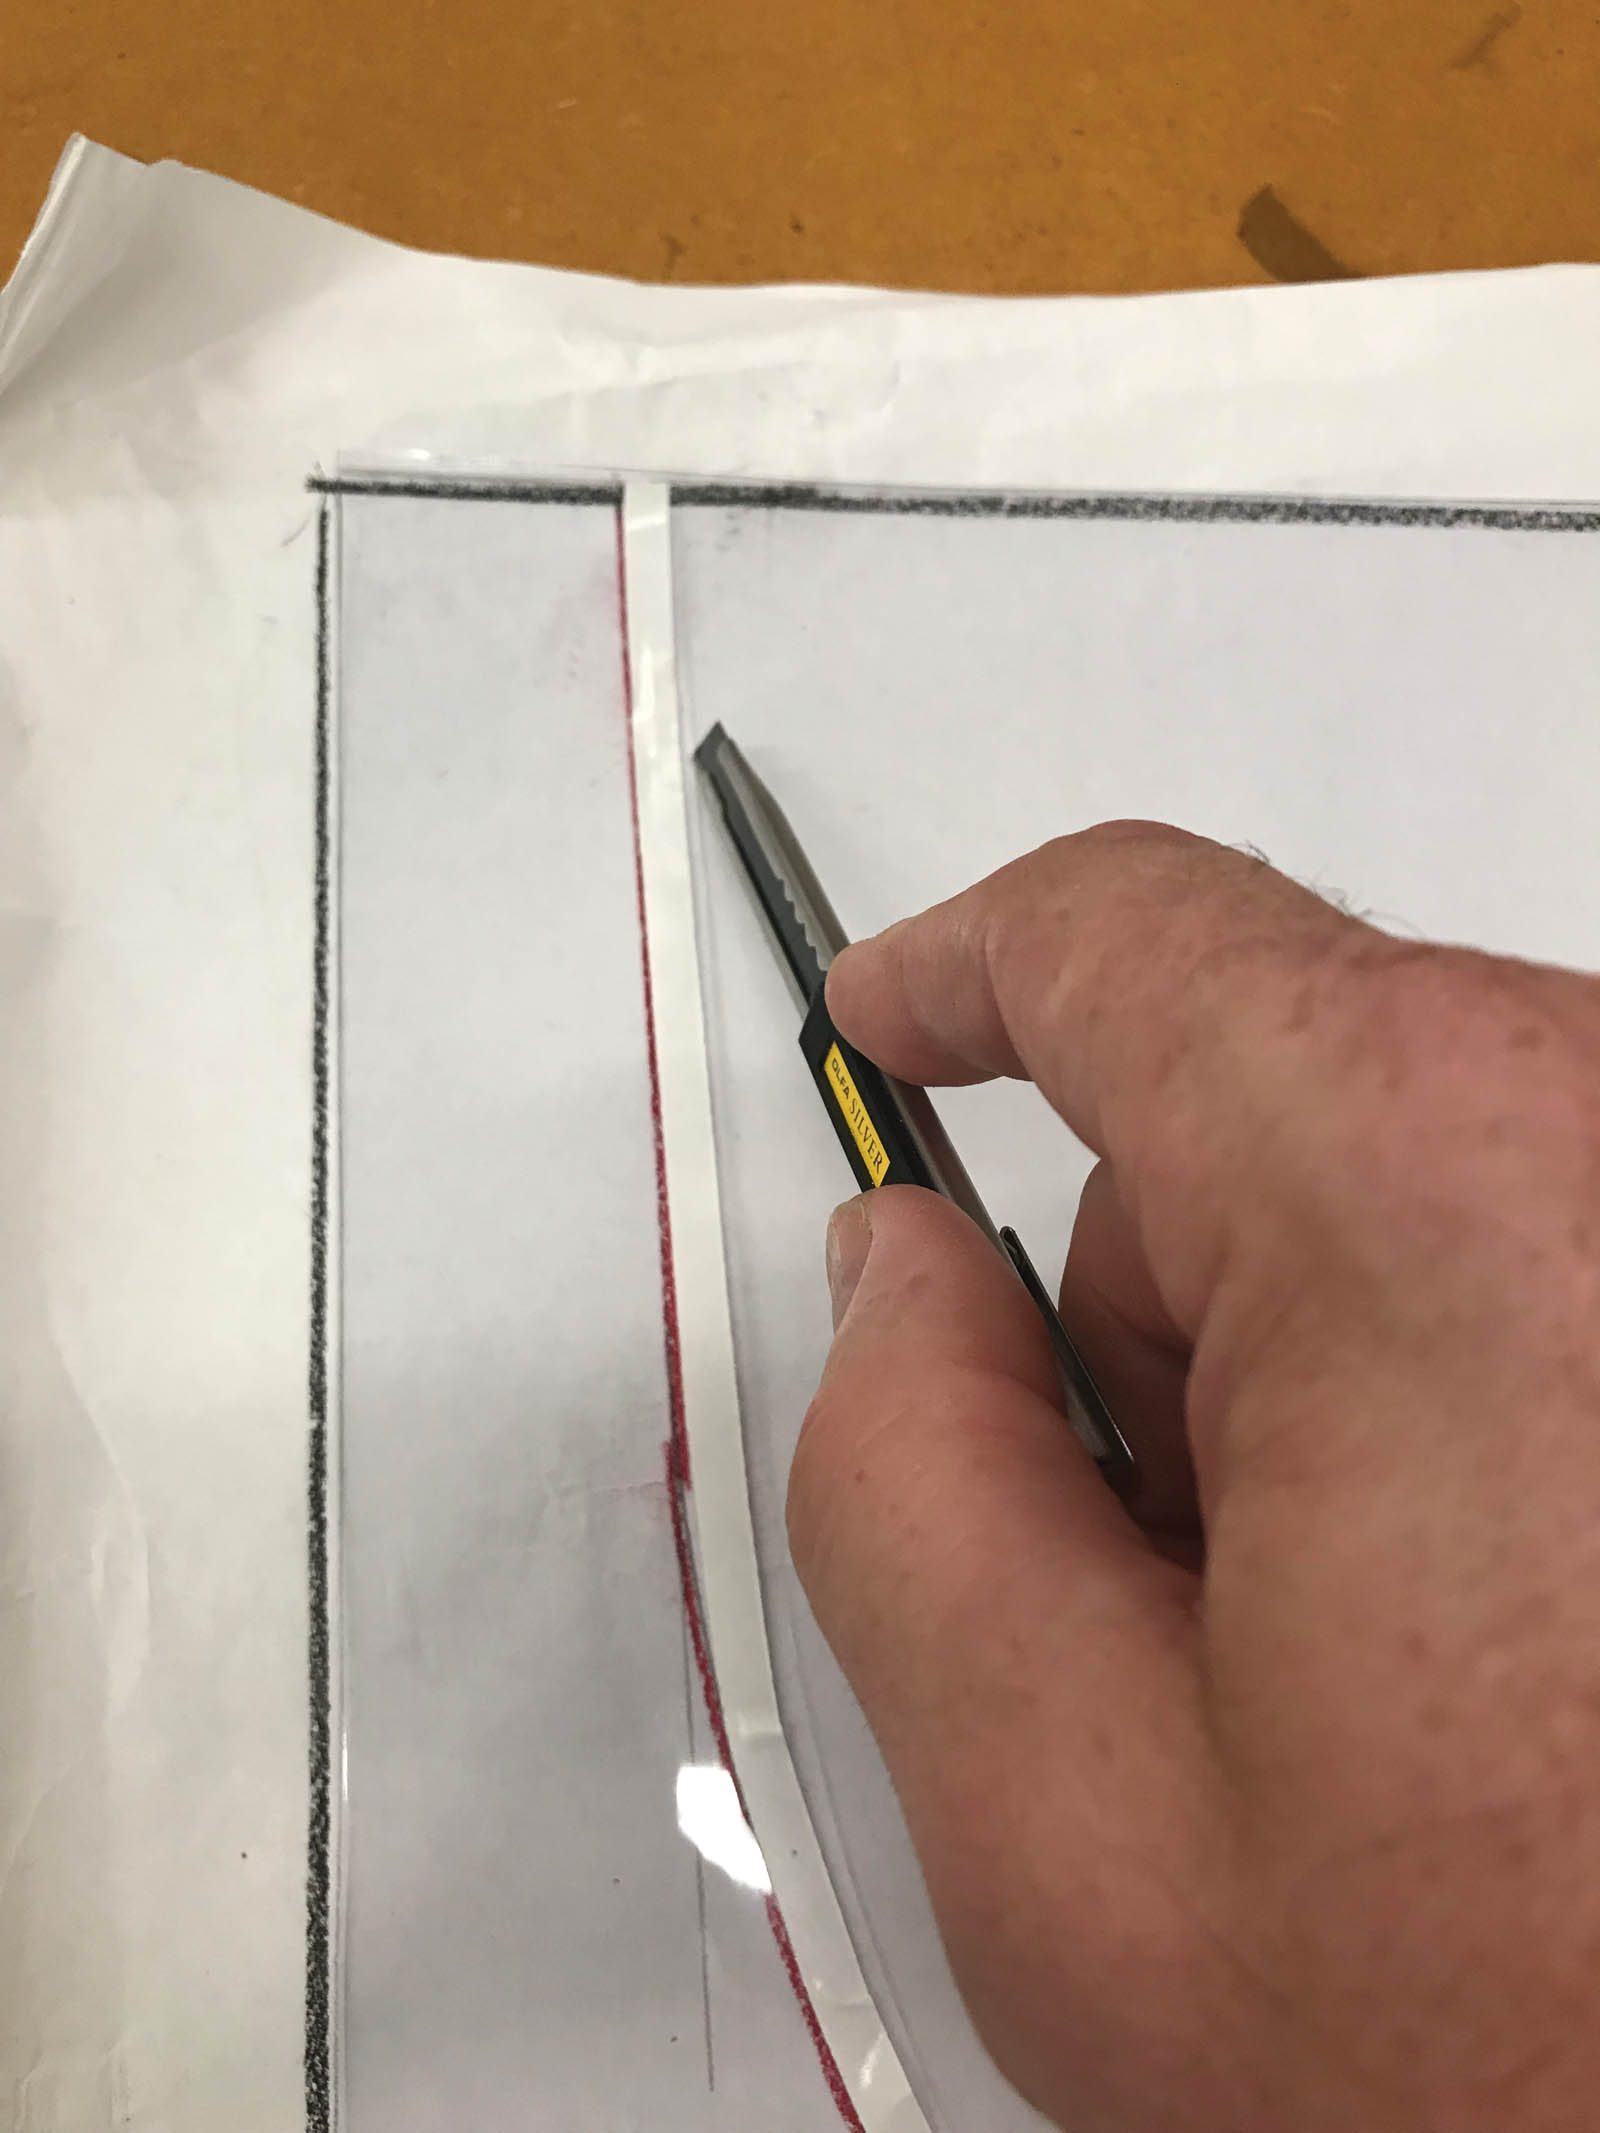
- Score the vinyl with a sharp razor blade on the inside edge of the 1/4-inch tape (Photo 2). DO NOT CUT THROUGH—JUST SCORE.
Binding prep
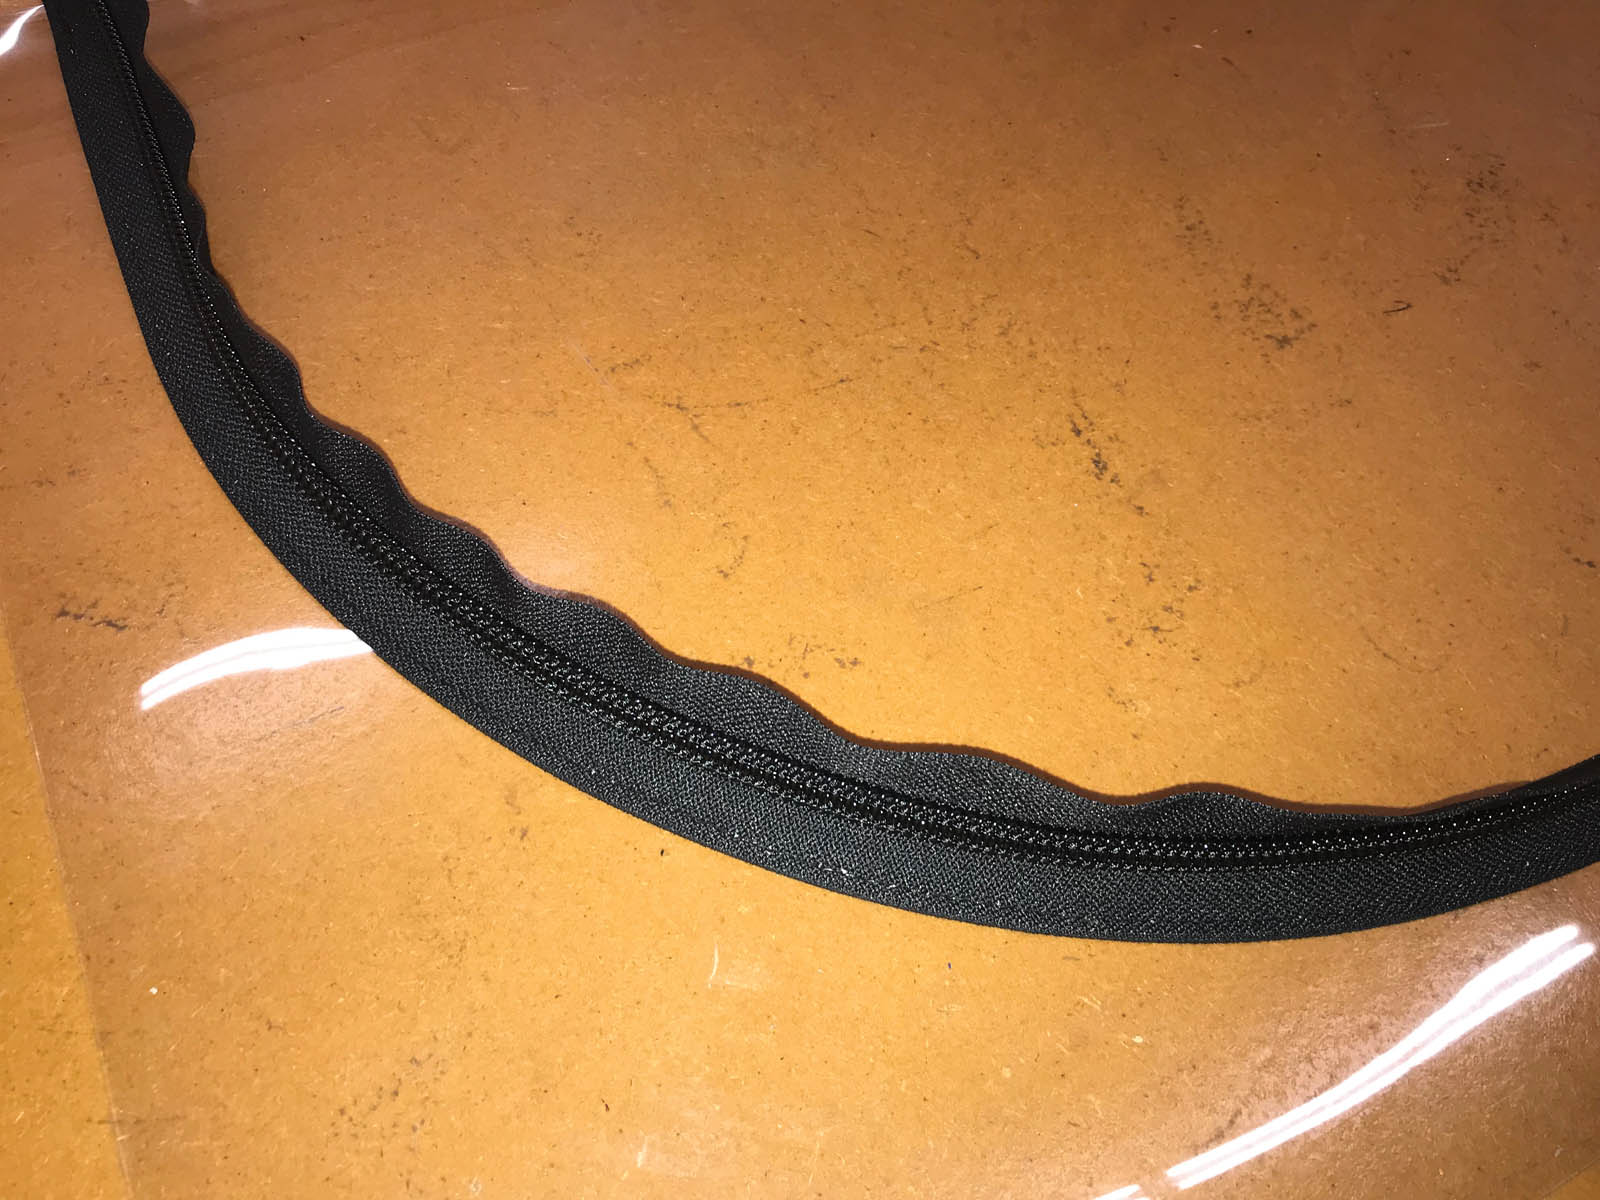
- Cut one piece each of 3/4-inch and 1 and 1/4-inch bias binding a few inches longer than the U-zip length.
- Add a “gathering stitch” on the inside curve of both pieces of binding (Photo 3).
- Use the natural curve of the binding to your advantage, and sew through the folded edge while adding a little extra thread tension by pinching it where it goes into the machine.
- Tape the 3/4-inch binding on the outside edge of the U-zip while the clear is still on the pattern (Photo 4).
SIDEBAR: Sewing procedures
Position the panel with the inside facing up (¾-inch binding should be facing down).
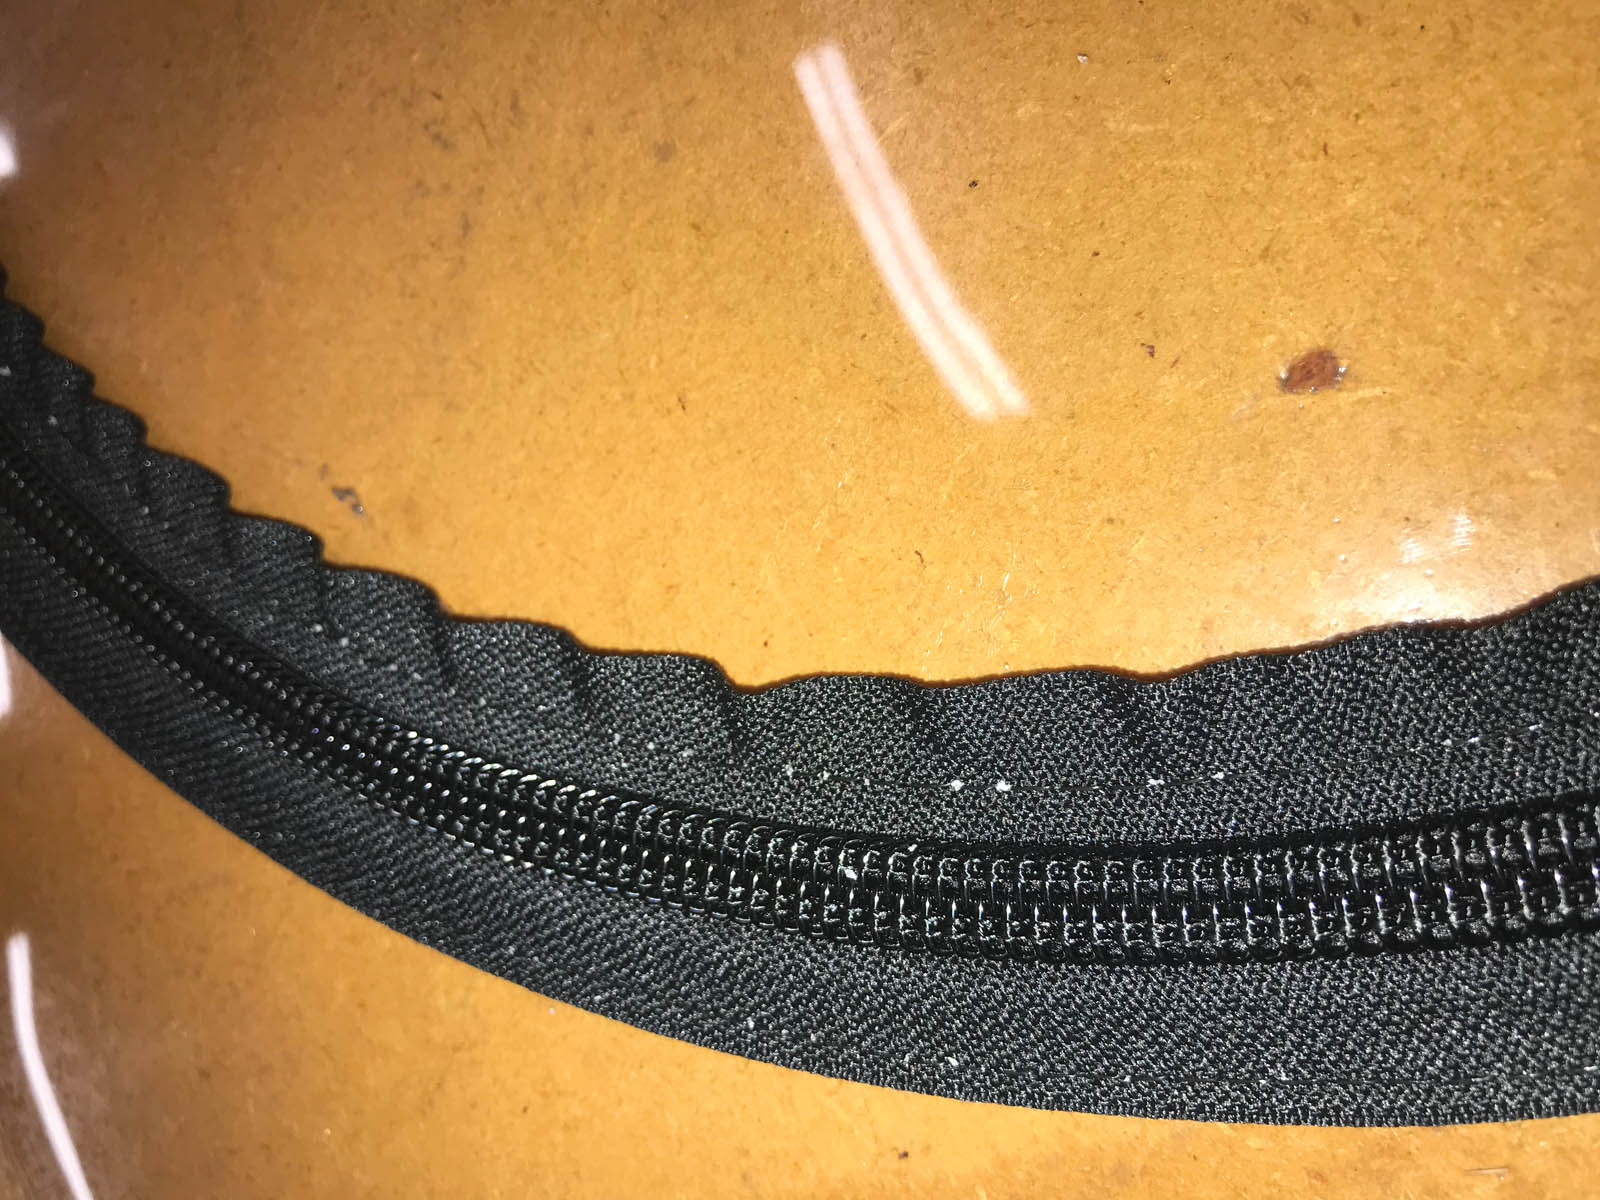
Line up the edge of the zipper with the outside edge of the 3/4-inch binding and stitch it down on the edge of the zipper. Pull the zipper tape very slightly when approaching the corner and try to keep the zipper teeth as flat as possible (Photo 1).
Stitch the inside curve of the zipper, staying as close to the zipper teeth as possible, while pushing the zipper teeth flat (Photo 2).
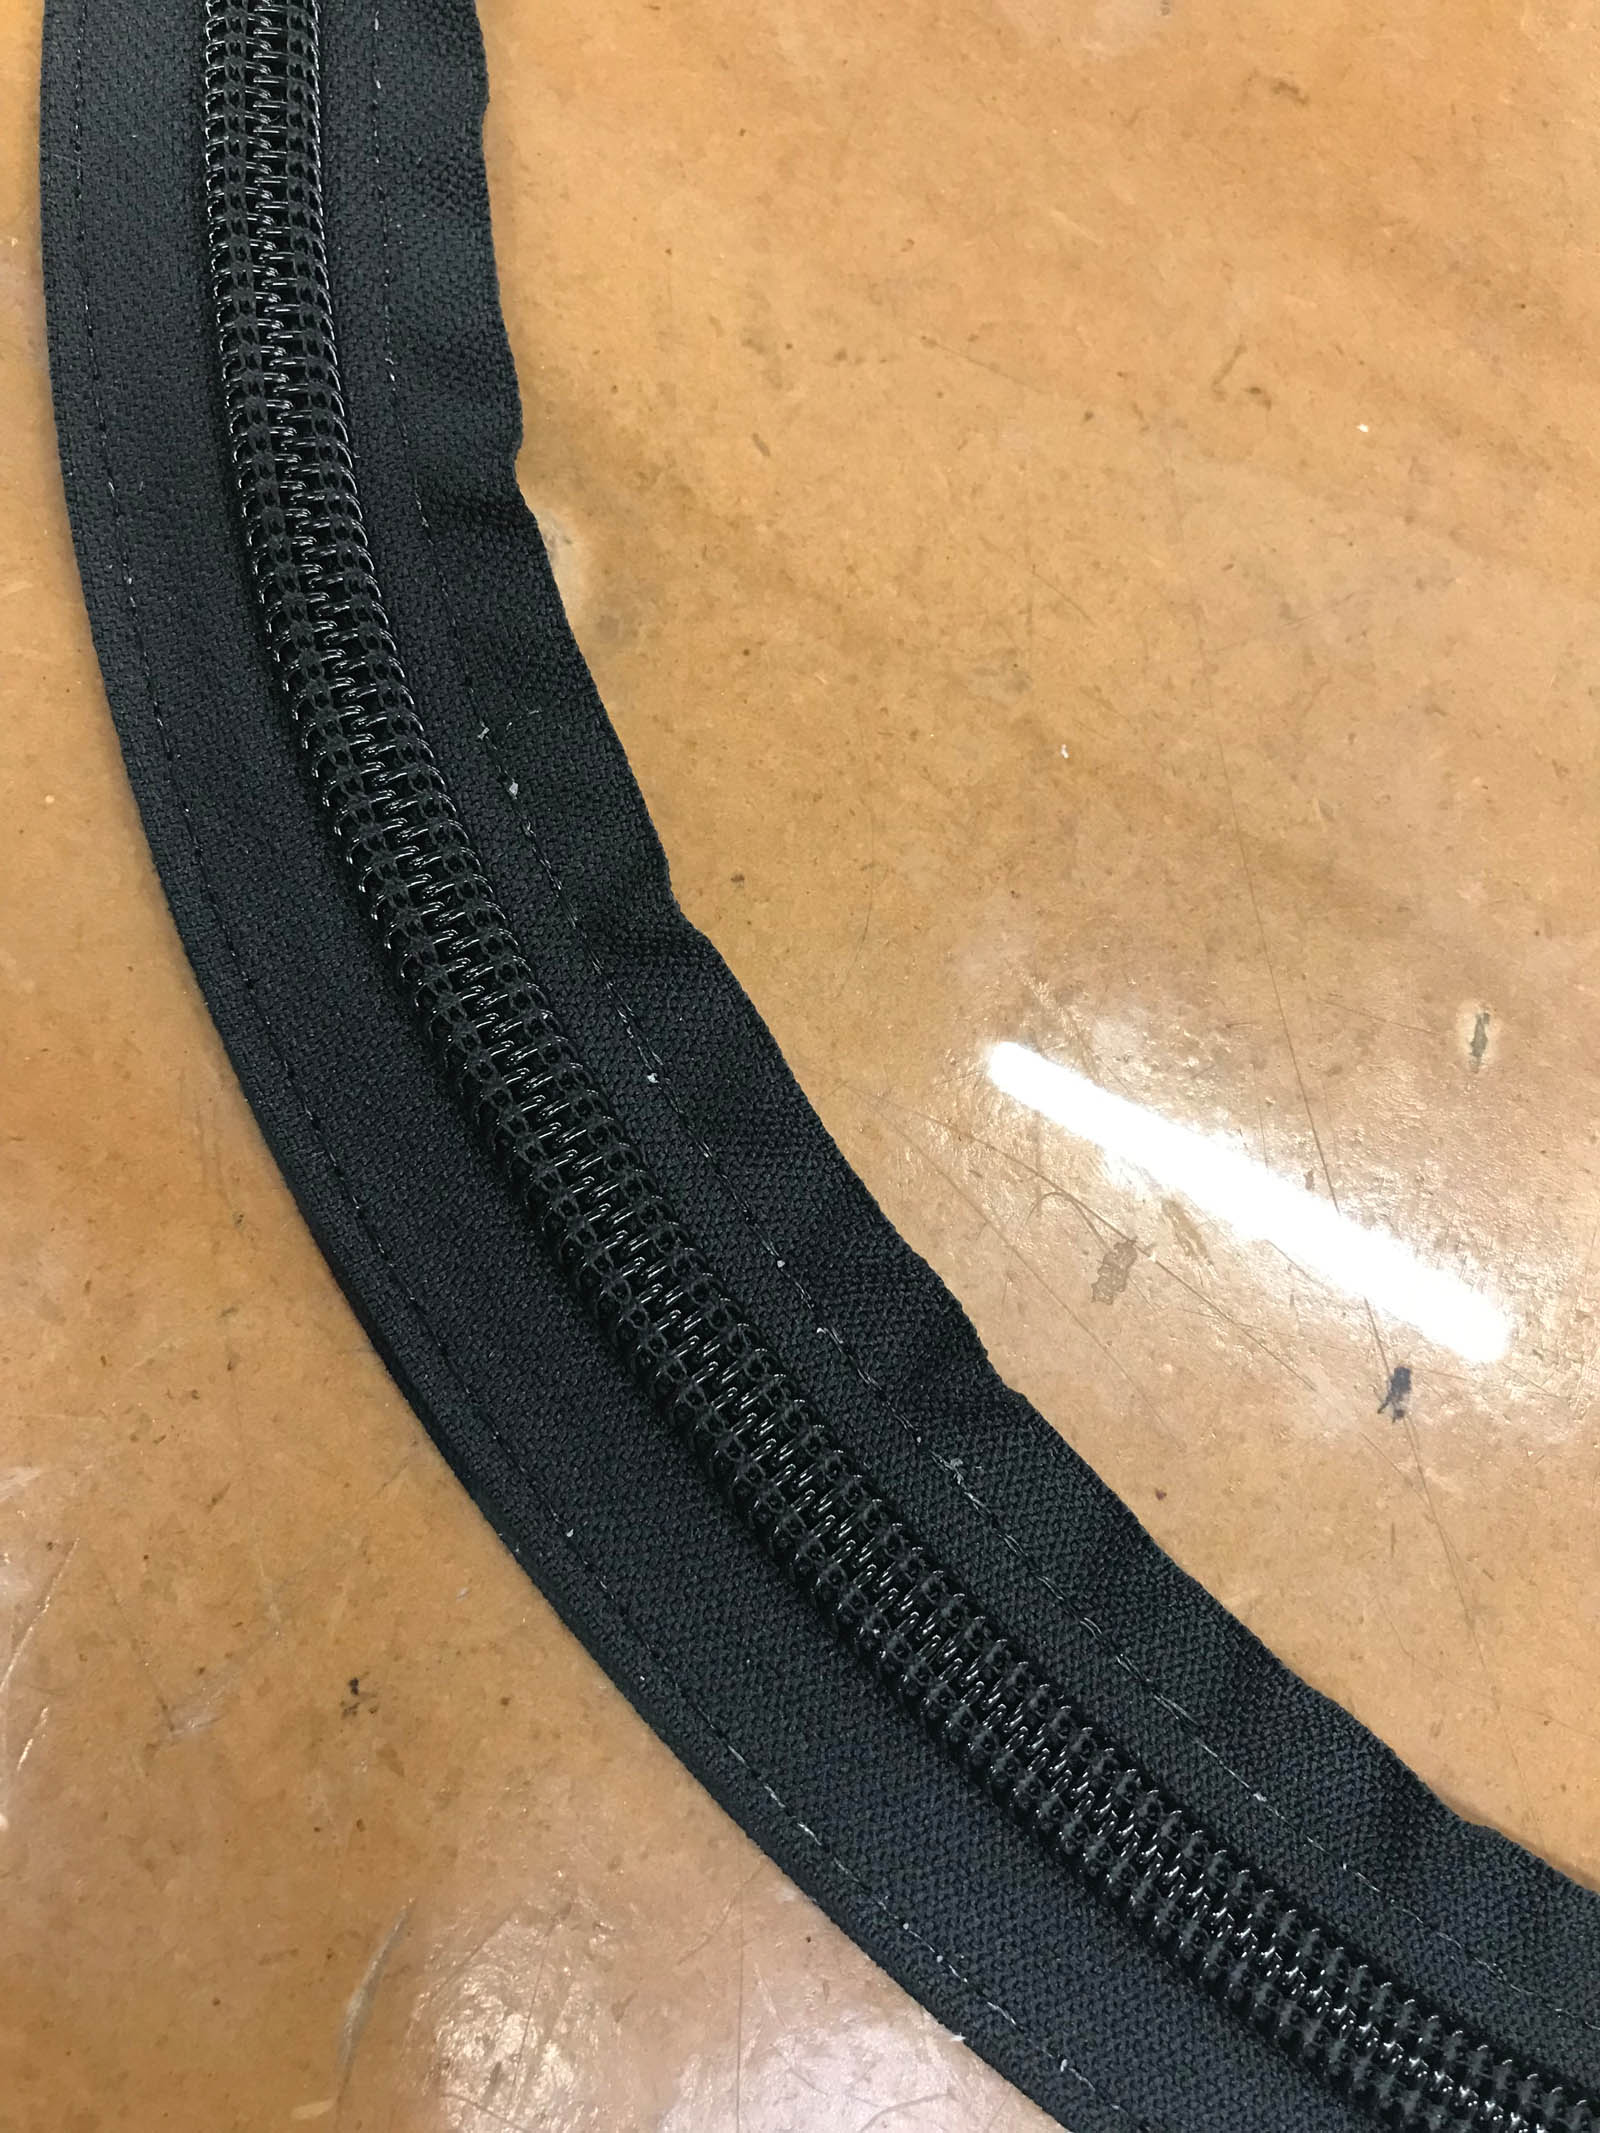
Ignore the “bacon edge” of the inside curve of the zipper tape (Photo 3).
Flip the panel over so the outside is facing up and stitch the inside edge of the 1 and 1/4-inch binding down, lining up with the inside edge of the zipper. You will be sewing through the gathering stitch you made in the binding prep stage (Photo 4).
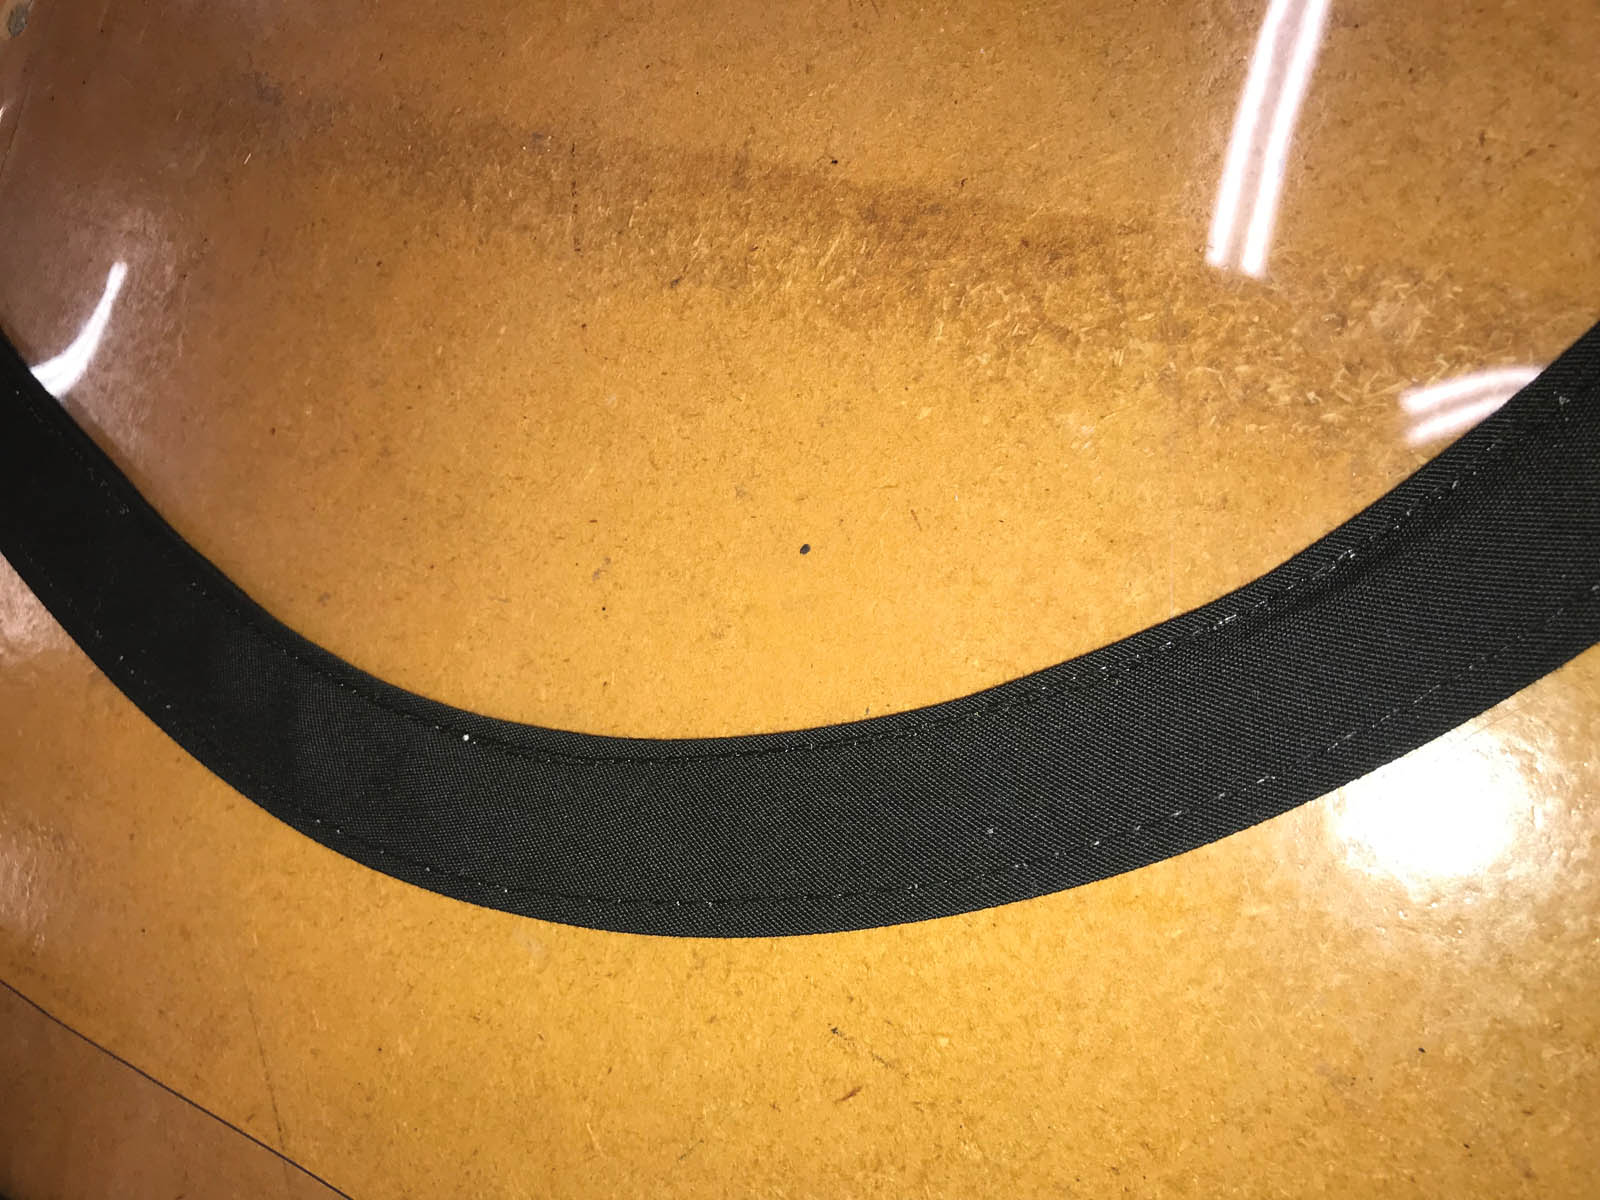
Put tension on the panel back as you approach the corner and force the sewing machine feed dogs to smooth out the bacon-edge wrinkles in the zipper tape.
Flip the panel over so that the inside is facing up.
Mark the zipper with match marks, separate the zipper and peel the clear vinyl apart on the scored line you made earlier with the razor blade.
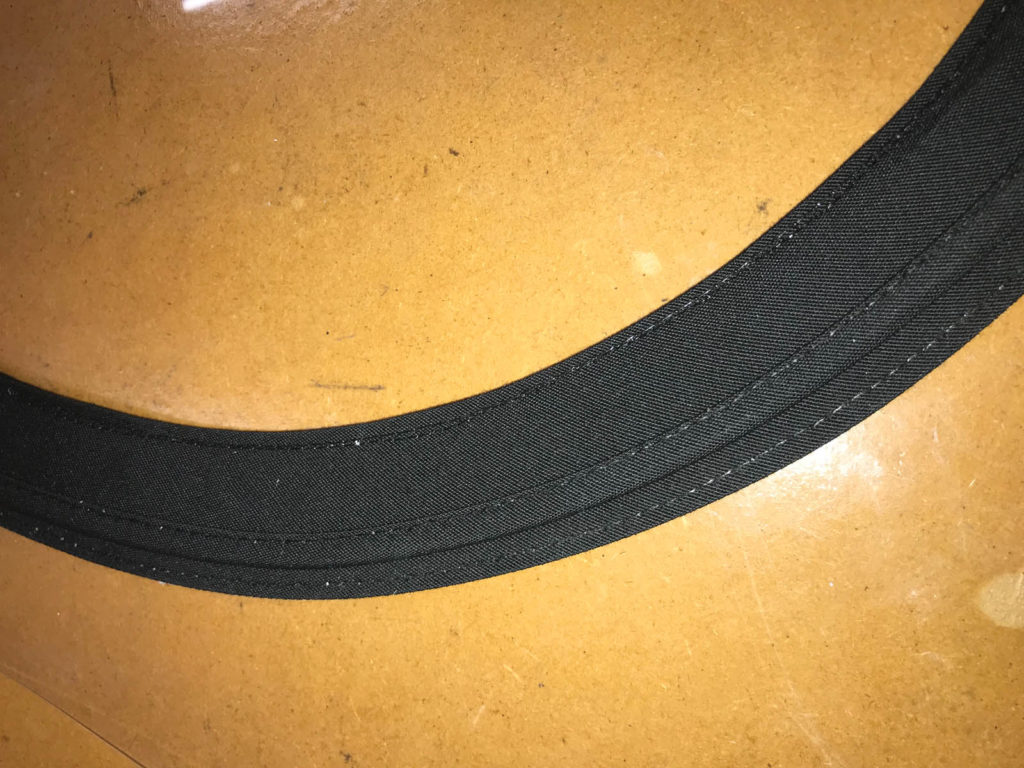
With the insert and body separated, stitch the outside zipper and 3/4-inch binding close to the zipper teeth.
Stitch the outside edge of the 1 and 1/4-inch binding to the edge of the clear vinyl.
Bind the outside edge of the 1 and 1/4-inch binding with 3/4-inch binding (Photo 5).
Line up the zipper match marks and add two zipper sliders (zip both to the center).