TEXTILES.ORG
 Enclosure fabrication details
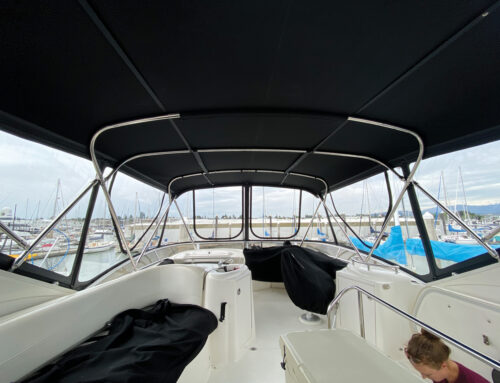
Interior shot of a recent Hood Bimini Enclosure. Notice the clean uncluttered look and maximum visibility made possible by our large binder.
At Hood Canvas, we have a unique method of fabrication that we teach to our students. Many shops around the world are now using our specialized large binder in their shops on a daily basis. This article will provide additional details into the way we reduce the time necessary to produce quality enclosures using our large binder. In addition, diagrams with explanations will provide additional insight.
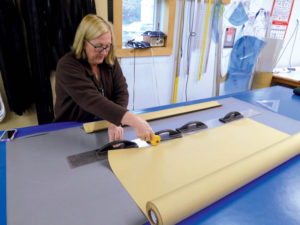
Deb is cutting the 40-50 4-inch-wide strips necessary for the average 10-piece enclosure. We use these strips in our large binder to install the tops and sides of all our enclosure pieces. Deb does this in short order using a rolling wheel cutter, width stick and self-healing matt. Notice the strips are being cut along the weft of the fabric, selvage edge to selvage edge. The 4-inch strips finish to 1½ inches wide at the output end of our binder. This is the width of a #10 zipper so we can overlap and hide the zippers from view.
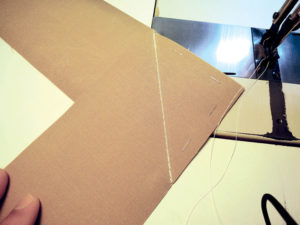
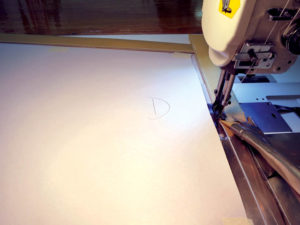
The strips Deb has cut are 60 inches long with 60-inch fabric. To get longer strips, they need to be joined at right angles to reduce bulk. To do this, we staple two 60-inch strips at right angles to each other. Then we draw a line from outside corner to outside corner as in the photo.
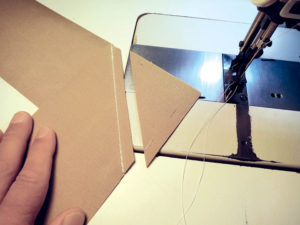
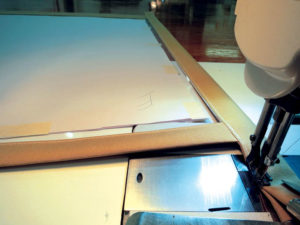
In this photo, we have stitched along this line and cut the corner off to approximately half an inch from the line.
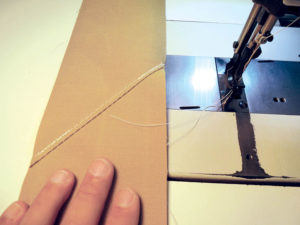
We have turned the hem to the back side and topstitched to complete the extension. Many shops already do this on a smaller scale when joining their welt strips together.
Here we are using our large binder to install the vertical edges onto our enclosure panel. They feed directly on with no seam tape or stapling involved. When using extended strips they need to feed into the binder with the cut side of the hem facing the operator to prevent snagging in the binder. Our large binder attaches with one screw so it is easy to put on and off in seconds. No other changes to the sewing machine are needed other than to drill and tap a 5mm thumb screw hole into the deck of the machine. Using the binder’s built-in adjustment, position so the needle is at least one inch from where the fabric exits the binder. Then adjust left to right so the needle stitches just inboard of the left edge of the strip exiting the binder.
We like to start our binding off the enclosure and run onto the enclosure and off again as in the photo. With the inch of free space, we can back tack with no problem. By running strips through the binder by themselves we make up all of our roll-up straps. Just add a stitch to the other side and cut to length. Notice that we add the top binding strip first, then overlap the vertical binding strips.
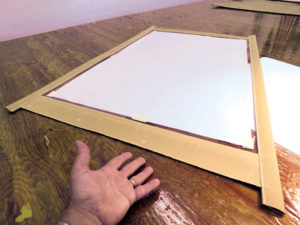
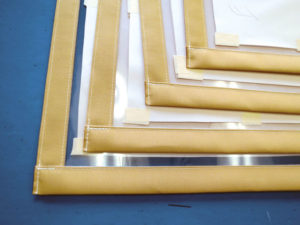
In this photo, the vertical strips are installed. It takes us about an hour and a half to install all the tops and sides on a 10-piece enclosure.
While we are at it, we made up some replacement screen panels. We find it is faster using our binder to make up identical interchangeable panels. Adding detail by combining clear and screens on one panel takes up too much time and adds weight. In the photo, we have trimmed the vertical strips even with the top and bottom of our enclosure pieces.
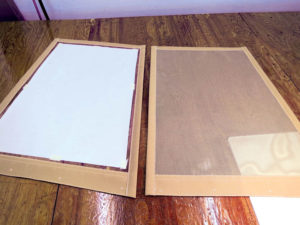
The completed enclosure pieces. Here we have added a stitch along the top edge of each panel and heated the tops of the vertical strips so they will not fray.
The identical screen replacement panels with binding added to the bottom edge. We install the zippers on our screen panels so they exactly match our clear panels. In this way our customers can mix and match clear and screen panels in whatever combination suits them. Our customers love this feature.

Mark Hood, MFC, and his wife, Deb, own and operate Hood Marine Canvas and Hood Marine Canvas Training Workshops in Merrimac, Mass. For more information and to purchase the large binder seen in these articles, visit www.hoodcanvas.com, email mark@hoodcanvas.com or visit the Facebook page.