TEXTILES.ORG
 Outside patterning techniques
When you’re re-covering built-in boat furniture, you can never have too many techniques tucked into your upholstery toolbox. Many fabricators use the same techniques every time, while others enjoy adapting and changing things up a bit.
During the first half of my career, I patterned built-in boat upholstery either by creating new patterns from steamed foam once the skins were removed, or by using the skins themselves as patterns. Somewhere along the line, I began taking patterns directly from the outside of the furniture before tearing down the cushion.
pattern was taken.
What I enjoy most about this style of patterning is the ability to visualize problems with the old cushions while keeping the skins intact for the sewers. Keeping the skins intact makes it so much easier to understand the cushion assembly for sewing. I also like being able to make notes and line-up marks directly on the vinyl cushion.
Reupholstering older boats is a time-consuming and challenging endeavor, and it’s always helpful to be able to speed up this process without compromising quality.
*Note: It’s not uncommon to use more than one patterning method on a boat, but this article will just be discussing outside patterning.
Assess existing cushions
Start your patterning project by taking photos or a video recording of the boat before removing the furniture. This will allow you to catch problems that need correction and make notes directly on the vinyl for future reference.
Things to observe and note include:
- Pattern line-up problems such as design flow irregularities from one cushion to another.
- Segmented cushions with pull-down tabs inside that don’t line up as they move from seat to seat.
- Shrunken or ill-shaped corners, etc.
Once the cushions are in the shop and you begin the patterning process, examine each cushion again for any problems that need correcting. You especially want to be on the lookout for shrunken corners and wacky seams. Make your corrections and line-up marks on the cushion and plan to transfer them onto the plastic while patterning.
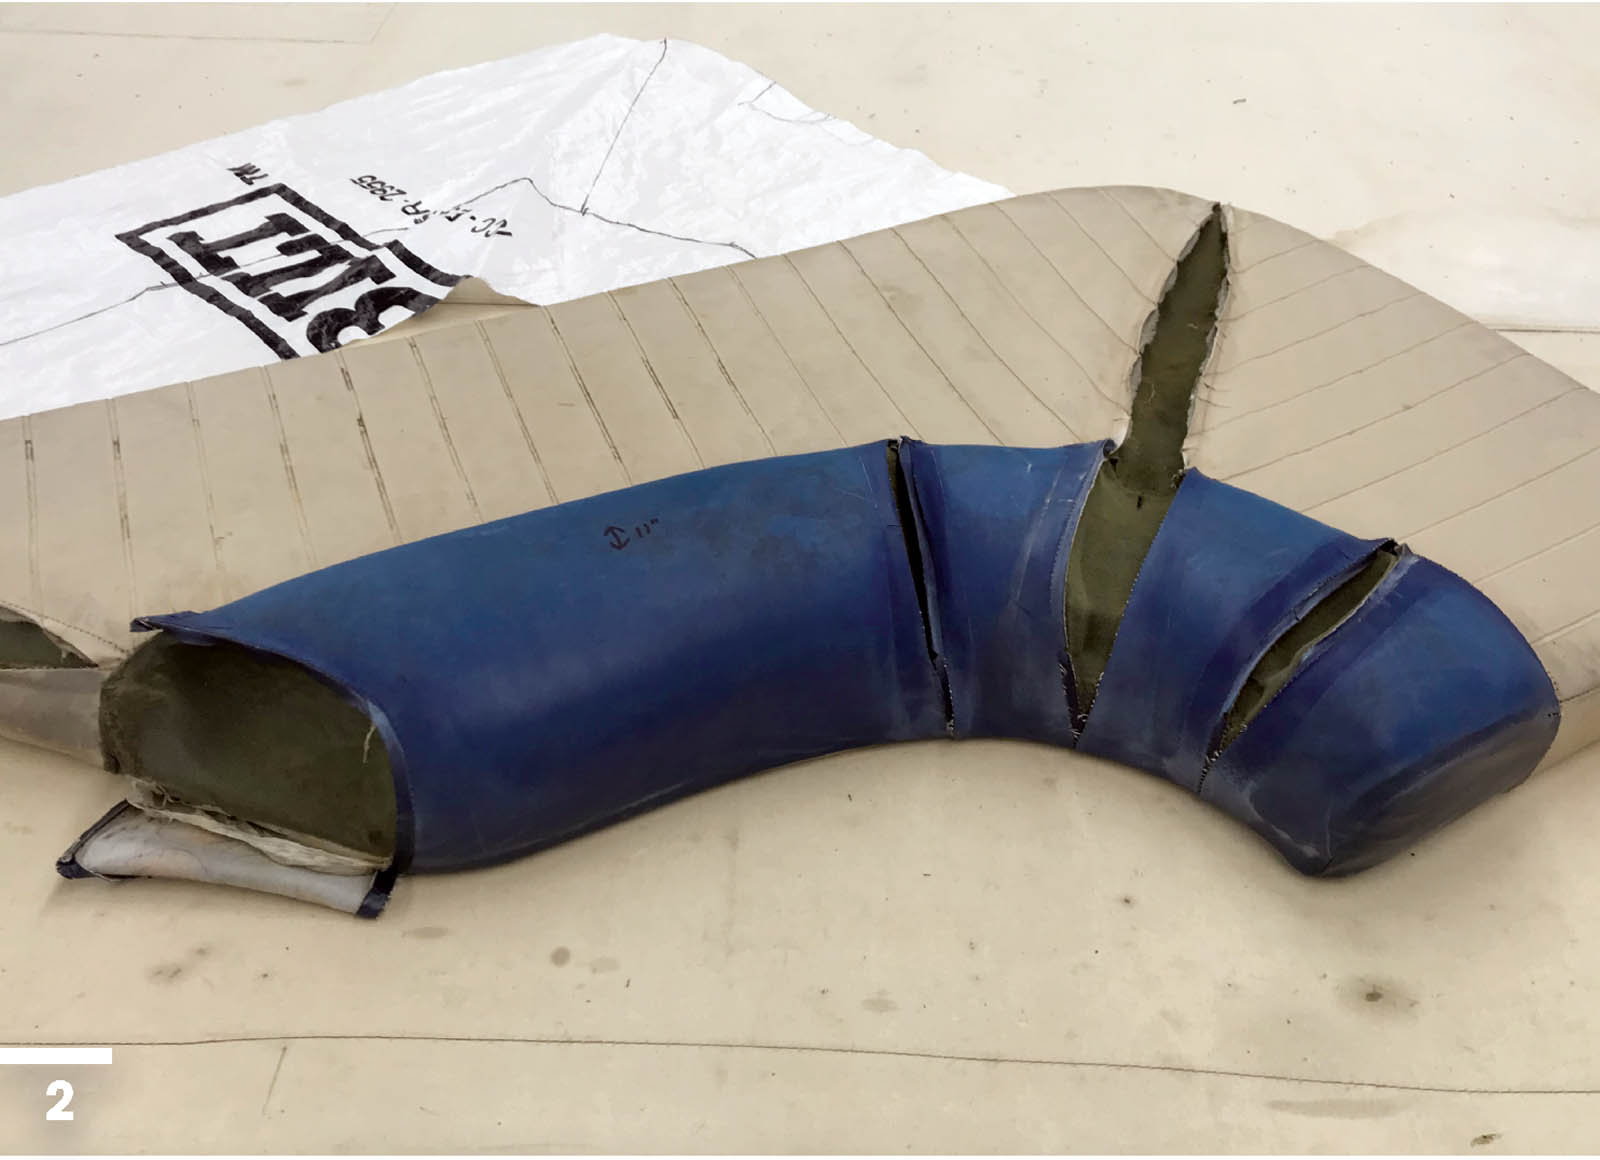
Once all corrections are noted, pin the plastic to the outside of the cushion. You will most likely be using multiple sections of plastic for different segments of the cushion, since pull-down tabs and other variations in cushion height will prevent the plastic from lying flat.

Transfer corrections carefully
Transfer all marks, design elements and line-up marks onto the plastic. Be sure to include any other notations you will need such as A to A, cushion numbers, top, direction marks, or color.
Once the plastic gets cut apart, you will need to know how to group the pattern pieces back together again as you prepare for sewing, so it’s important to be meticulous with your markings.
Tip: Remember, one of the benefits of this technique is having the original skin intact and available for viewing while sewing the new skin.

You will most likely be using multiple sections of plastic for different segments
of the cushion, since pull-down tabs and other variations in cushion height will prevent the plastic from lying flat.
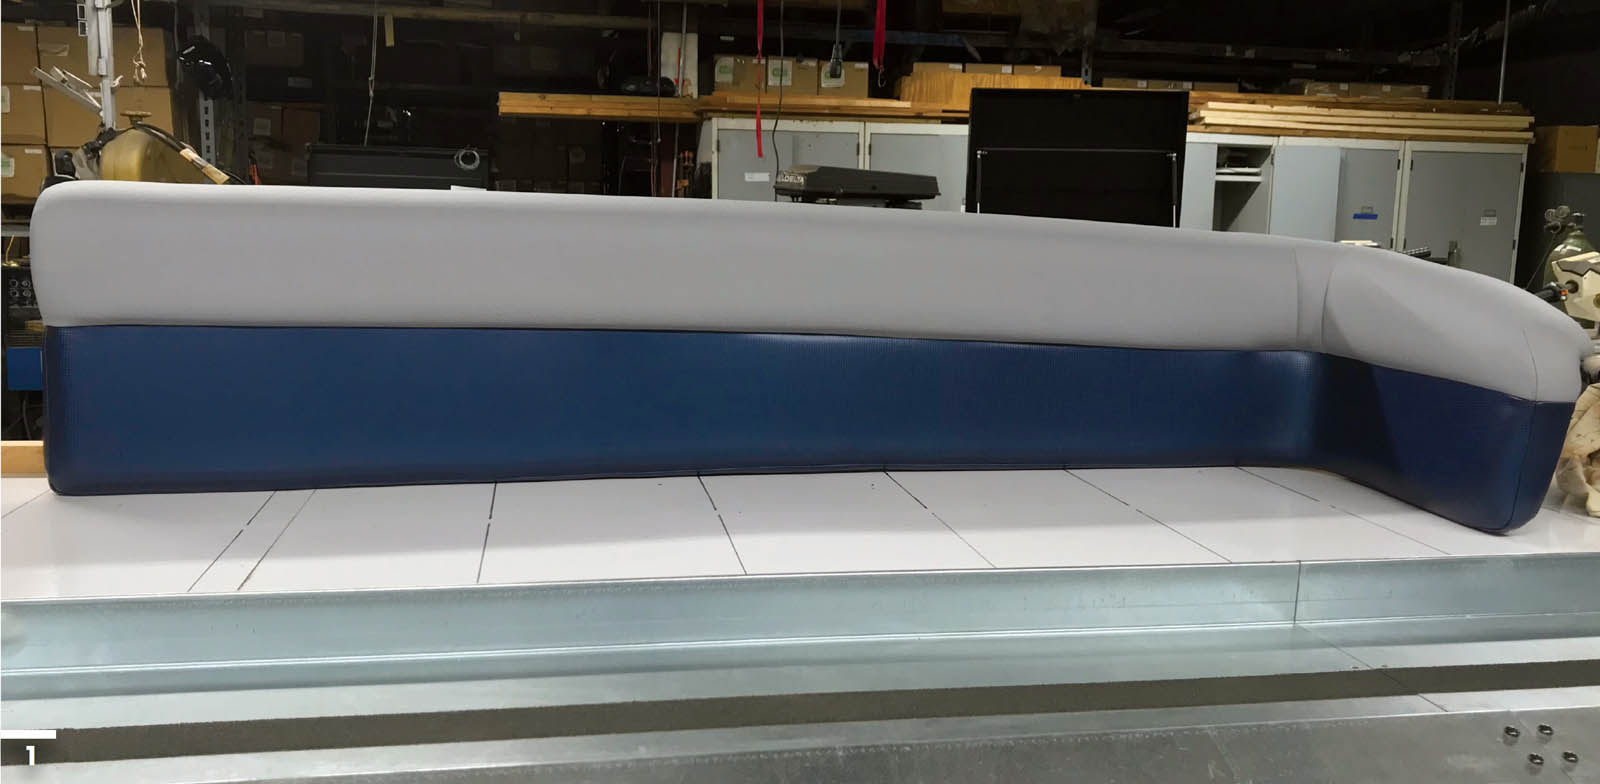
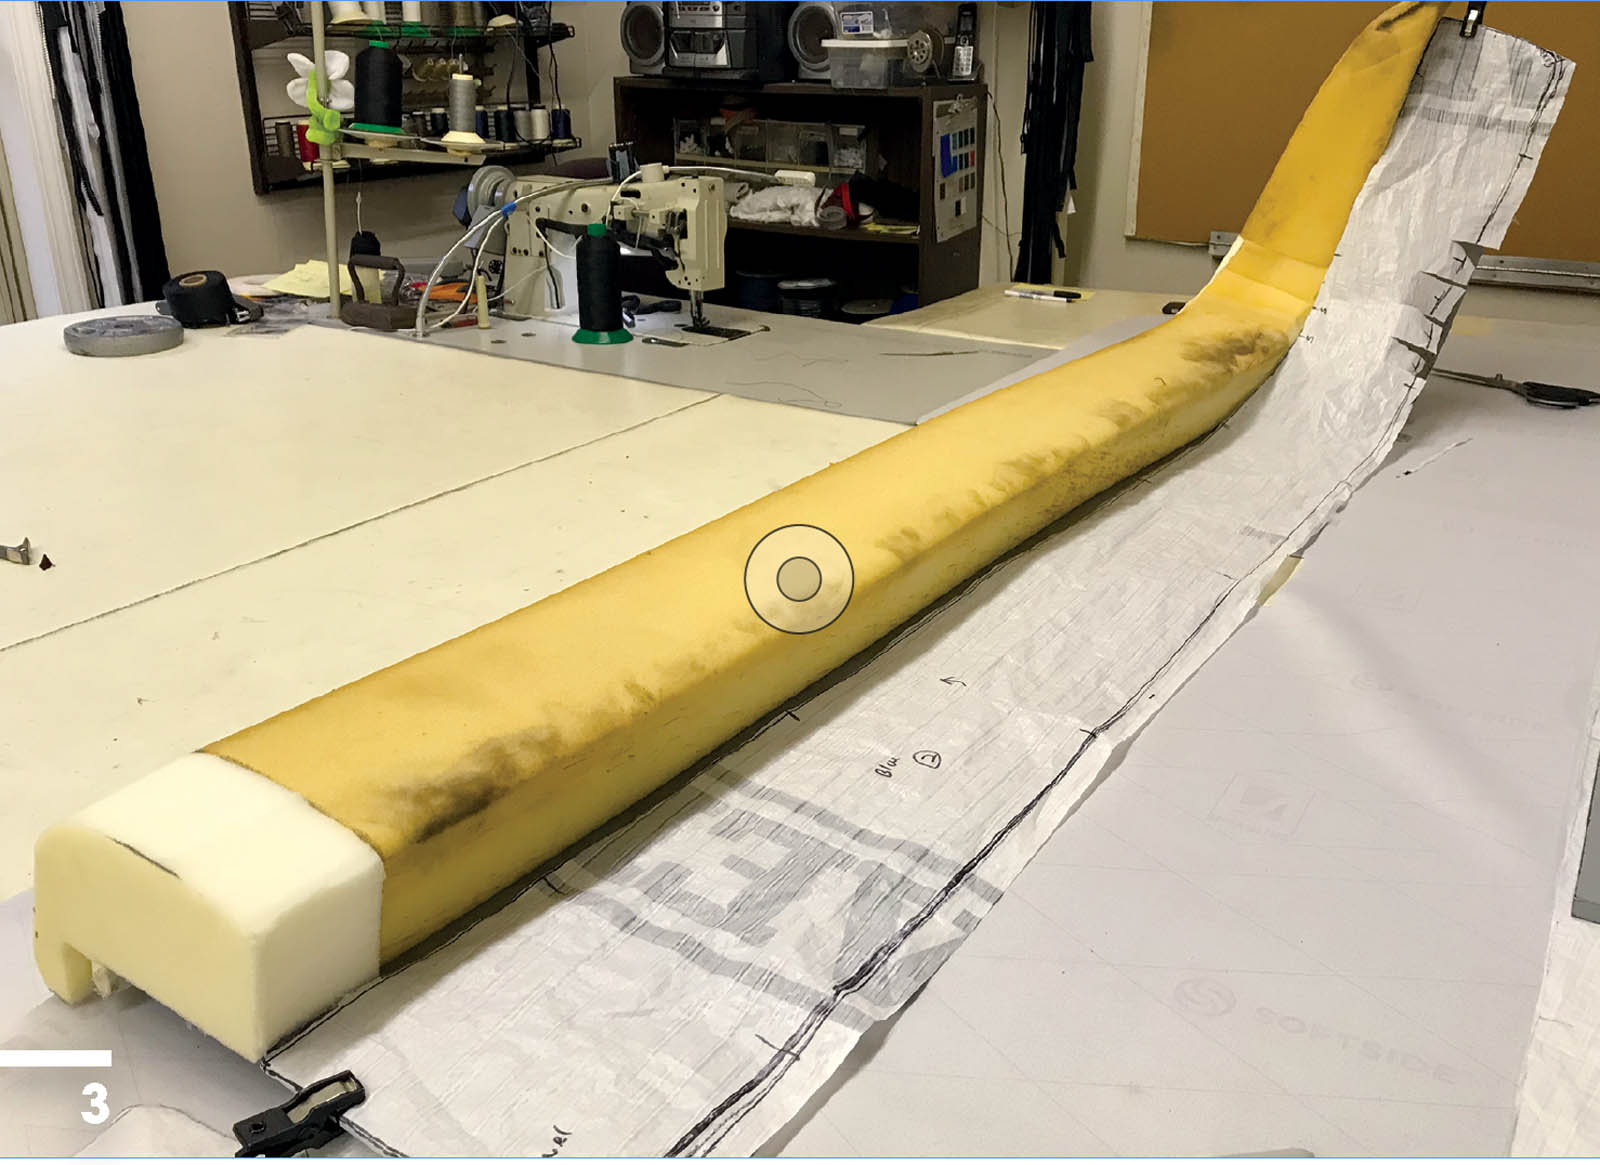
Flip the cushion over. If it’s a simple rectangle, just measure the wood and make measurement notes on the plastic. If it’s a complex shape, make a pattern of the bottom side. After cutting it out, lay it directly onto your topside pattern to further correct corners, etc. This step is important and is the secret to getting beautiful, high-quality results on cushions with complex shapes.
*Note: This is where experience helps you make judgment calls. For example, if I’m using old foam and it will not steam out all the way, I know that I may need to slant inwards 1/4 inch here or there to fill the edges better.
Assess the foam
Once the old skins have been removed and the foam steamed, you may need to make further decisions about foam replacement or splicing. Of course, we would all like to see old foam completely replaced due to mildew concerns and general appearance, but depending on the boat owner’s budget, that may not always be possible.
*Tip: If you need to slice off a corner and rebuild it because the foam is not responding to steam, consider using firmer foam in the corner you’re replacing.
When it’s done correctly, you can achieve remarkable results by using firmer foam on the outer edges. This technique is especially helpful when the area has a funky shape or point, and more foam is needed to fill out the fabric.
Make final corrections
Finally, before cutting out your top plastic pattern, spend the time to correct line discrepancies and other issues. You will want to correct dips in the seams and clean up any inconsistencies.
*Tip: If you have a U-shaped seating area or back cushions that sit next to one another on the boat, be sure to lay your patterns out and make sure everything matches up cleanly and evenly before cutting out the plastic pattern, and especially before cutting the vinyl.
With a little practice, this method can provide quick and easy patterns to work from. Once your patterning is completed, you can pass the cushions on to your prep team for teardown.
Tammy Hampton is the owner of Cover Girl Marine Canvas & Upholstery in Buford, Ga., and the inventor of EZ-Xtend Boat Zippers. Started in 1988, Cover Girl specializes in high-quality boat canvas, marine upholstery and specialty covers for the race industry along with prototyping and many other specialty custom creations.