TEXTILES.ORG
 Seam finishing for cushions and covers
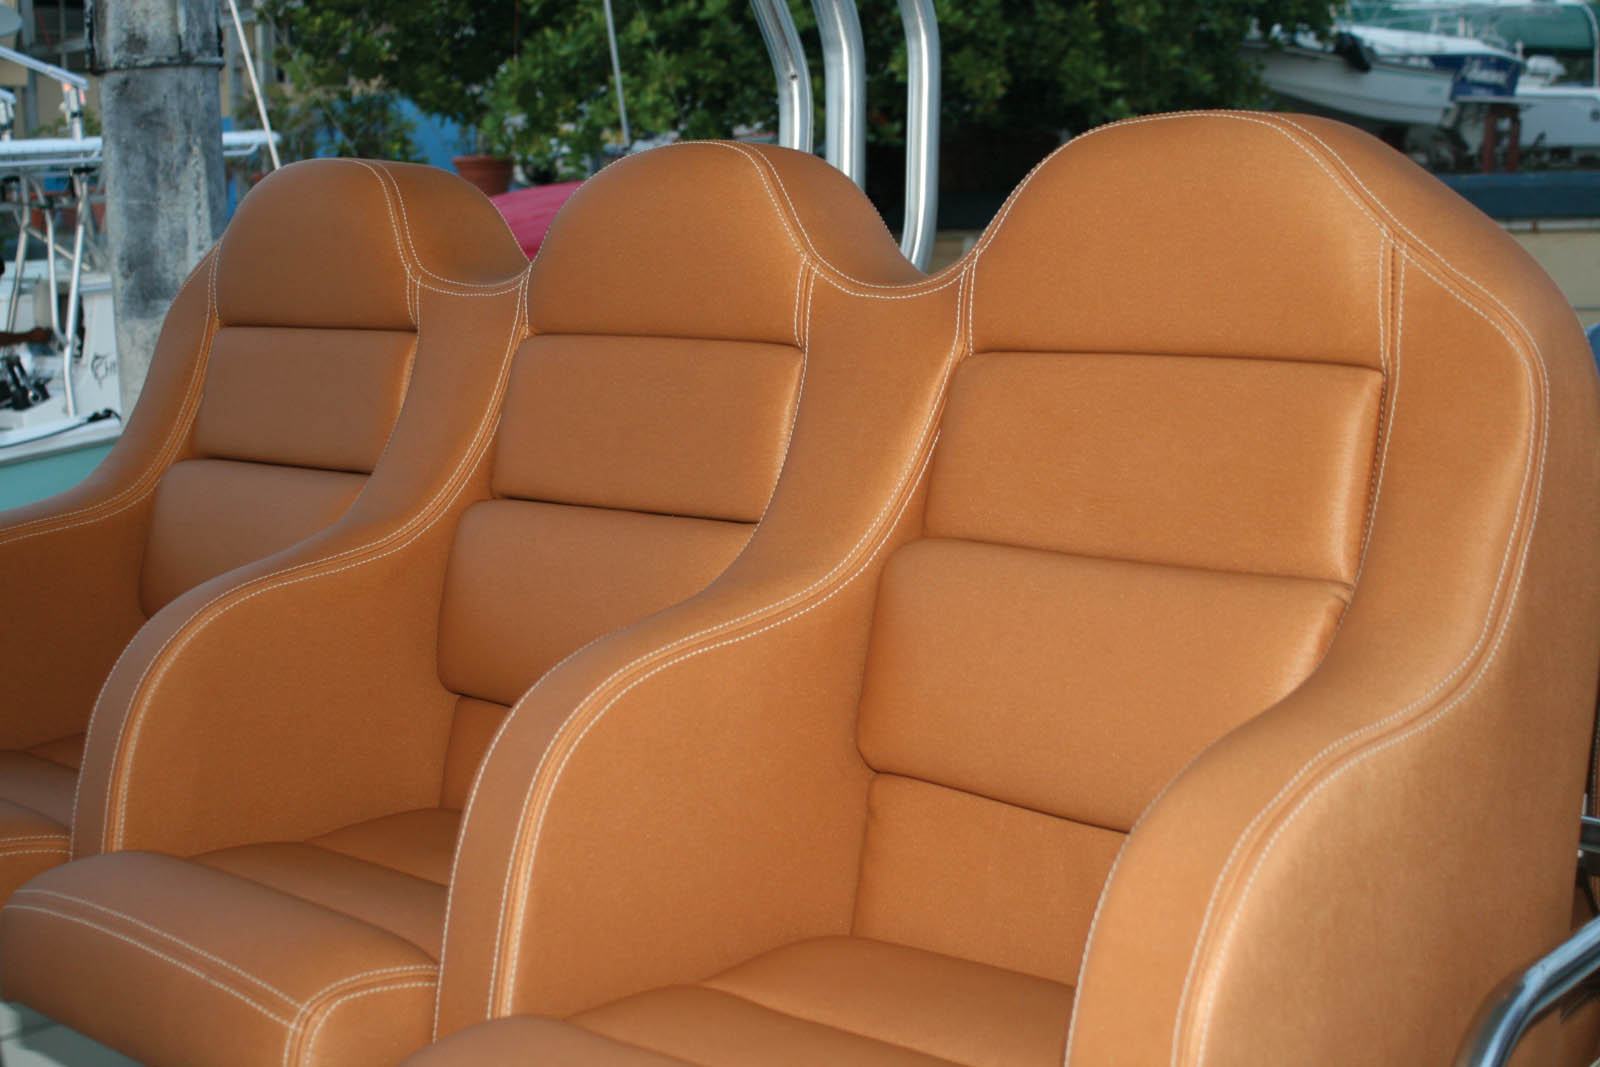
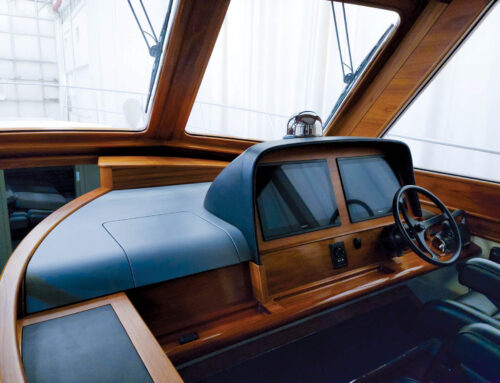
This MFA Outstanding Achievement Award-winner has “Chestnut” Silvertex™ Vinyl enhanced by the double-stitching accent stitched on a single needle machine. Unique patterning and stitching were required for the seat sides and face, as the frame components are a continuous unit of three sections assembled into one continuous unit.
When you plan your projects, how much thought do you give to their finished edges? The material you’ve chosen dictates the best cutting tools and types of seams to use for finishing your projects. Visible seams on exterior projects need to be considered carefully to achieve attractive and well-constructed projects that will withstand the elements. And although most seams on interior projects are rarely seen, the finishing details contribute to the longevity of cushions and bedding when customers sit and sleep or their vessels. Customers will also appreciate your attention to these details when they remove and launder their covers.
This article will address the best cutting tools and seam types for finishing a standard ½-inch seam allowance, the average width used by most fabricators for their projects. With practice, your projects will stand out and distinguish you as a skilled and creative marine fabricator.
Cutting Tools
These are the basic tools to have on hand for cutting materials:
Kai Scissors: These are often referred to as “the best pair of scissors” and have been our shop favorite for years. They are ergonomically designed and feature durable stainless steel blades. They are strong, available in 10 sizes from 4 inches to 10 inches and are available for both right- and left-handed people. 
Hot Knife: This is a great tool for sealing fabric edges, as it prevents unraveling. It is important to know what you should and should not cut with a hot knife because the fumes of some materials may be toxic or the material itself can ignite. A hot knife is great for cutting a clean finished edge on Sunbrella® and acrylic fabrics. Experiment with various surfaces to use underneath your material, as the blade gets extremely hot.
Tip: Glass or Teflon™ baking mats come in large sizes for using underneath your material while cutting and are a good option to use with a hot knife.
Pinking Shears: These are a valuable addition to your scissor collection, even though you may not use them very often. Their zigzag edge is a quick solution that helps prevent fraying.

closed modern pinking shears with black handles isolated on white background
Serger: You can get by without the benefit of a serger, but once you try sewing seams with a serger, you will love the way it finishes raw edges and prevents fraying. When a durable seam is required, you will still need to sew your seams with a straight stitch first on your sewing machine. We just completed a project where the customer wanted us to replicate the visible exterior seams with a serge stitch in a contrasting color (as seen on very expensive Italian furniture). It is becoming a popular “deconstructed” look.
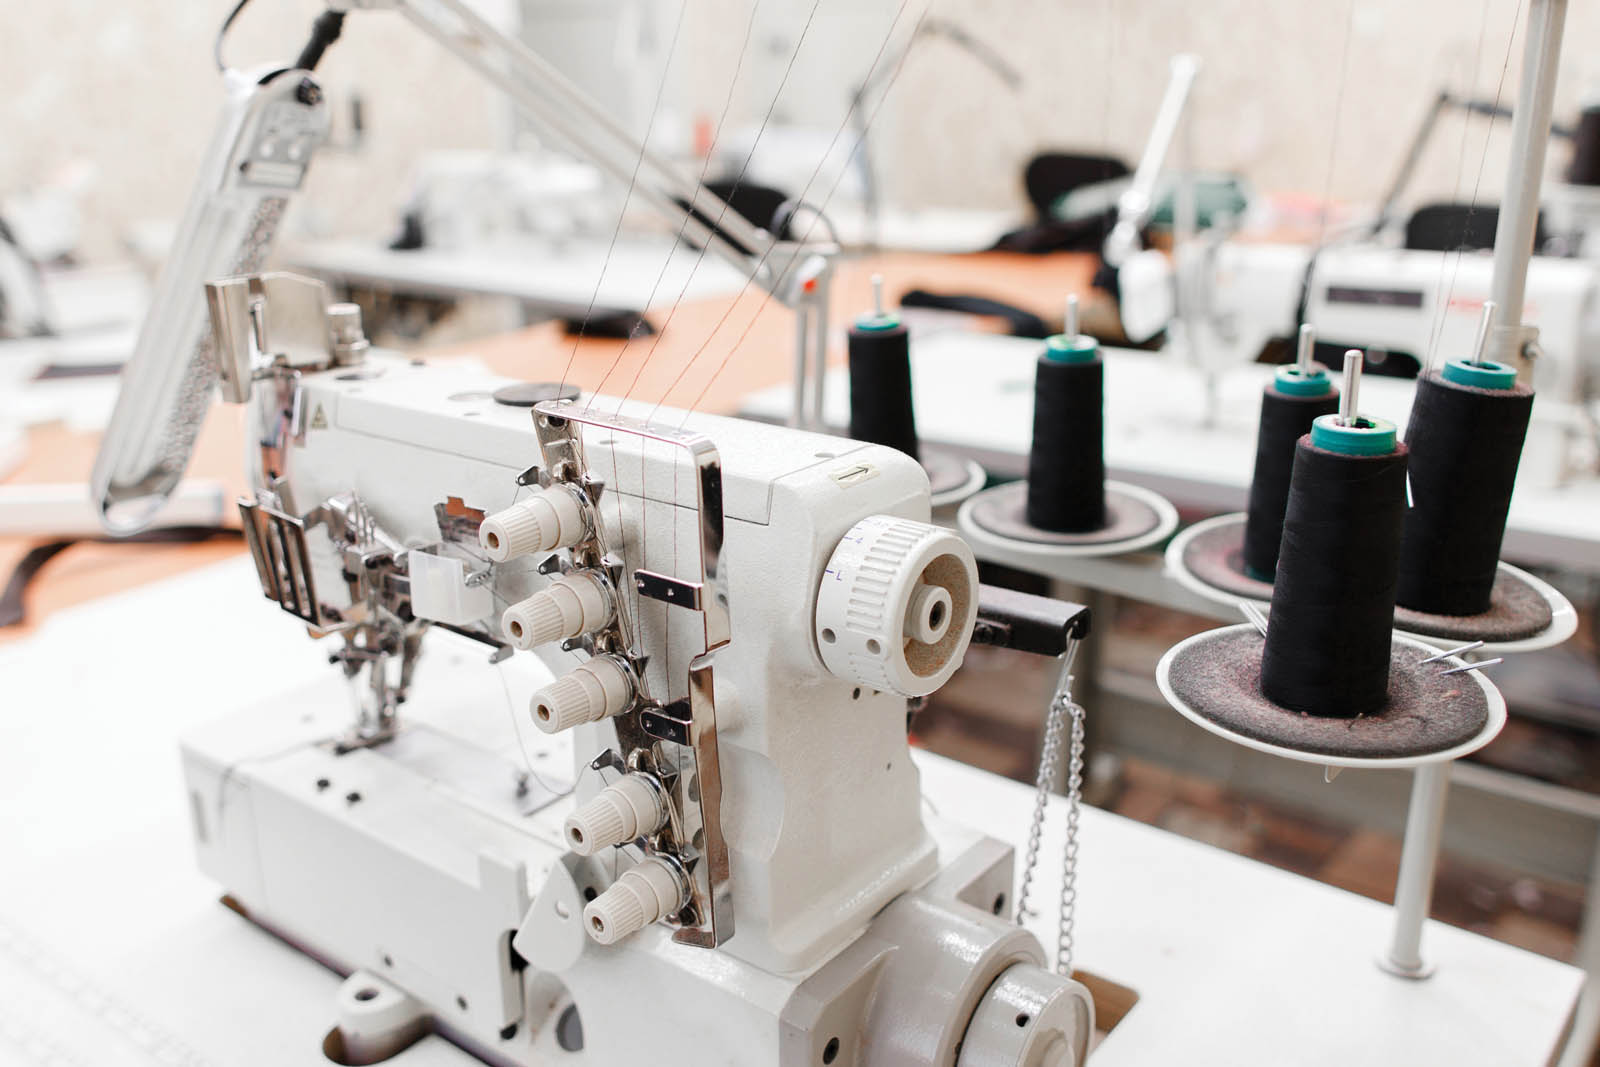
Professional overlock sewing machine with black thread in workshop. Equipment for edging, hemming or seaming clothes at tailors shop.
Finished Seam Options
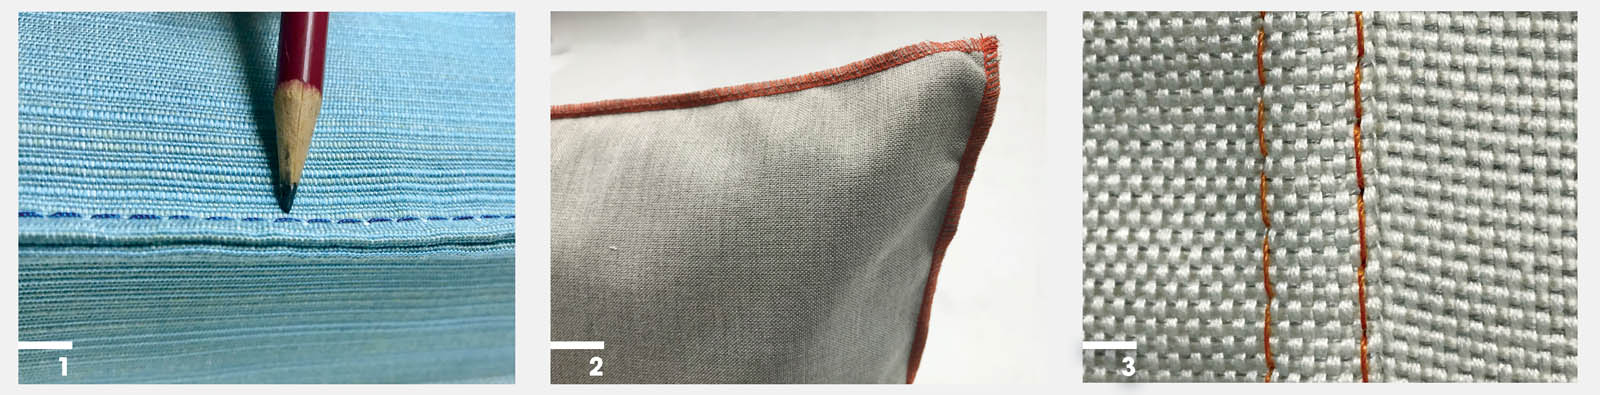
Photo 1: Single Topstitch: Topstitching adds a decorative touch to your projects and durability to a seam. It also helps facings lie flat.
Photo 2: Serge Topstitch: A client requested an accent pillow with a zigzag topstitch in contrasting thread as an accent detail. We used our serger for the stitching and used a straight stitch close to the inside of the zigzag stitches for durability.
Photo 3: Welt Stitch Seam: Welt stitch seams are a nice finishing detail you can use on fitted sheet corners, bags and covers.
Once you have determined the “look” of the finished seams for your next project, here are some options to consider that add decorative details and increase the seam’s durability.
Single or Double Topstitch: You can sew a single or double topstitch with a standard machine; however, a double topstitch should only be sewn by a very experienced sewer on a single needle machine. Depending on your clientele, project load and the number of requests for double topstitching on seams, you may want to consider purchasing a machine devoted only to sewing a double row of topstitching precisely each time. You will be able to command a higher price for projects and add to your profit.
TIP: Since every topstitch shows, carefully match the weight of your thread to the weight of your fabric. Also, check thread tension, proper needle size and stitch length to achieve a nice topstitch accent. Avoid backstitching by pulling the threads to the wrong side and knot closed.
Topstitching Tips:
- Use a guide foot for consistency.
- Experiment with decorative topstitches. A “beefy” topstitch in either a matching thread color or a contrasting color makes your project unique.
- Consider using a lightweight material underneath the outside of your material. Place the lightweight material against the open seam and check frequently to ensure that it is centered as you sew the topstitching to the right side of the material. I like to use a 1-inch lightweight carpet binding to add durability and strength without added thickness.
TIP: A 1-inch material gives sufficient area for the stitch to catch both sides of the topstitching.
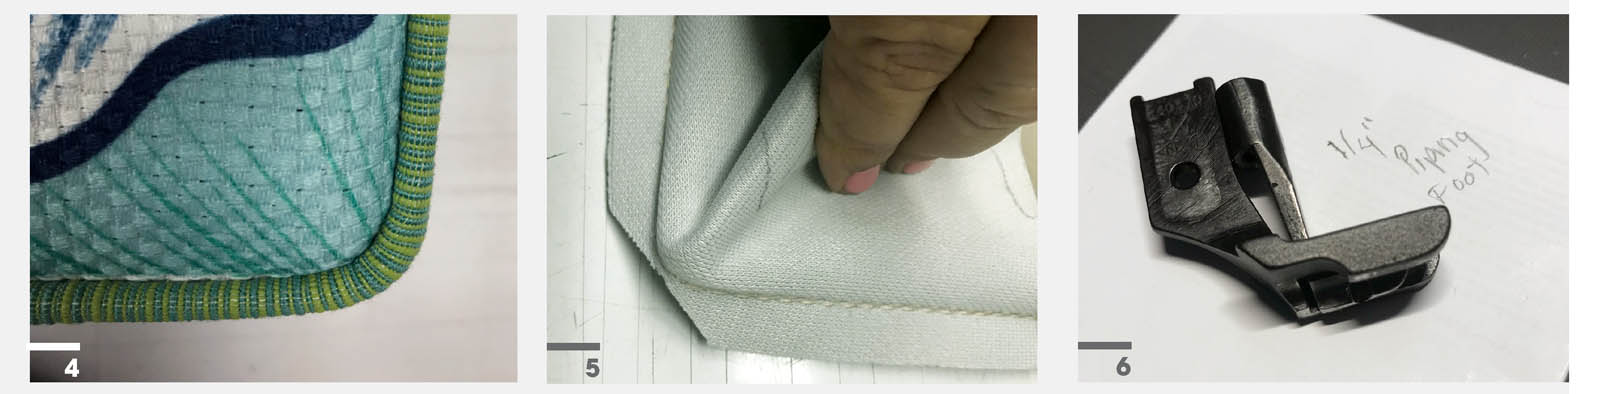
Photo 4: Accent Vinyl Piping: Although prefab piping is available in most standard colors, many marine fabricators prefer to make their own.
Photo 5: Interior Corner Piping: A diagonal cut along the inside seam corner helps the side seams lay flat on the inside and ensures the exterior side bands give a sleek appearance—especially on thick vinyl materials.
Photo 6: Curve Corner Piping Foot: A welt foot with a curved back edge lets you sew curves tightly.
Welt Stitched Seams: After stitching together the pieces of your project, fold the seam over to one side and iron flat. Stitch along the folded edge, keeping in mind that this stitch will show on the outside of the fabric.
Piping/Welting: Piping, also called welting, is fabric or vinyl sewed over a center cord that gives your seams a professional edge. Although prefab piping is available in most standard colors, many marine fabricators prefer to make their own. The prefab core is less flexible, and vinyl piping is available only in large quantities from distributors. Also, making your own piping reduces inventory expenses since most projects require less than 100 yards and are generally in custom colors and textures.
Piping Tips:
- Piping cut along the bias makes your piping take curves easier and achieves a smooth edge. It provides an overall cleaner look than straight-cut piping, which is cut along the length of the fabric parallel to the selvage, as the selvage edge has the least amount of flexibility or stretch.
- Welt cord fillers come in assorted sizes from a #5/32 “standard” in materials from cotton to polyester and polypropylene. Experiment to know which best works for your needs and for interior vs. exterior projects.
- Set up your machine to switch to one or two standard sizes of welt feet. A welt foot set allows for a single welt cord to pass to the left of the needle. Choose a size slightly larger than your welt cord size to allow room for the fabric. Various sizes are sold per set (inside and outside foot). Practice until you are able to sew the piping strip directly over the welt cord onto your fabric in one shot. This will not only save you time, it will eliminate pre-stitches from showing, especially around corners.
Terri Madden owns Sand Sea & Air Interiors Inc. in San Juan, Puerto Rico.
www.sandseaair.com