TEXTILES.ORG
 Upholstery: draping vs. digital

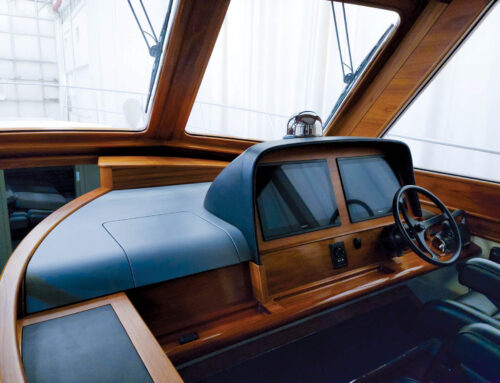
Digital design processes can be used to create this curved backrest, but traditional draping pattern and design methods create fast, beautiful results.
At Chicago Marine Canvas, our MFA- and IFAI-award-winning canvas and upholstery shop, we have fully integrated digital methods into our canvas work. There are many benefits to implementing a digital measurement and design process, including speed and accuracy.
During the past four years that we’ve been measuring and designing in 3-D, we’ve found it works well for pretty much anything except complex curves. In these situations, it’s usually faster to design and produce these projects using a traditional draping method and manually patterning these curves.
But there are many other kinds of projects that can benefit by using a digital design process. Chicago Marine Canvas’s lead upholsterer, Soren Chapman, says that recurring geometrically sound designs, such as rectangular cushions, can be designed and processed far faster in CAD than through a manual draping process.
Our shop has found a pleasant balance in our upholstery production process by combining both digital and draping methods. We look at each project and decide which process to use before giving an estimate to the customer. It’s not always clear initially which process will be most cost-effective, and a lot of it comes down to experience. No matter what, we prioritize excellent results for ourselves and our customers, and the trick is doing it in a profitable manner so all parties are happy with the outcome.
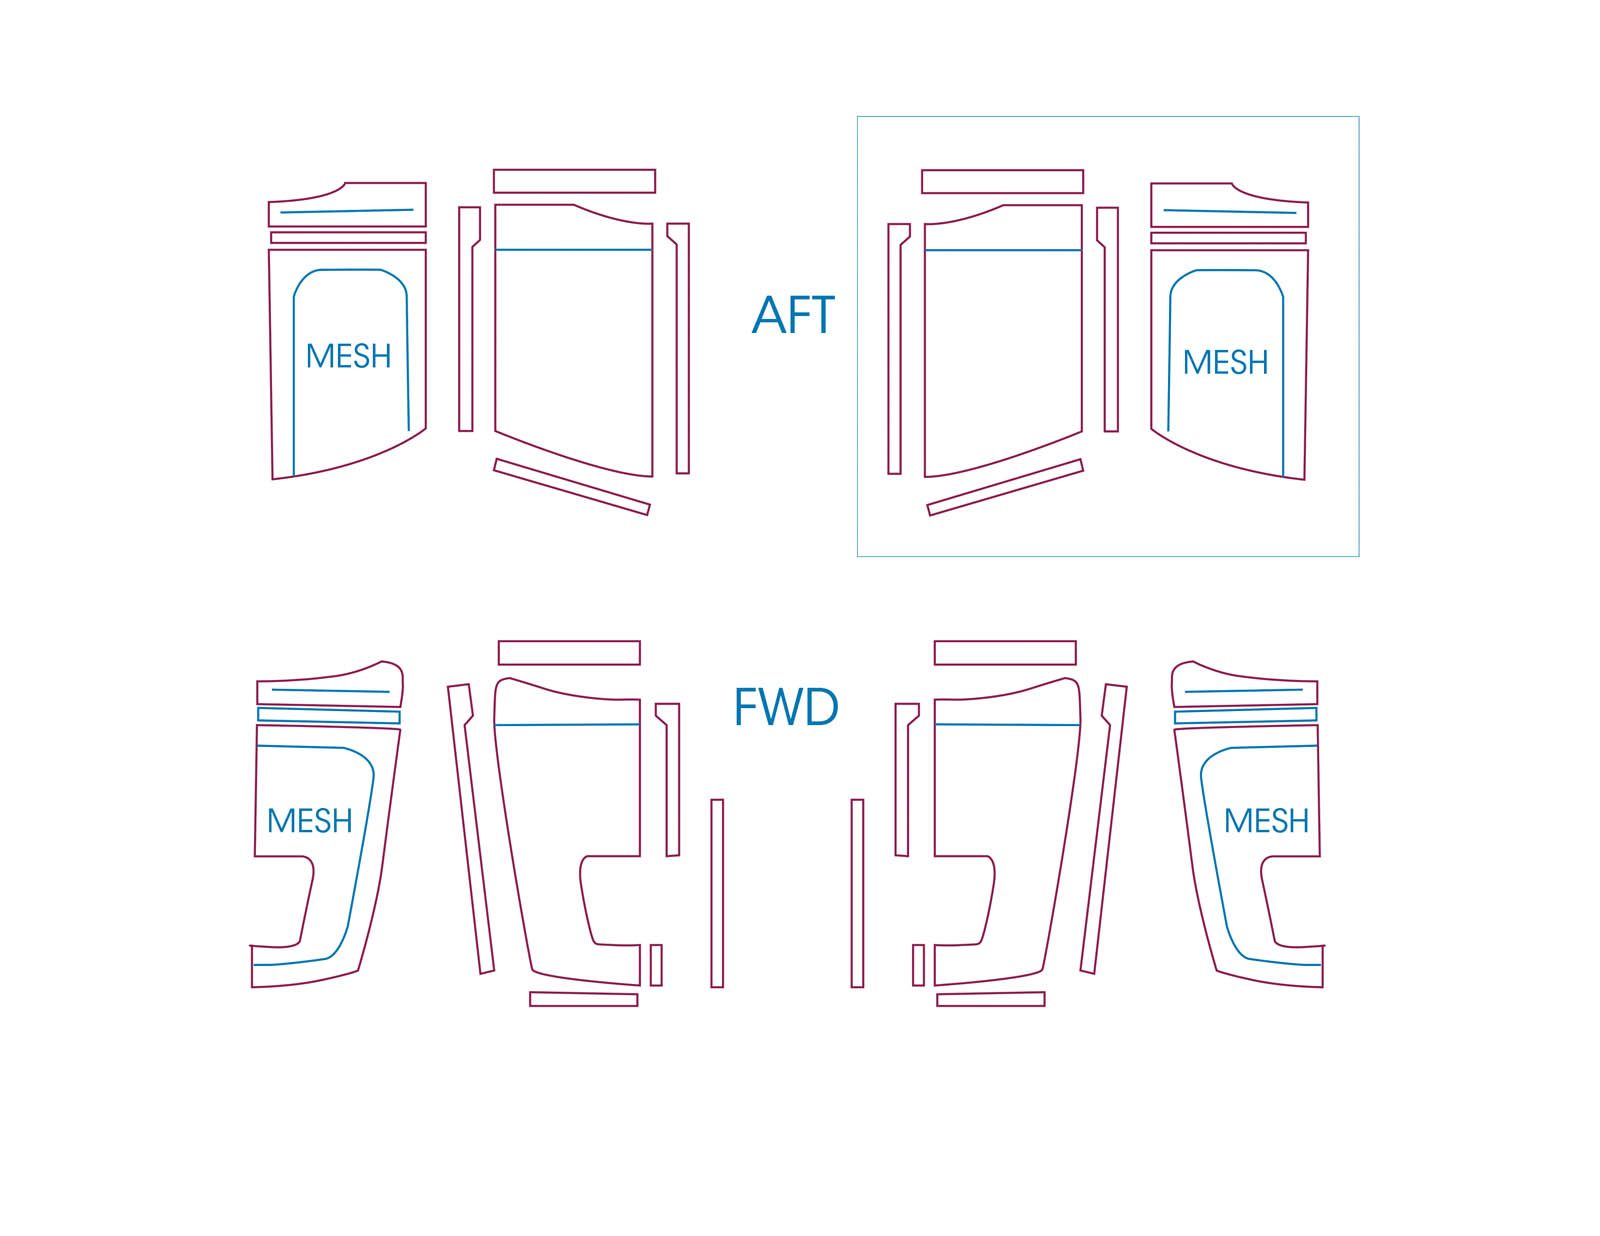
 Digital Measurements and 3-D Design—Bow sunpads

Digital processes are a great fit for creating beautiful sunpad cushions.
Here is our process:
Taking measurements
Unlike a canvas cover or enclosure, when we measure for a sunpad, we’re only measuring the relatively flat portion of the deck and will build up the thickness of the sunpad during the design process. The measuring process takes less than 10 minutes total.
Start measuring the inside and work your way out. An early error we made in taking digital measurements was not clearly identifying what we were measuring in our system. We now address this by creating “layers” and labeling everything.
Before measuring, identify whether the owner will be reusing the current fastening system or installing something new. Be sure to measure for the correct fastening system.
 Next, measure easily identifiable markings that will be used as the outer edge of the sunpad, essentially the outline of the pad. These markings include:
- Edges
- Nonskid
- “Dirt” lines
Lastly, measure any identifying markings on the boat that will help in the design process. This includes taking measurements of topside rails, portholes, the windshield and other potential markings or obstructions.
TIP: When taking digital measurements with a “point to point” system, it’s always best to take more points in curves and less points in straight sections. Taking more points will give you more data to work with during the design, but too many points can overwhelm you and slow down the process.
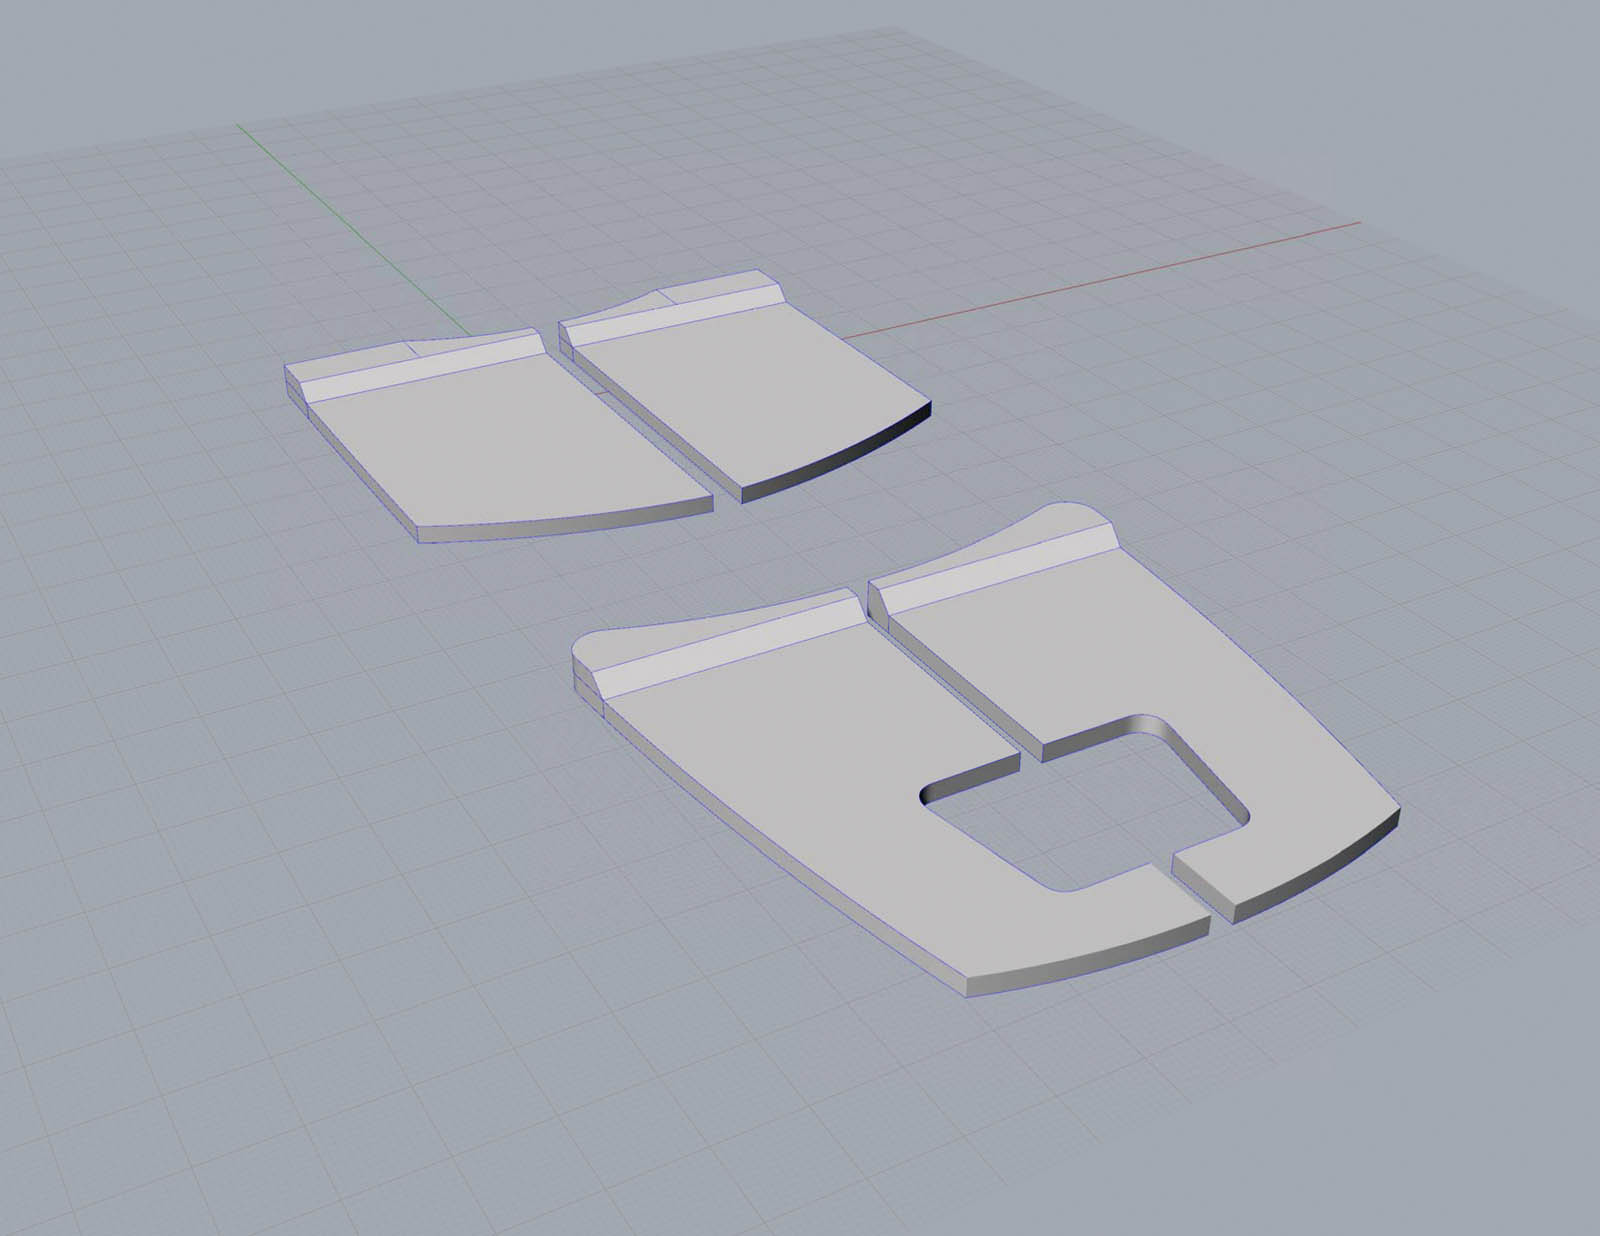
 Using CAD Design
Measurements in your CAD program “clean up” the data by creating straight lines and smooth curves. This step is fast and is the foundation for a great-looking finished project.
After we have an outline of the sunpad, we’ll build it up to the actual thickness of the foam that will be in the sunpad. We’ll do another step-up in thickness for a headrest too. The CAD program creates surfaces and meshes that ultimately get converted to a 2-D design, where most of the design work takes place.
Once we have our 2-D pattern, which has system-generated match marks and seam allowances, we begin to add particulars to the project. This includes where keder or fasteners will be located, zippers and sewing instructions. This is also when we create patterns for foam or framing for reclining sunpad cushions. Any of these patterns can be easily mirrored or duplicated across the deck for multiple pads. By using digital measurement and 3-D design for these processes, we create a set of uniform design standards for all the sunpads we manufacture.
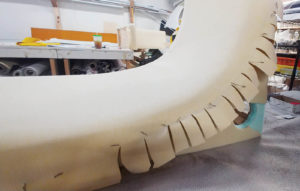 Draping—Curved Backrest

A curved backrest is a common project in our shop. Although we can use digital design processes to create it, we’ve found that staying with a traditional draping pattern and design method creates beautiful results and is faster. These are the steps Chicago Marine Canvas lead upholsterer, Soren Chapman, uses on all backrest projects requiring a complex inward curve such as a captain’s chair or bucket seat.
Start by examining the existing seat frame and foam. To reuse a wooden seat frame, it can’t be rotted and must have sanded or padded edges, which will not damage vinyl or fabric. The condition of the foam must be good and we will often add an additional layer of thin ¼-inch to ½-inch foam on the existing pieces. Softer foam fills inverted curves better and the foam should be larger than the finished piece will be.
Starting with the primary “base” piece of the backrest, lay the material over the curve starting at the approximate center. When you tack the fabric into place, it is very important to stretch it toward the edges as you go. The stretching will go outward and up and down. Make cuts to open up and stretch the fabric around the curve.
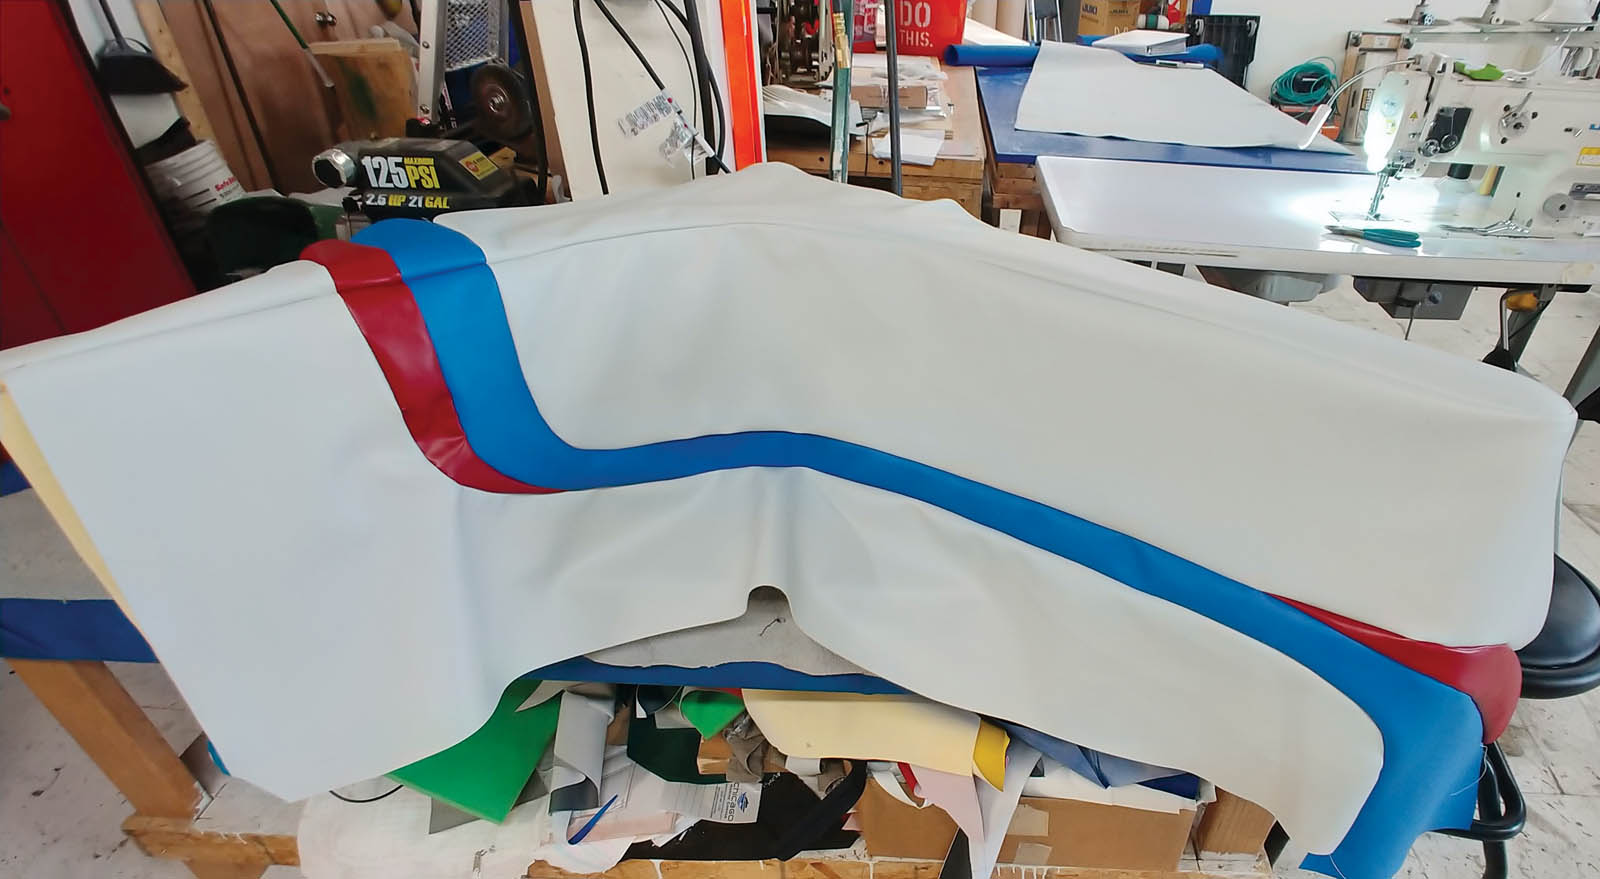
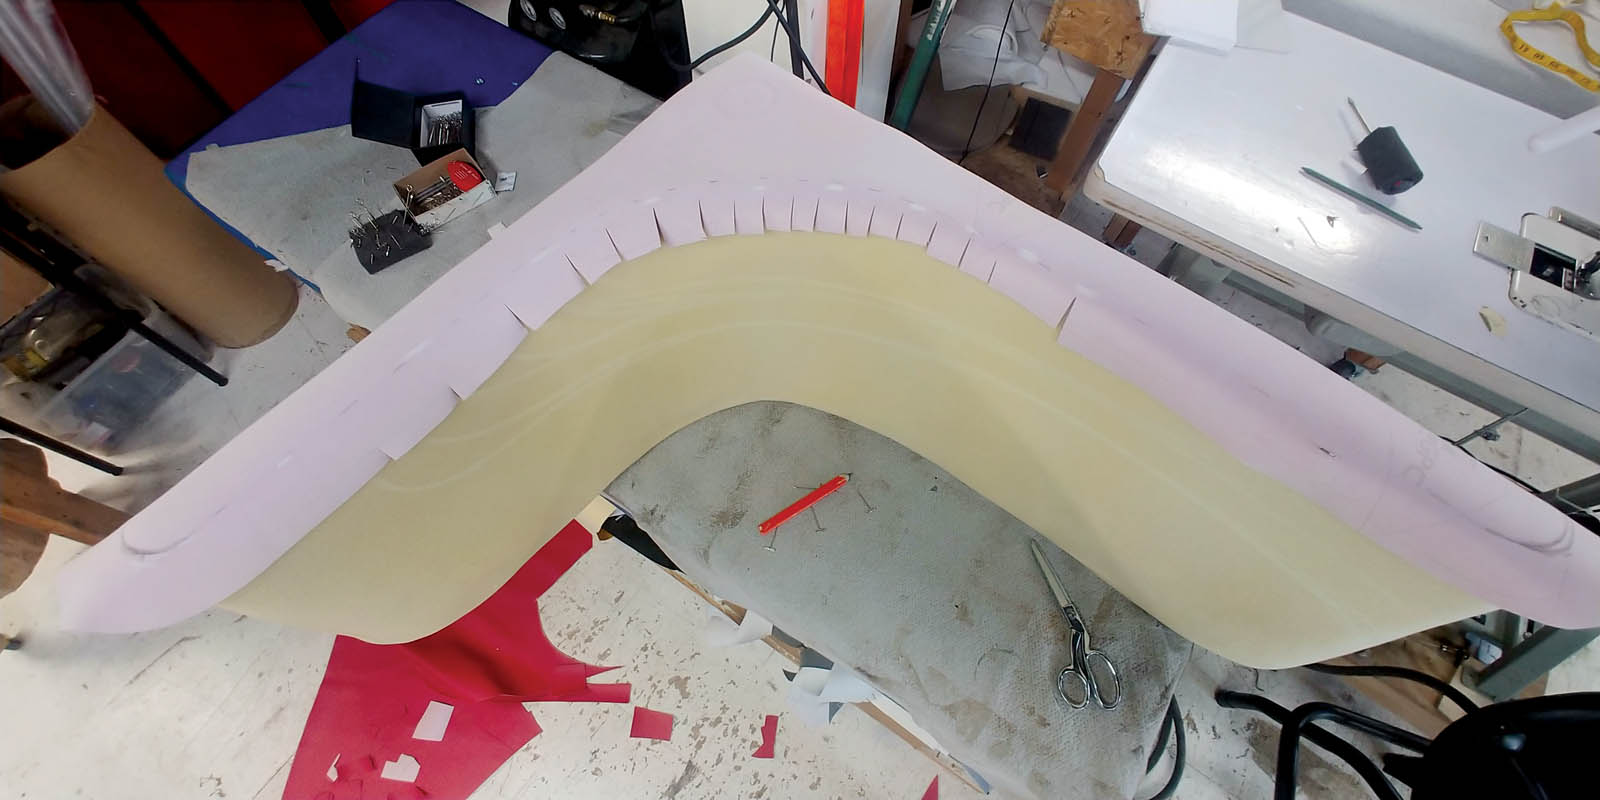 After you pin down the primary pieces, mark where the stitch line will be to adjoining pieces. Also mark any details or designs that will be integrated into the curved backrest such as stripes. At this point, we cut and sew the fully patterned base piece.
TIP: Use the same fabric or fabric from the same fabric “family” when patterning. This is a costlier option when compared to other patterning fabrics, but by using the same fabric, you’ll be able to get the same stretch qualities, giving you excellent end results.
Repeat the same steps for the adjoining top and bottom pieces that will be sewn to the base piece. These pieces will be tacked on and we make “connections” tick marks that assist in uniform sewing. After combining all of the pieces, do your detailed sewing as needed.
 Note: If the base piece is not stretched over the sides and there are “end caps,” pattern these in the next step.
Tack the sewn piece back onto the frame and foam one more time, stretching the piece into position to find the final fit and the position of the “end caps” that will need to be sewn on. Take in any extra material at the sides as needed.
This is a great time to check corners and edges to see if you need to fill anywhere. Now is the time to add foam, batting or forgotten hardware. Once again, during the final upholstery process, stretch the fabric top to bottom and side to side. Be sure to stretch and staple down the vinyl with flat, soft hands, not fingertips.
When stapling down the finished product, do so in an angled fashion, not straight across. This will help hold the fabric in place over time and prevent tearing.
Vince Innocenzi is the owner of Chicago Marine Canvas, a full-service marine canvas and upholstery shop servicing the Chicago, Ill., area. Soren Chapman is the lead upholster at Chicago Marine Canvas and has experience in the custom furniture market.